A Competitive Advantage

Adjustments.jpeg

In today’s archery market, the options for gear are profound and overwhelming. Single pin, multi pin, cable driven, limb driven, hybrid cam, dual cam, fixed blade, mechanical, realtree, optifade, barren, there are dozens of decisions to be made. One piece of gear that is often overlooked is stabilizers. In this article, we will cover the advantages of a micro diameter bow stabilizer, and more specifically, the advantages of the ones we offer here at Cutter Stabilizers.

When highlighting any product, it can be difficult to not come off as “sales pitch-y”, but the intention of this writing is to simply educate the reader on the benefits of the system we have created. As stated earlier, the number of options is overwhelming. Having used and tested many of the available stabilizers both on the range and in the woods, we have established a baseline of information. It is here that we began development.

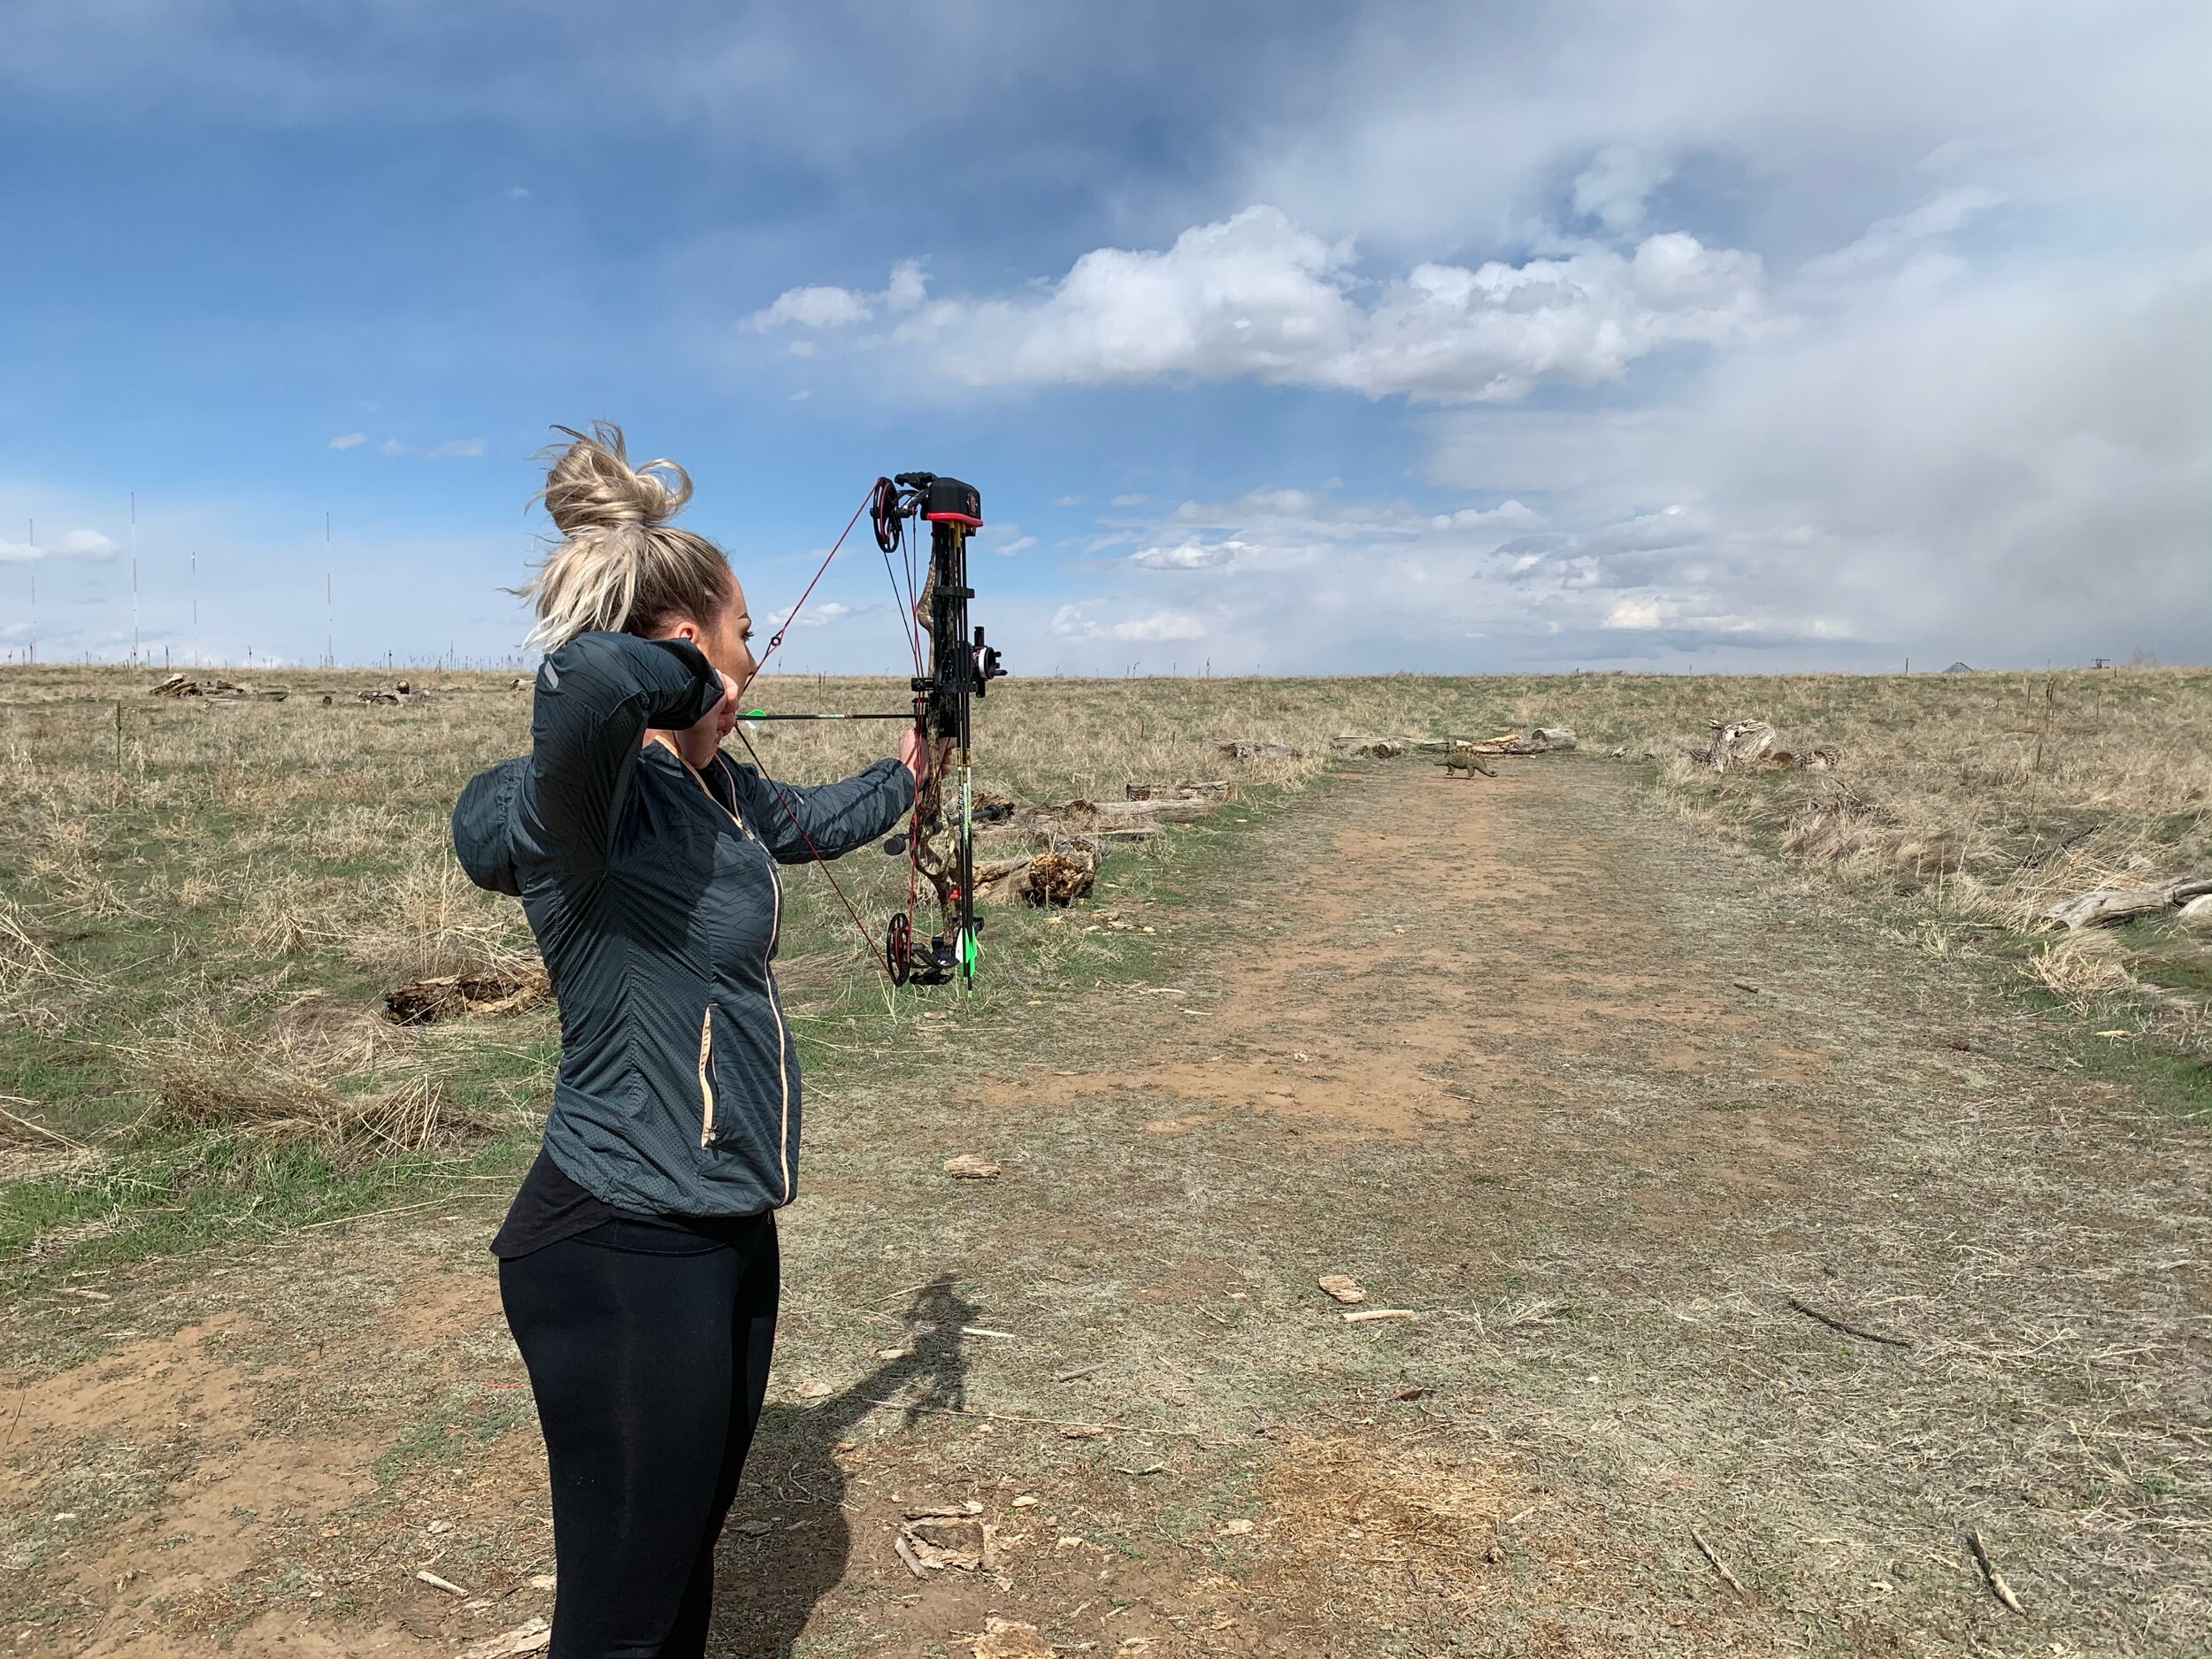
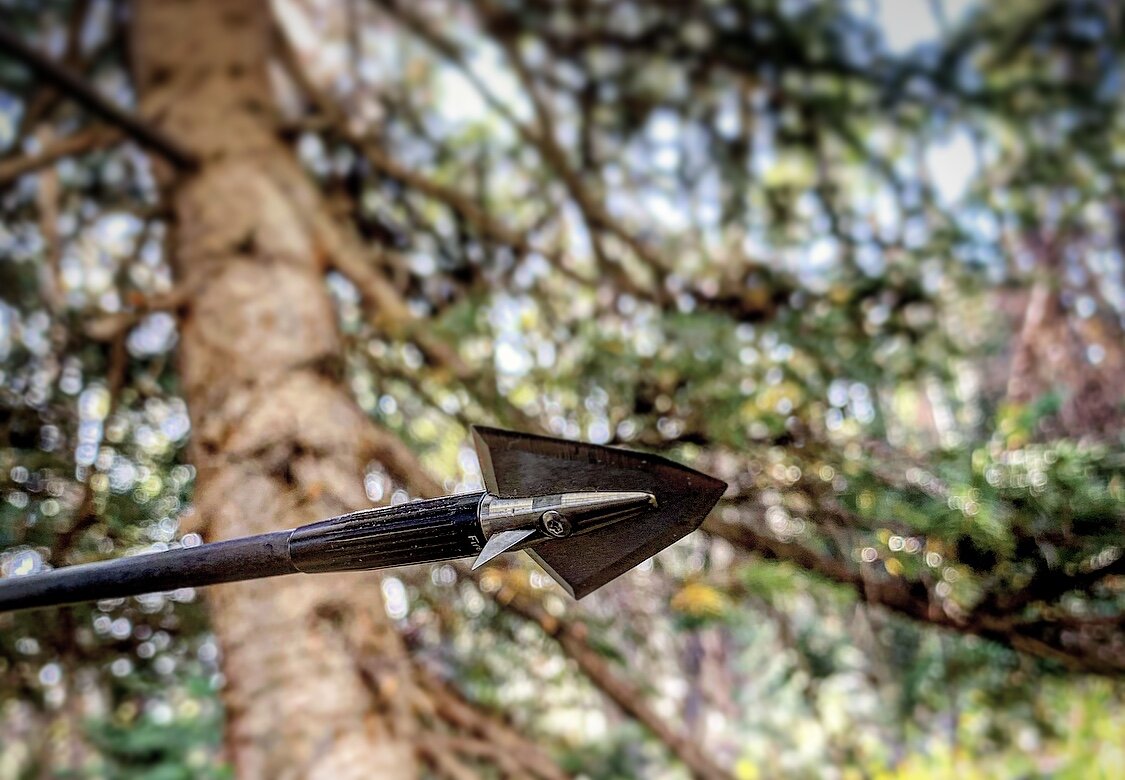
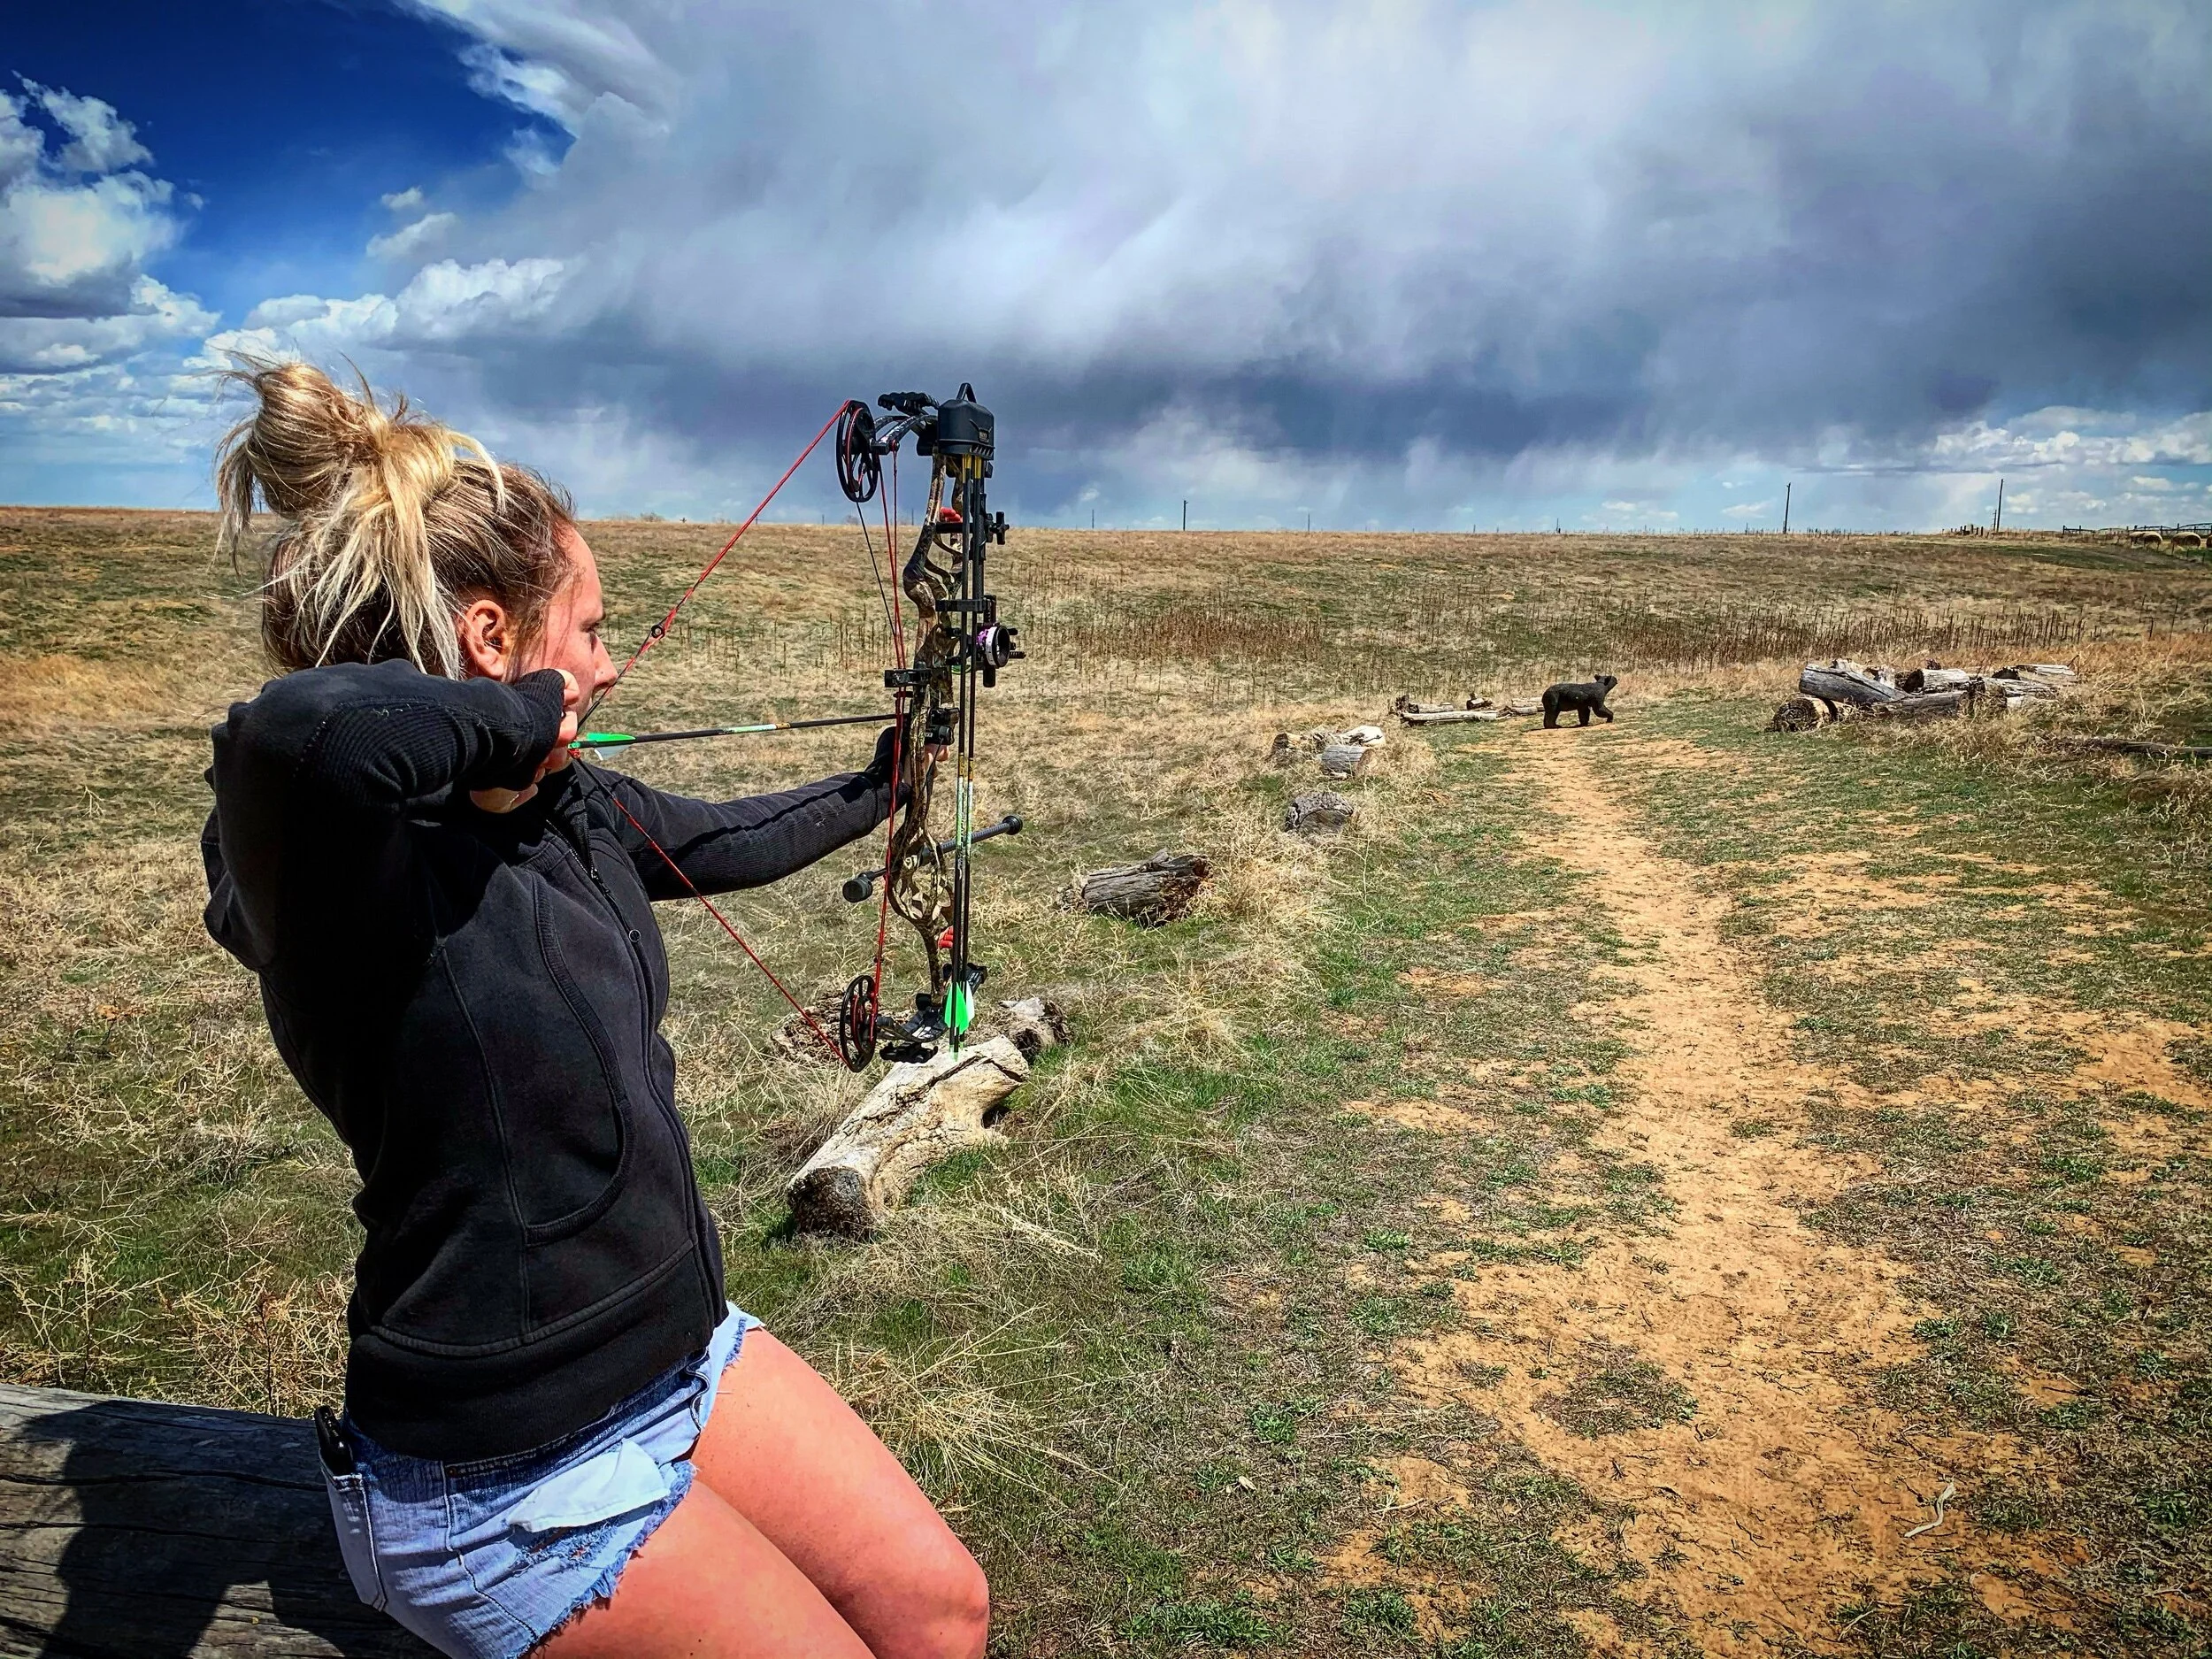
In order to get to where we are now, we need to go back almost three years, to the beginning. I left my retail job at Sportsmans Warehouse to pursue a new endeavor in a field I had zero experience in, automation, more specifically, manufacturing parts in a machine shop. The new career brought challenges, and an entirely different skill set, but something was missing, the passion. I needed to find a way to tie the two together, so utilizing a piece of carbon I had sitting around at the house from a previous project, I machined a few aluminum caps and made my first stabilizer. It was clunky, heavy, and 7/8” in diameter, but it worked! Very similar to other bars on the market, it worked, but had one huge downfall. Once a cross wind came into play, I found myself struggling to hold on target. After talking to a few different really good archers, and thinking about my arrow choice (a micro diameter shaft), it was time to see if it was possible to build something strong enough for hunting, yet sleek and aerodynamic to increase performance in the wind. Trial, failure, trial, failure, until the V1 was born. An ultralight, strong 1/2” diameter stabilizer, I knew I was onto something here. One windy day on the 3D course confirmed it, my pin float was small, and the wind had a noticeably smaller effect on my bow. We were in business.

DA4A1D06-D291-4A6F-B9DB-DA6B03FBF7EA.jpeg

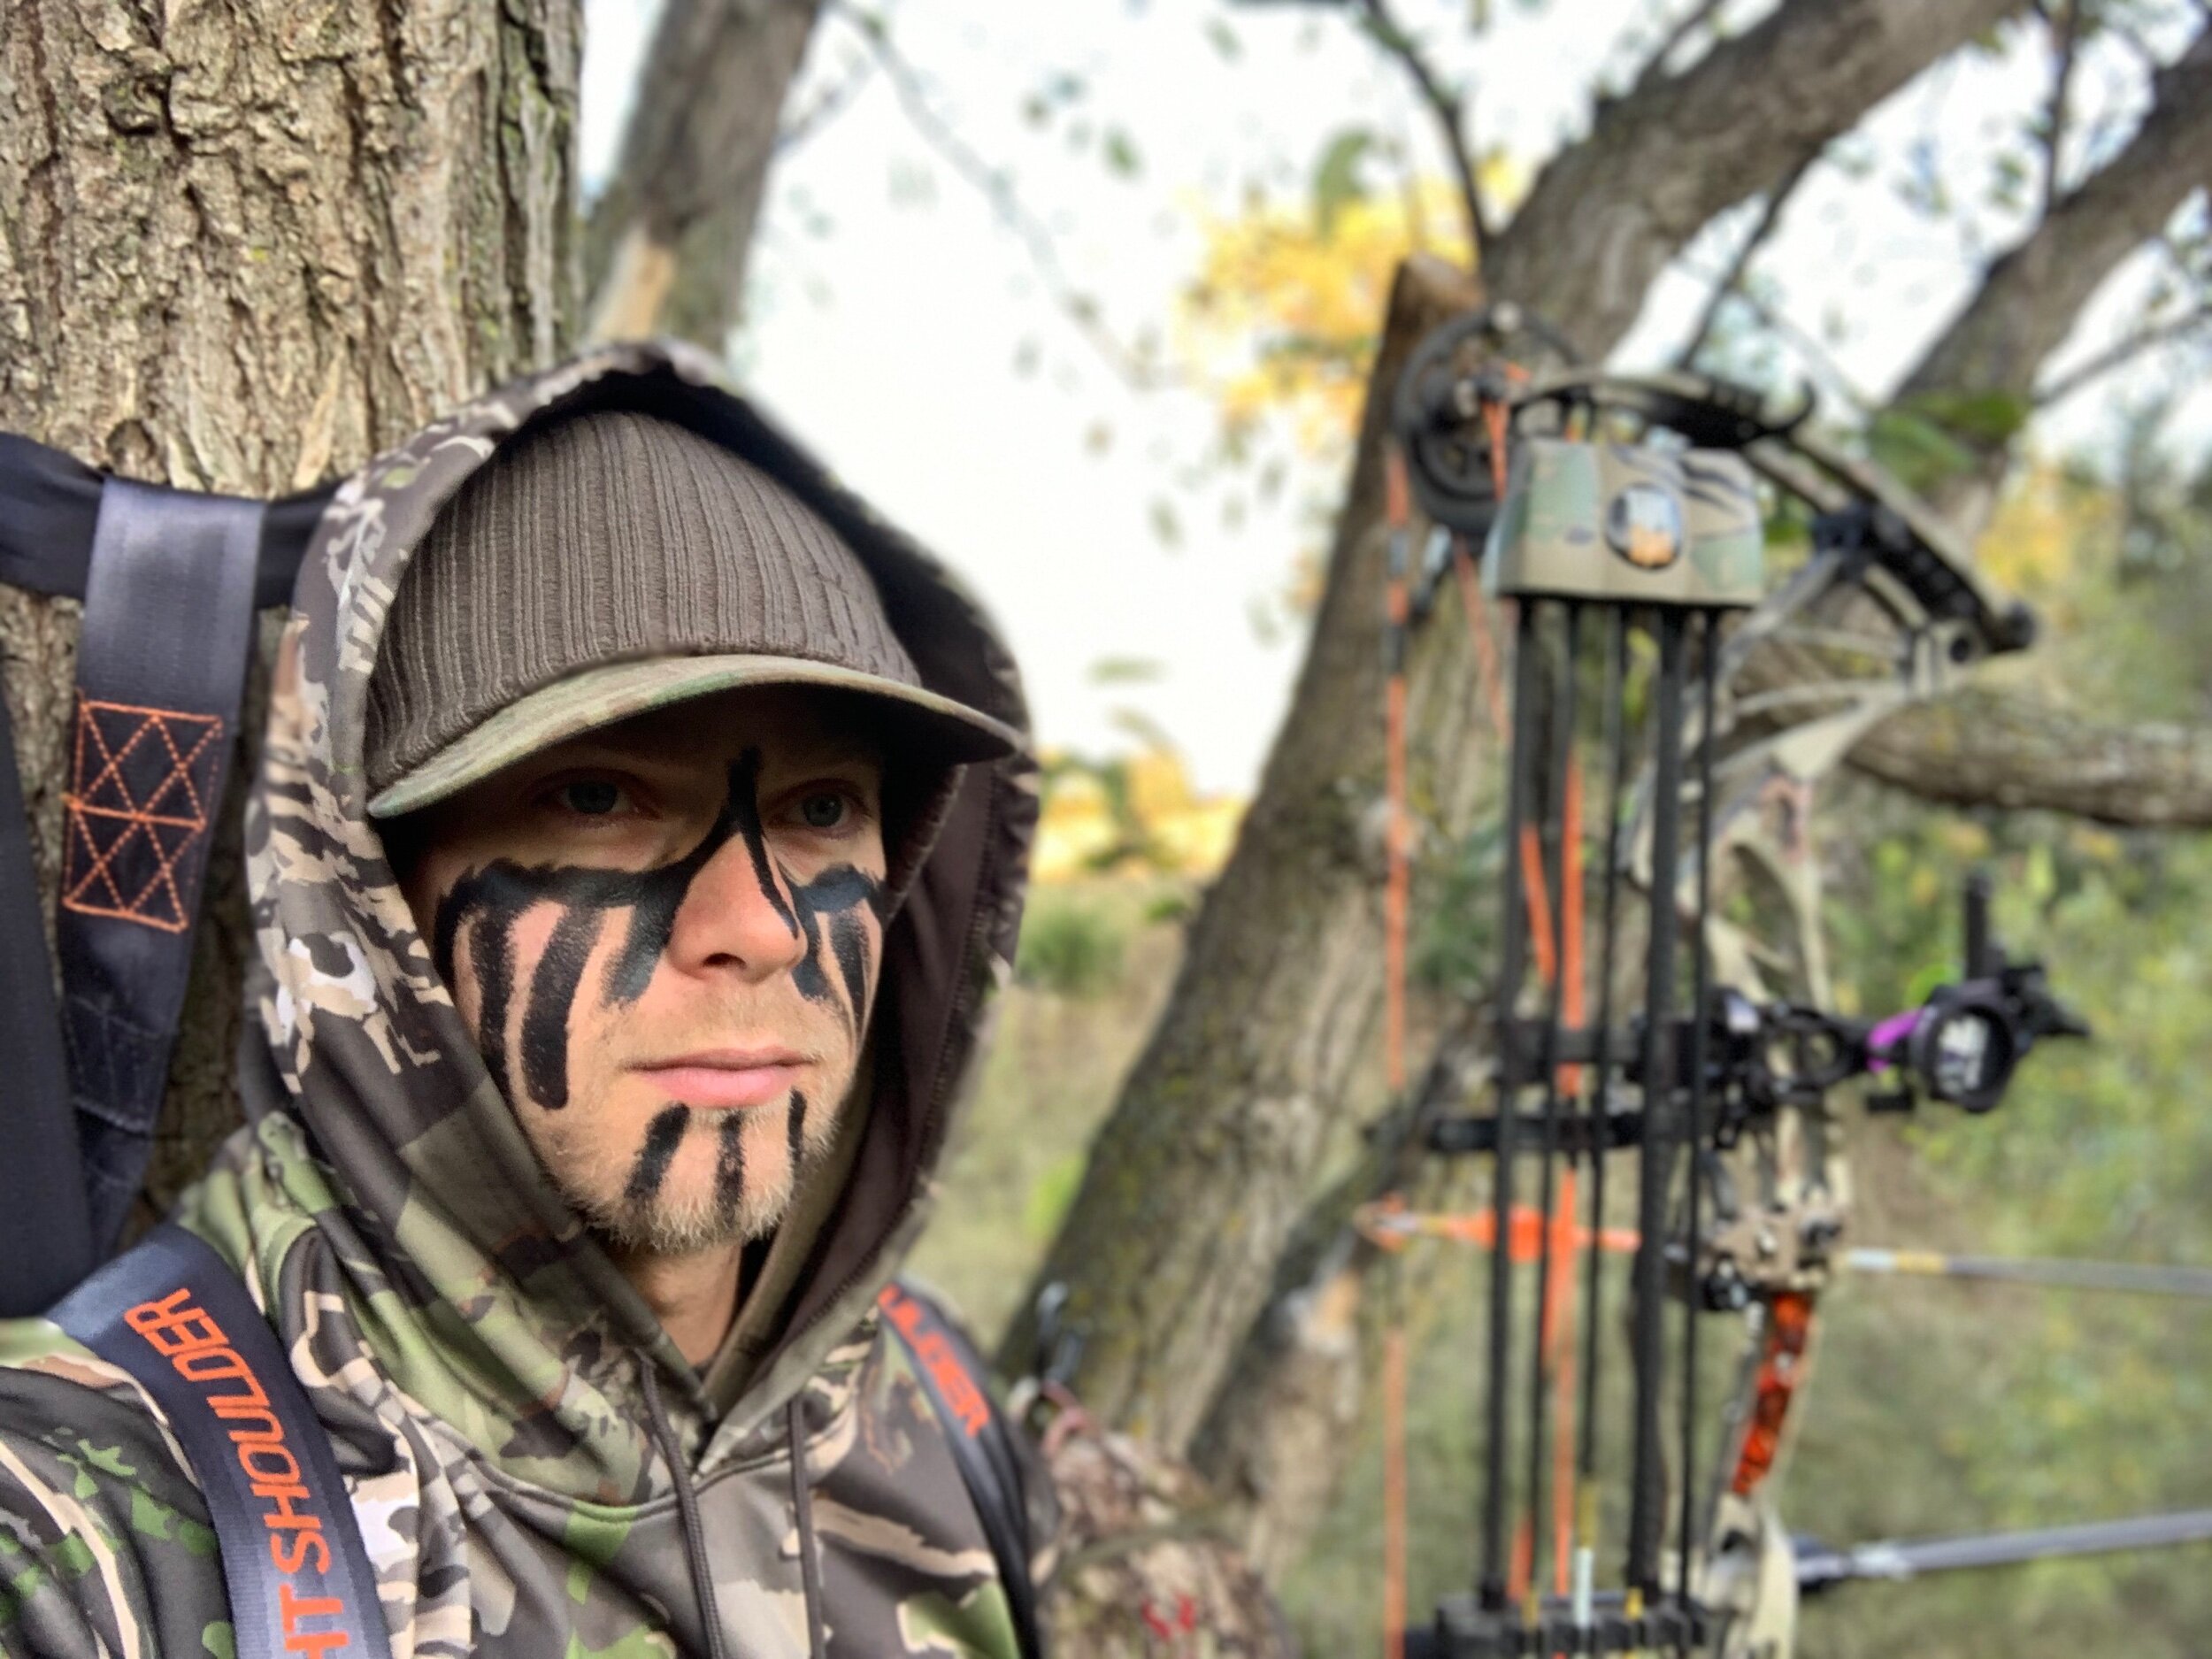
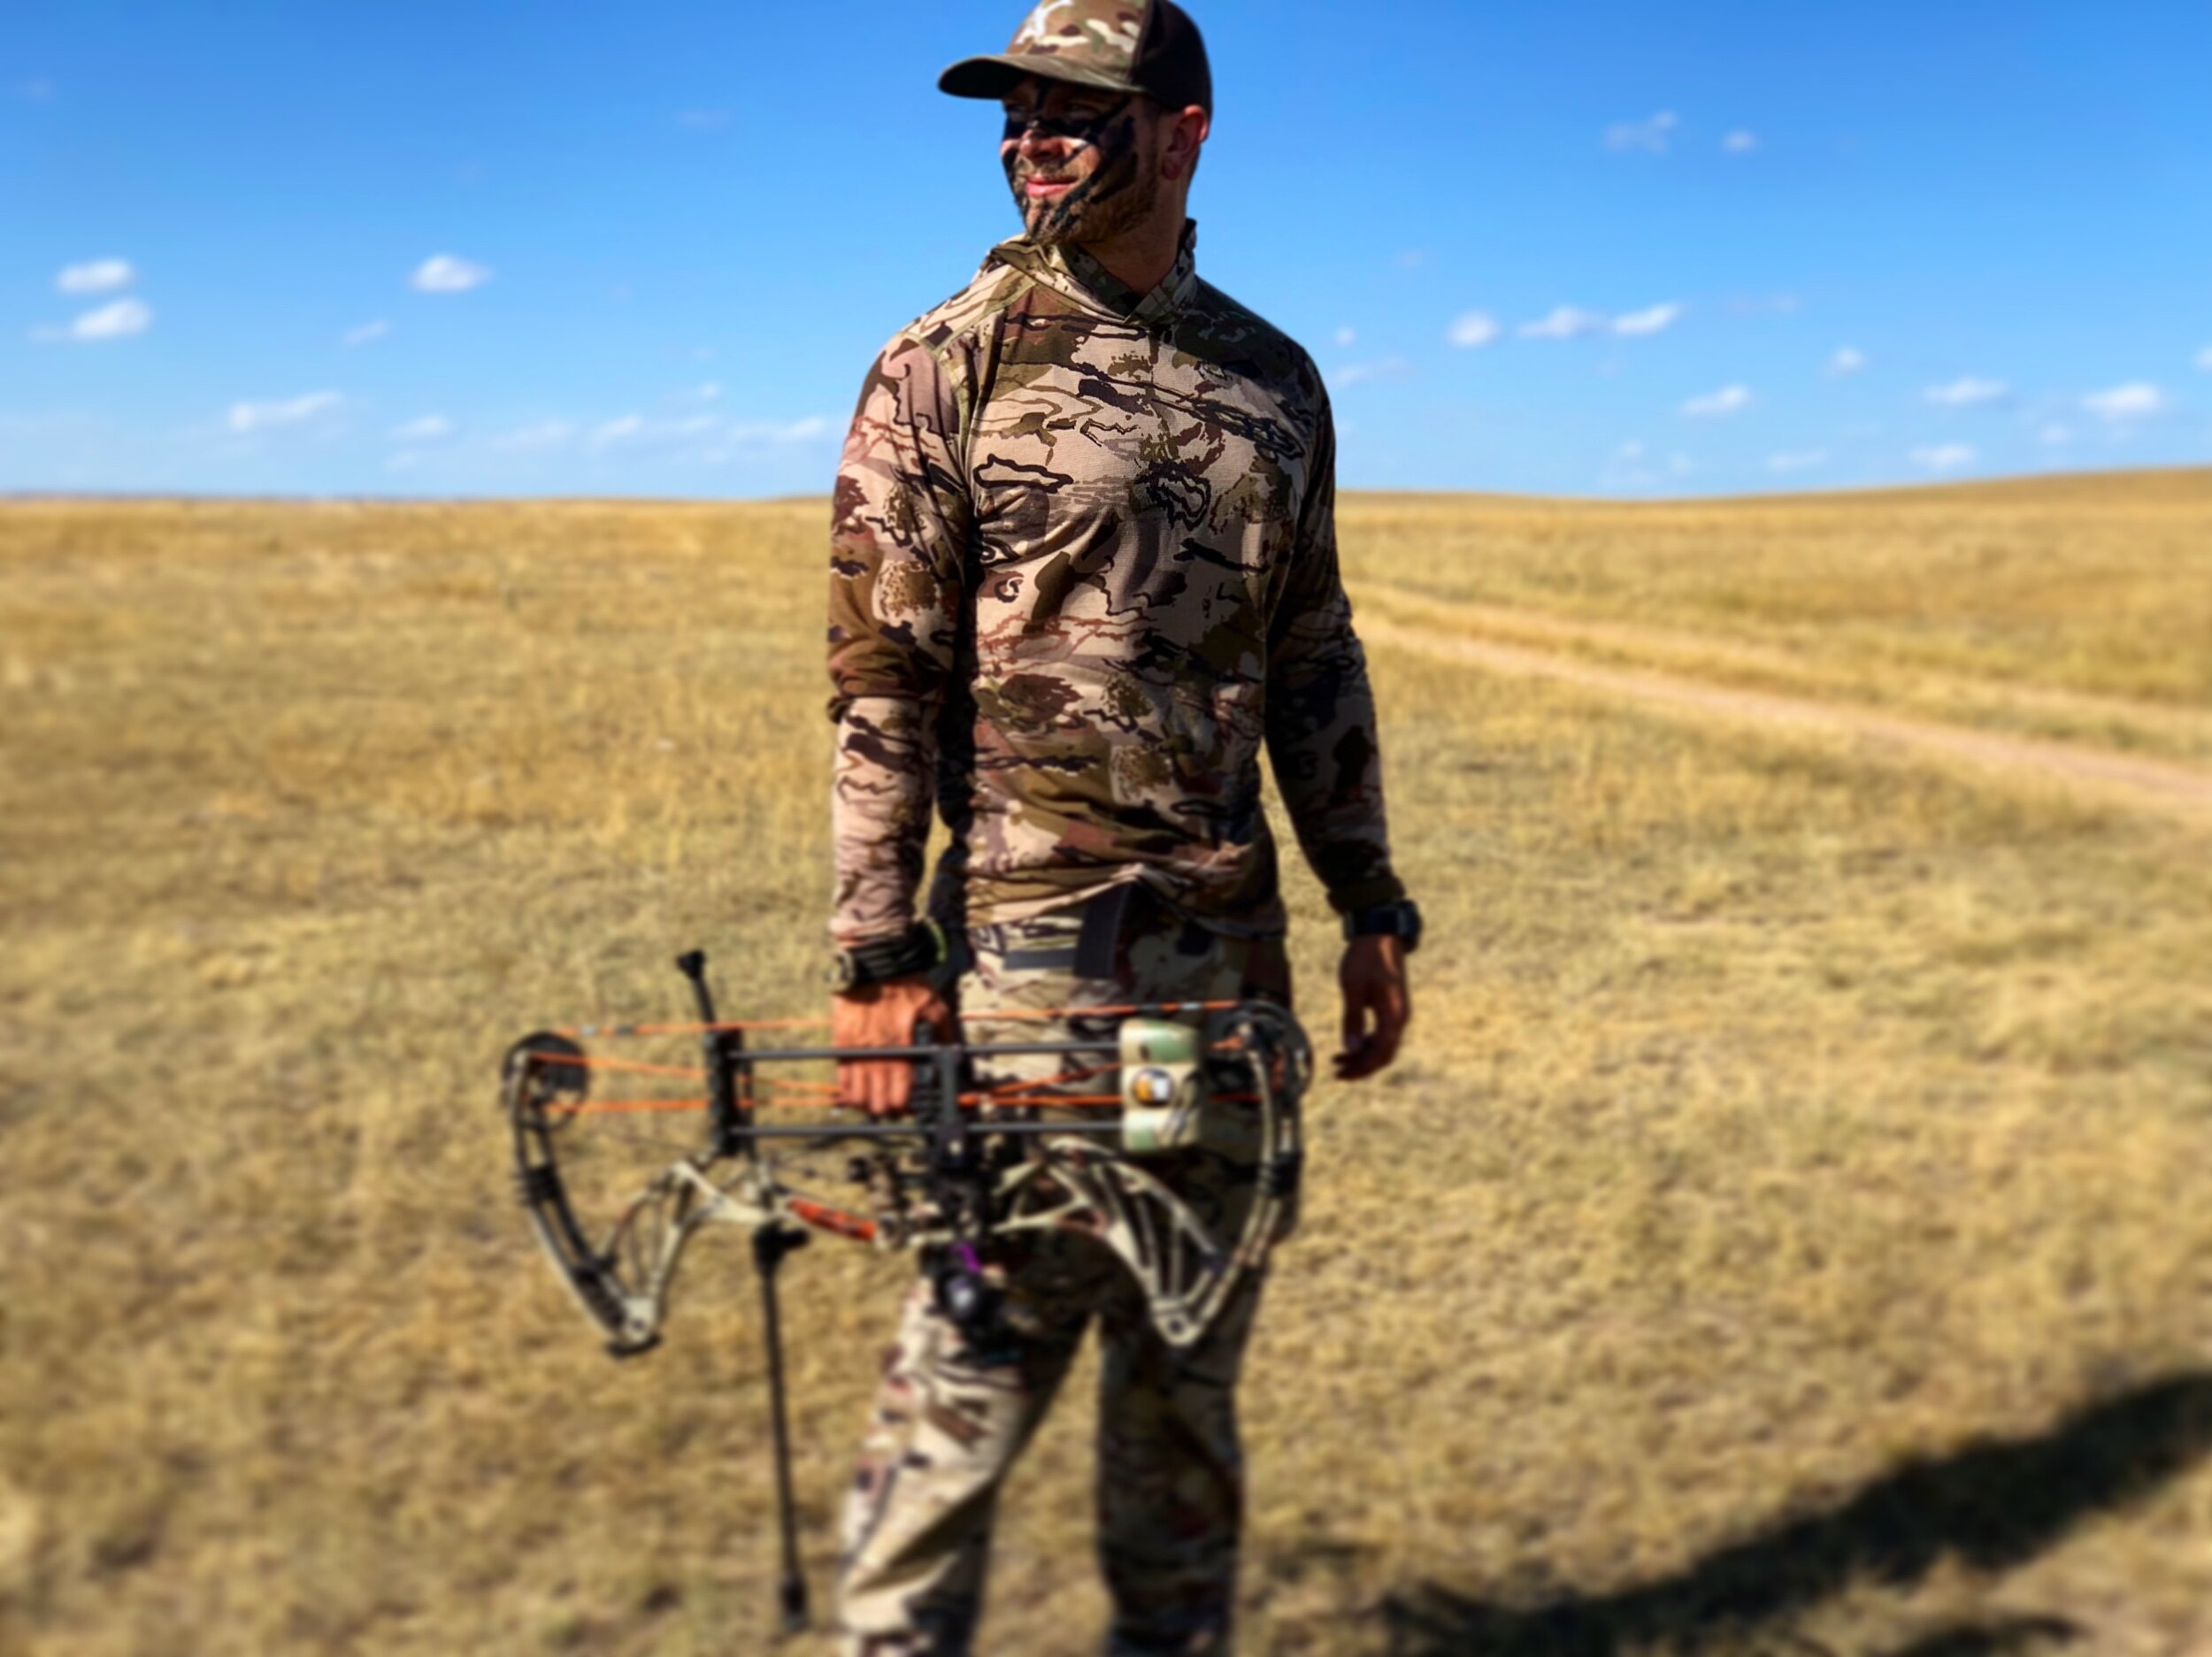
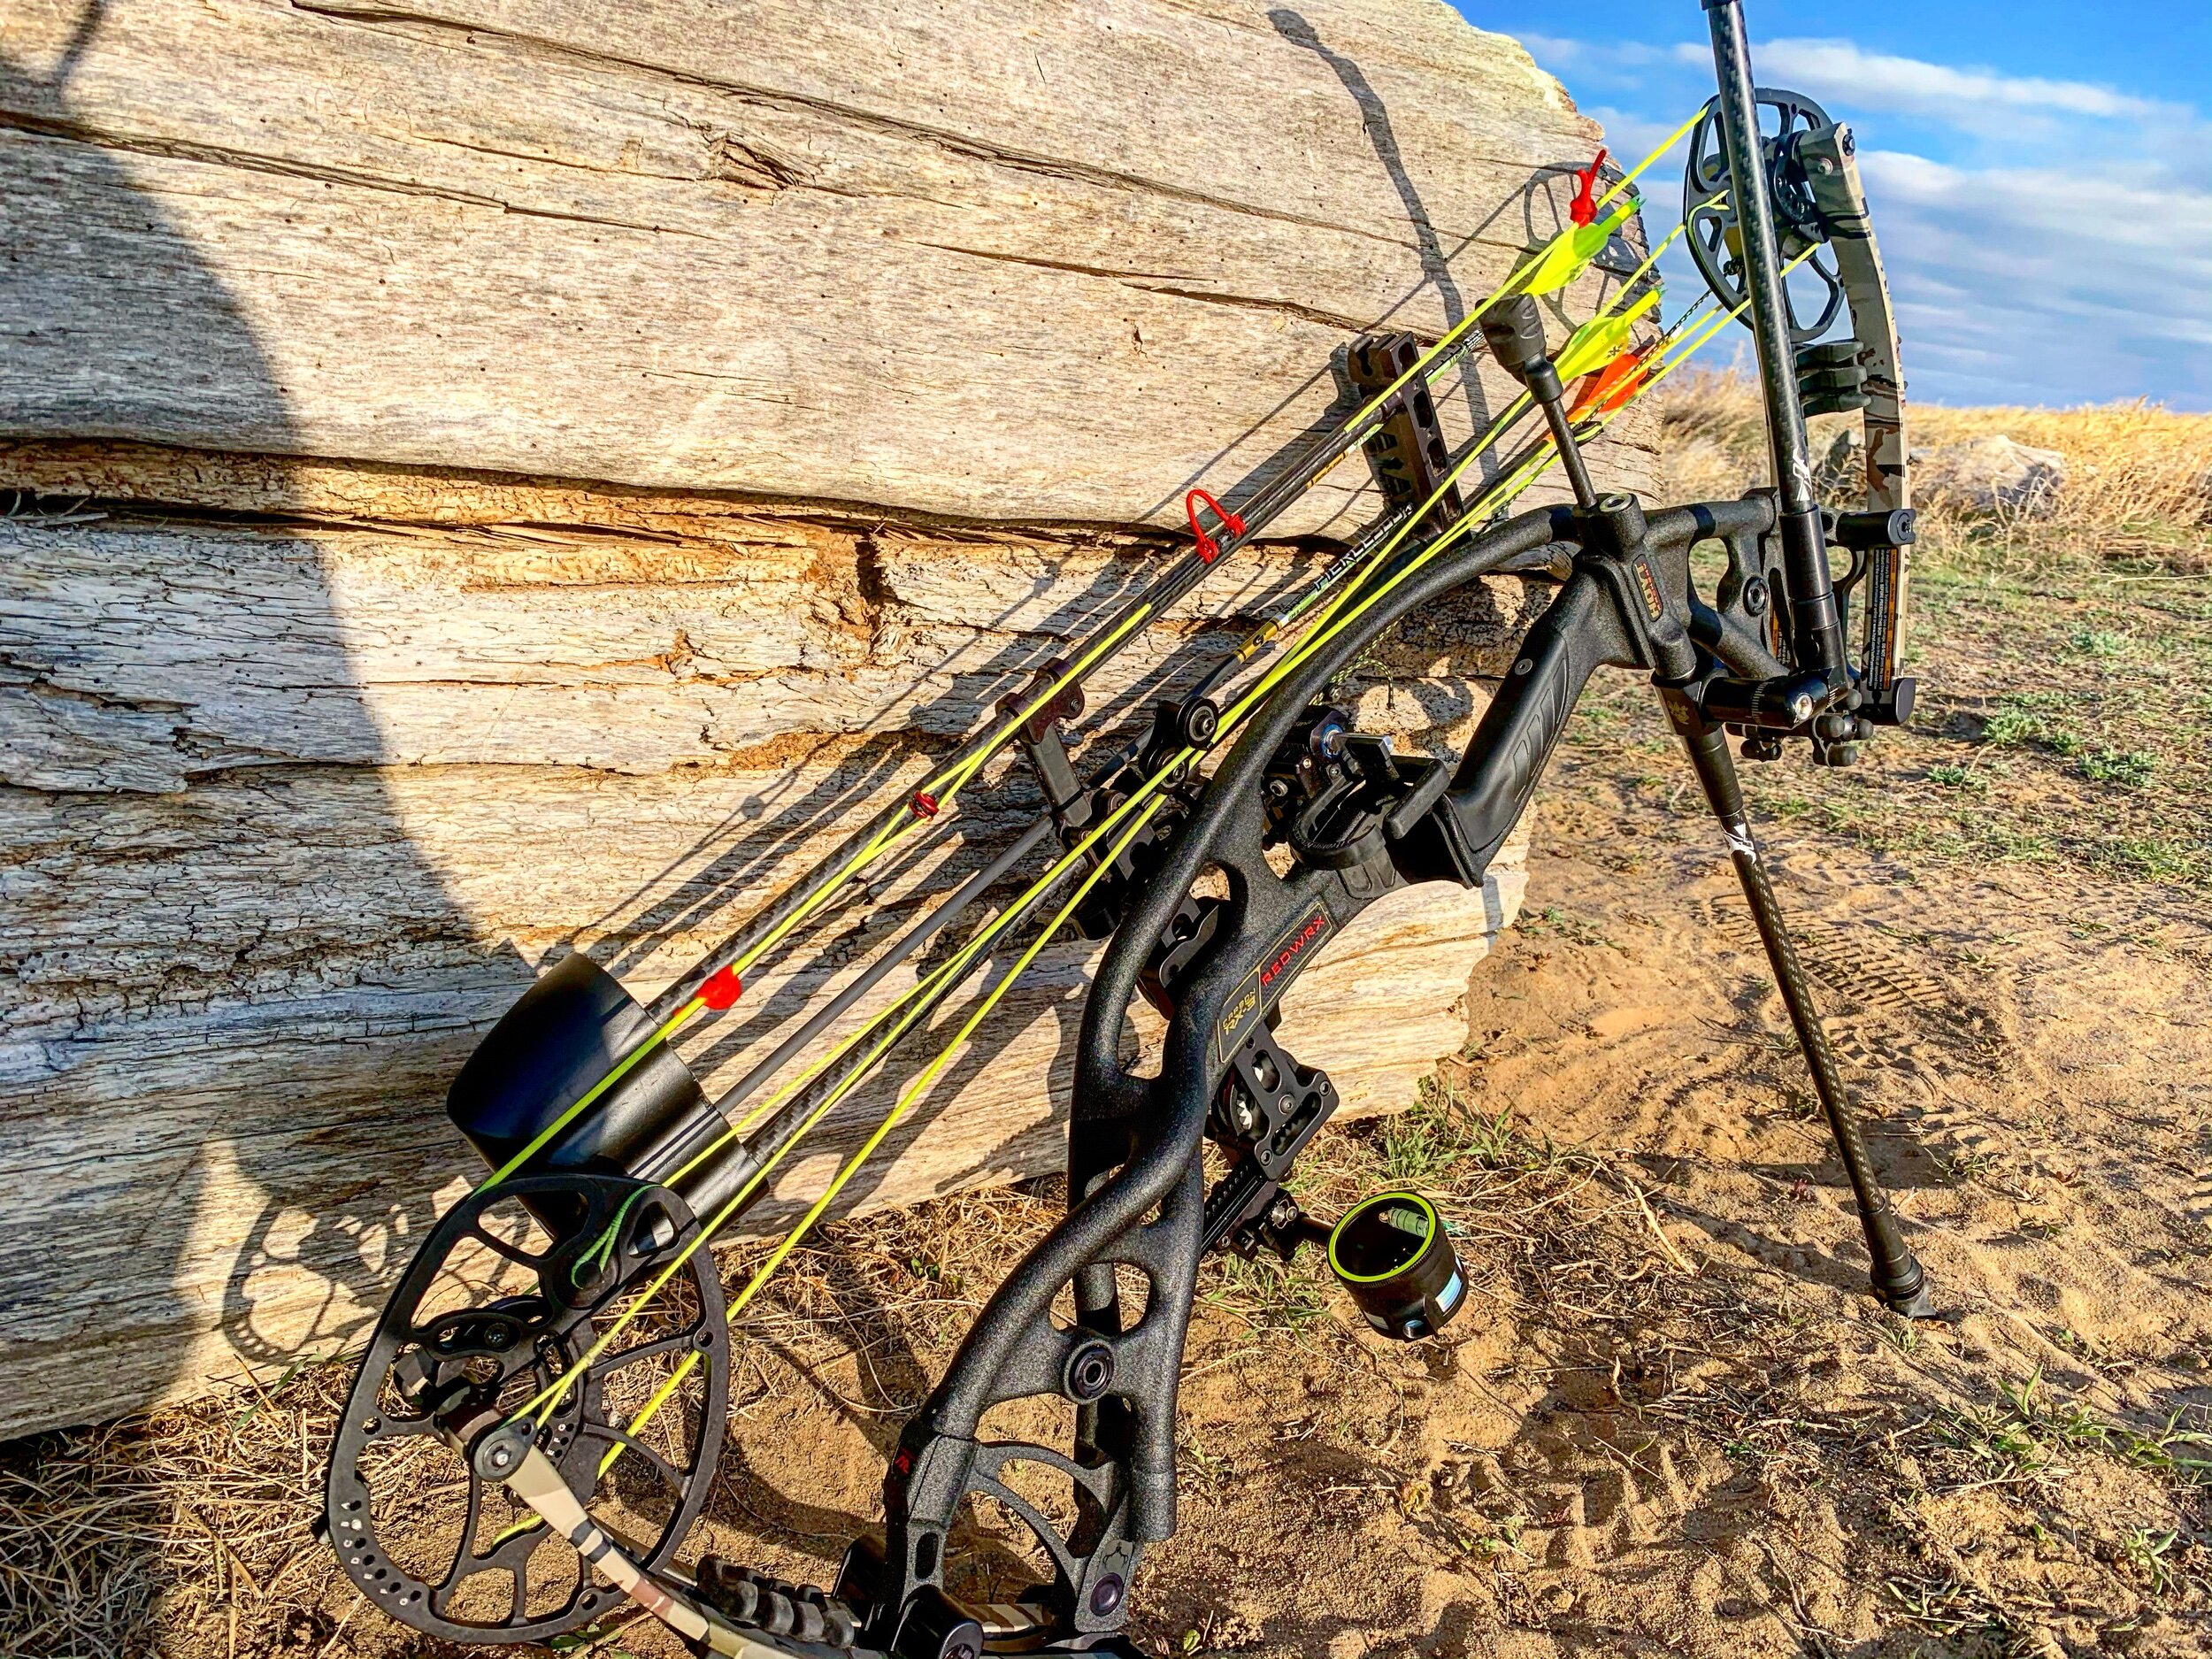
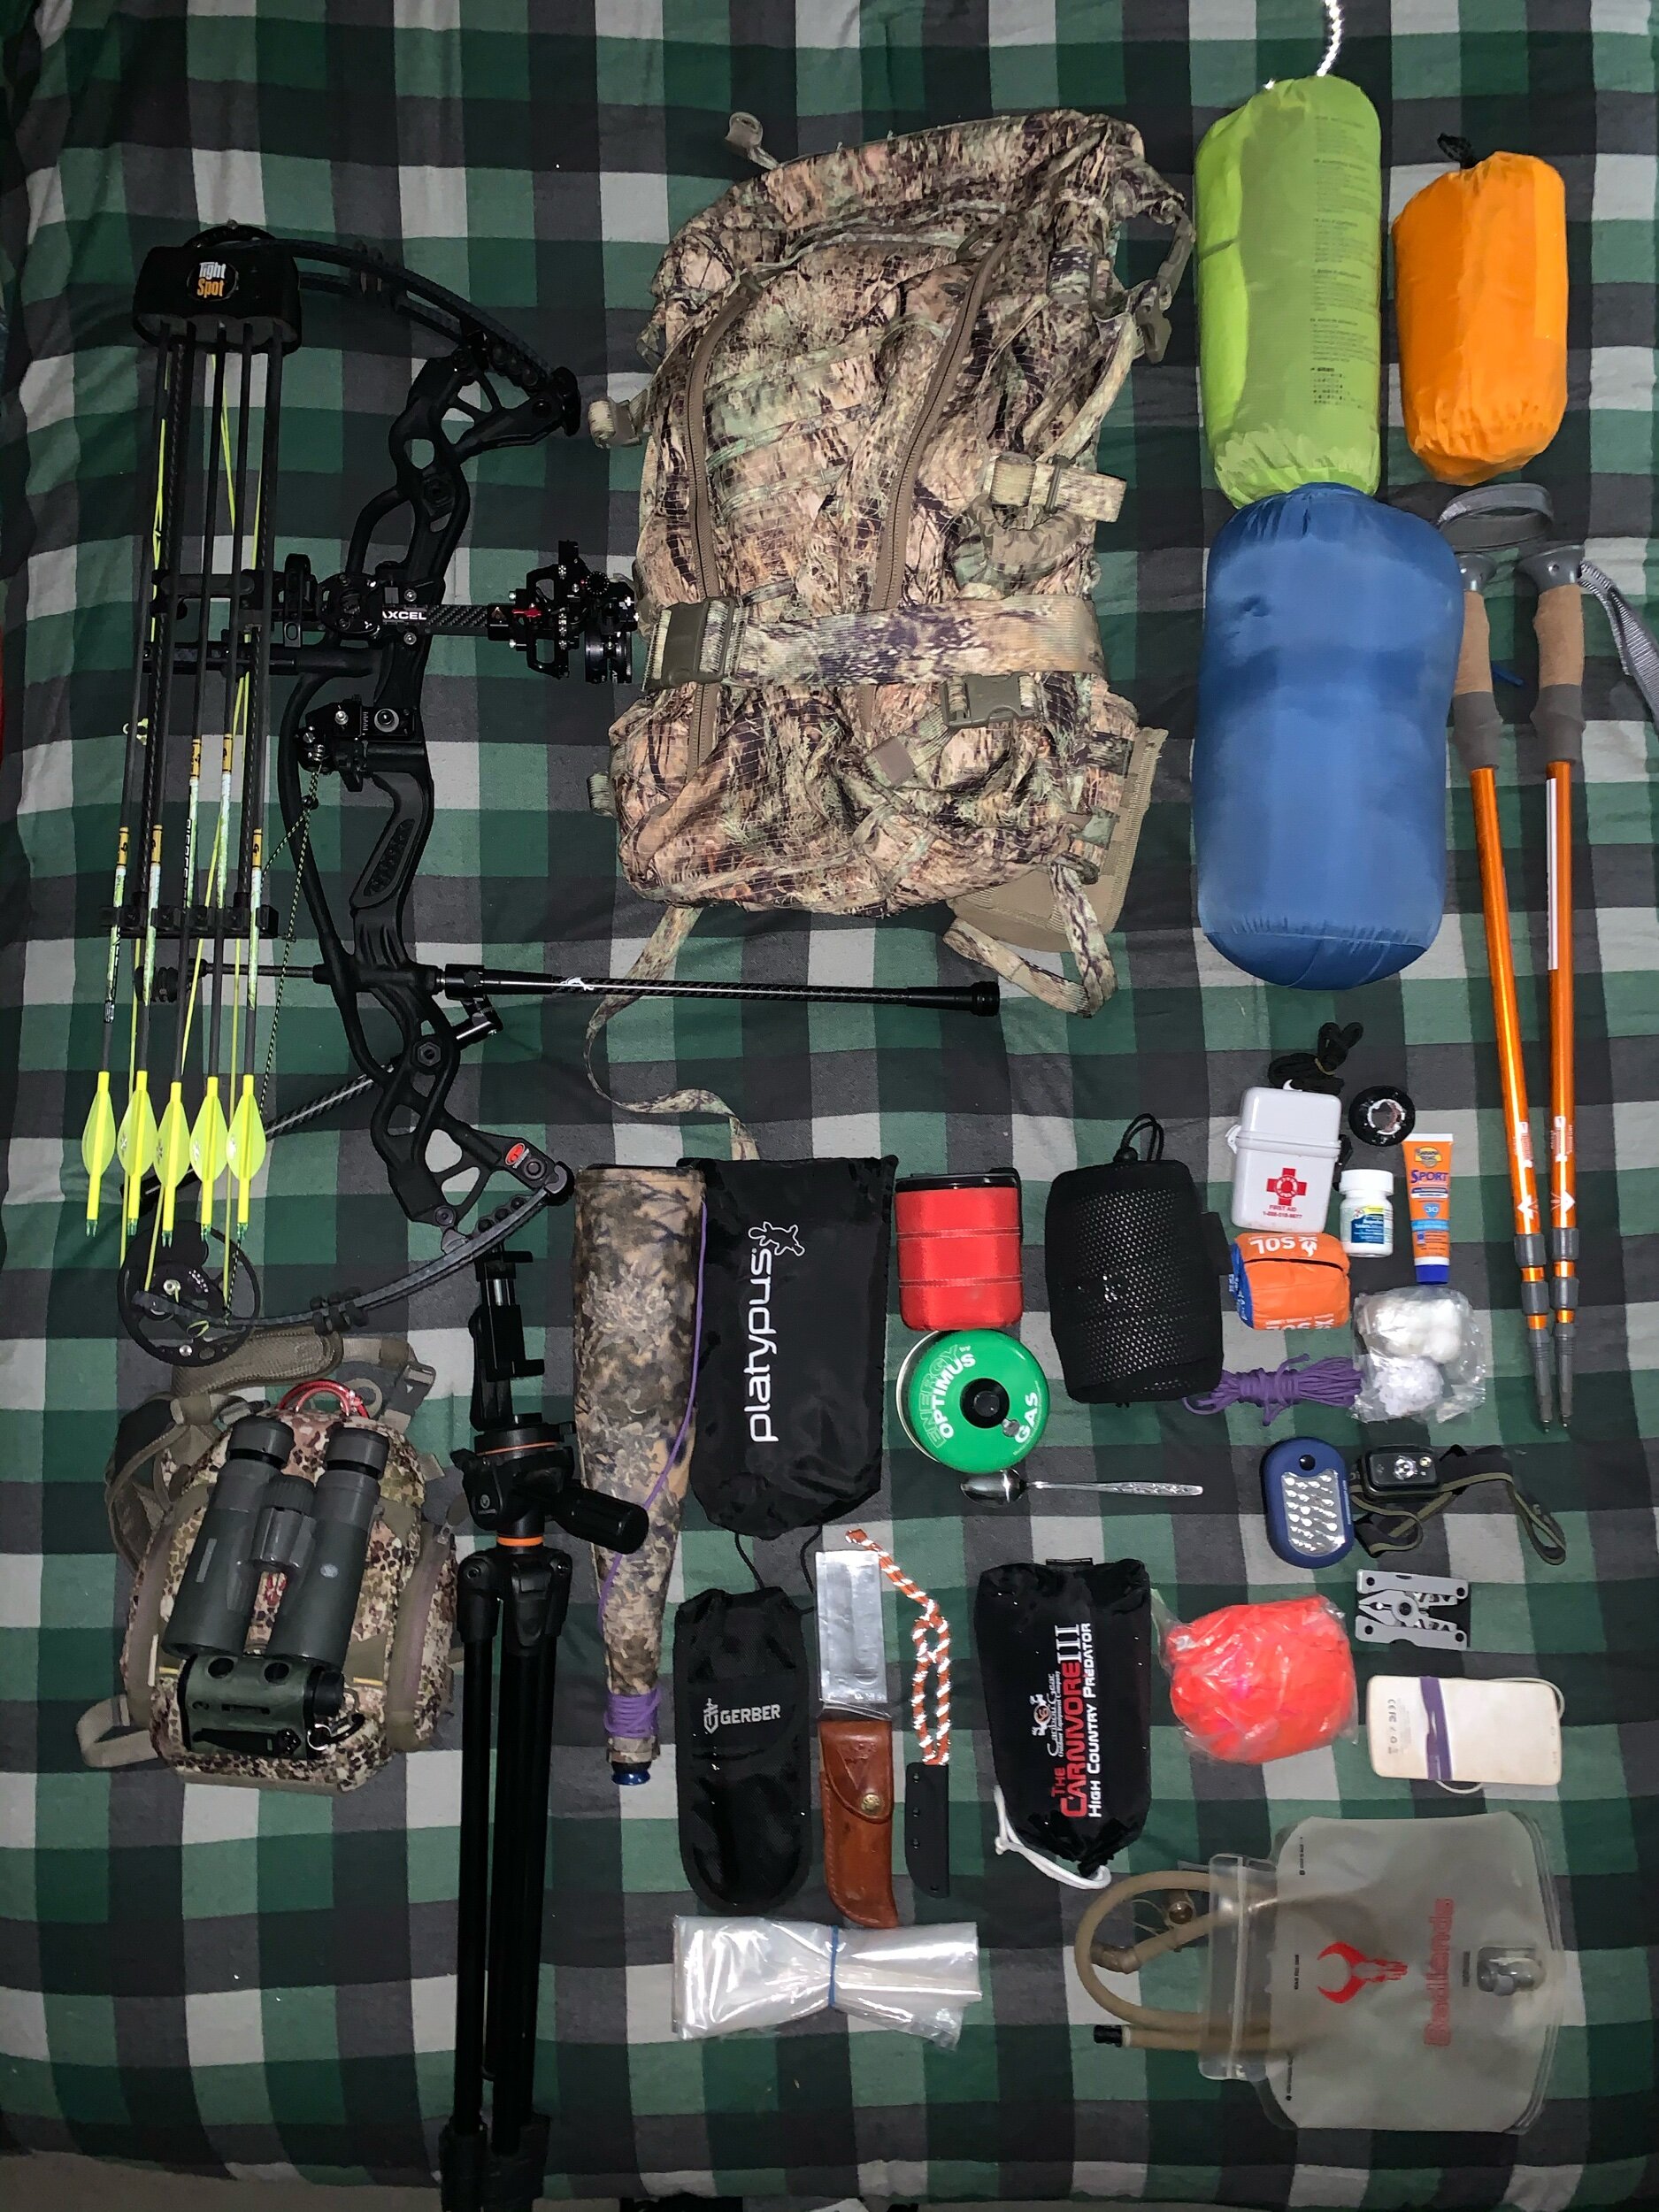
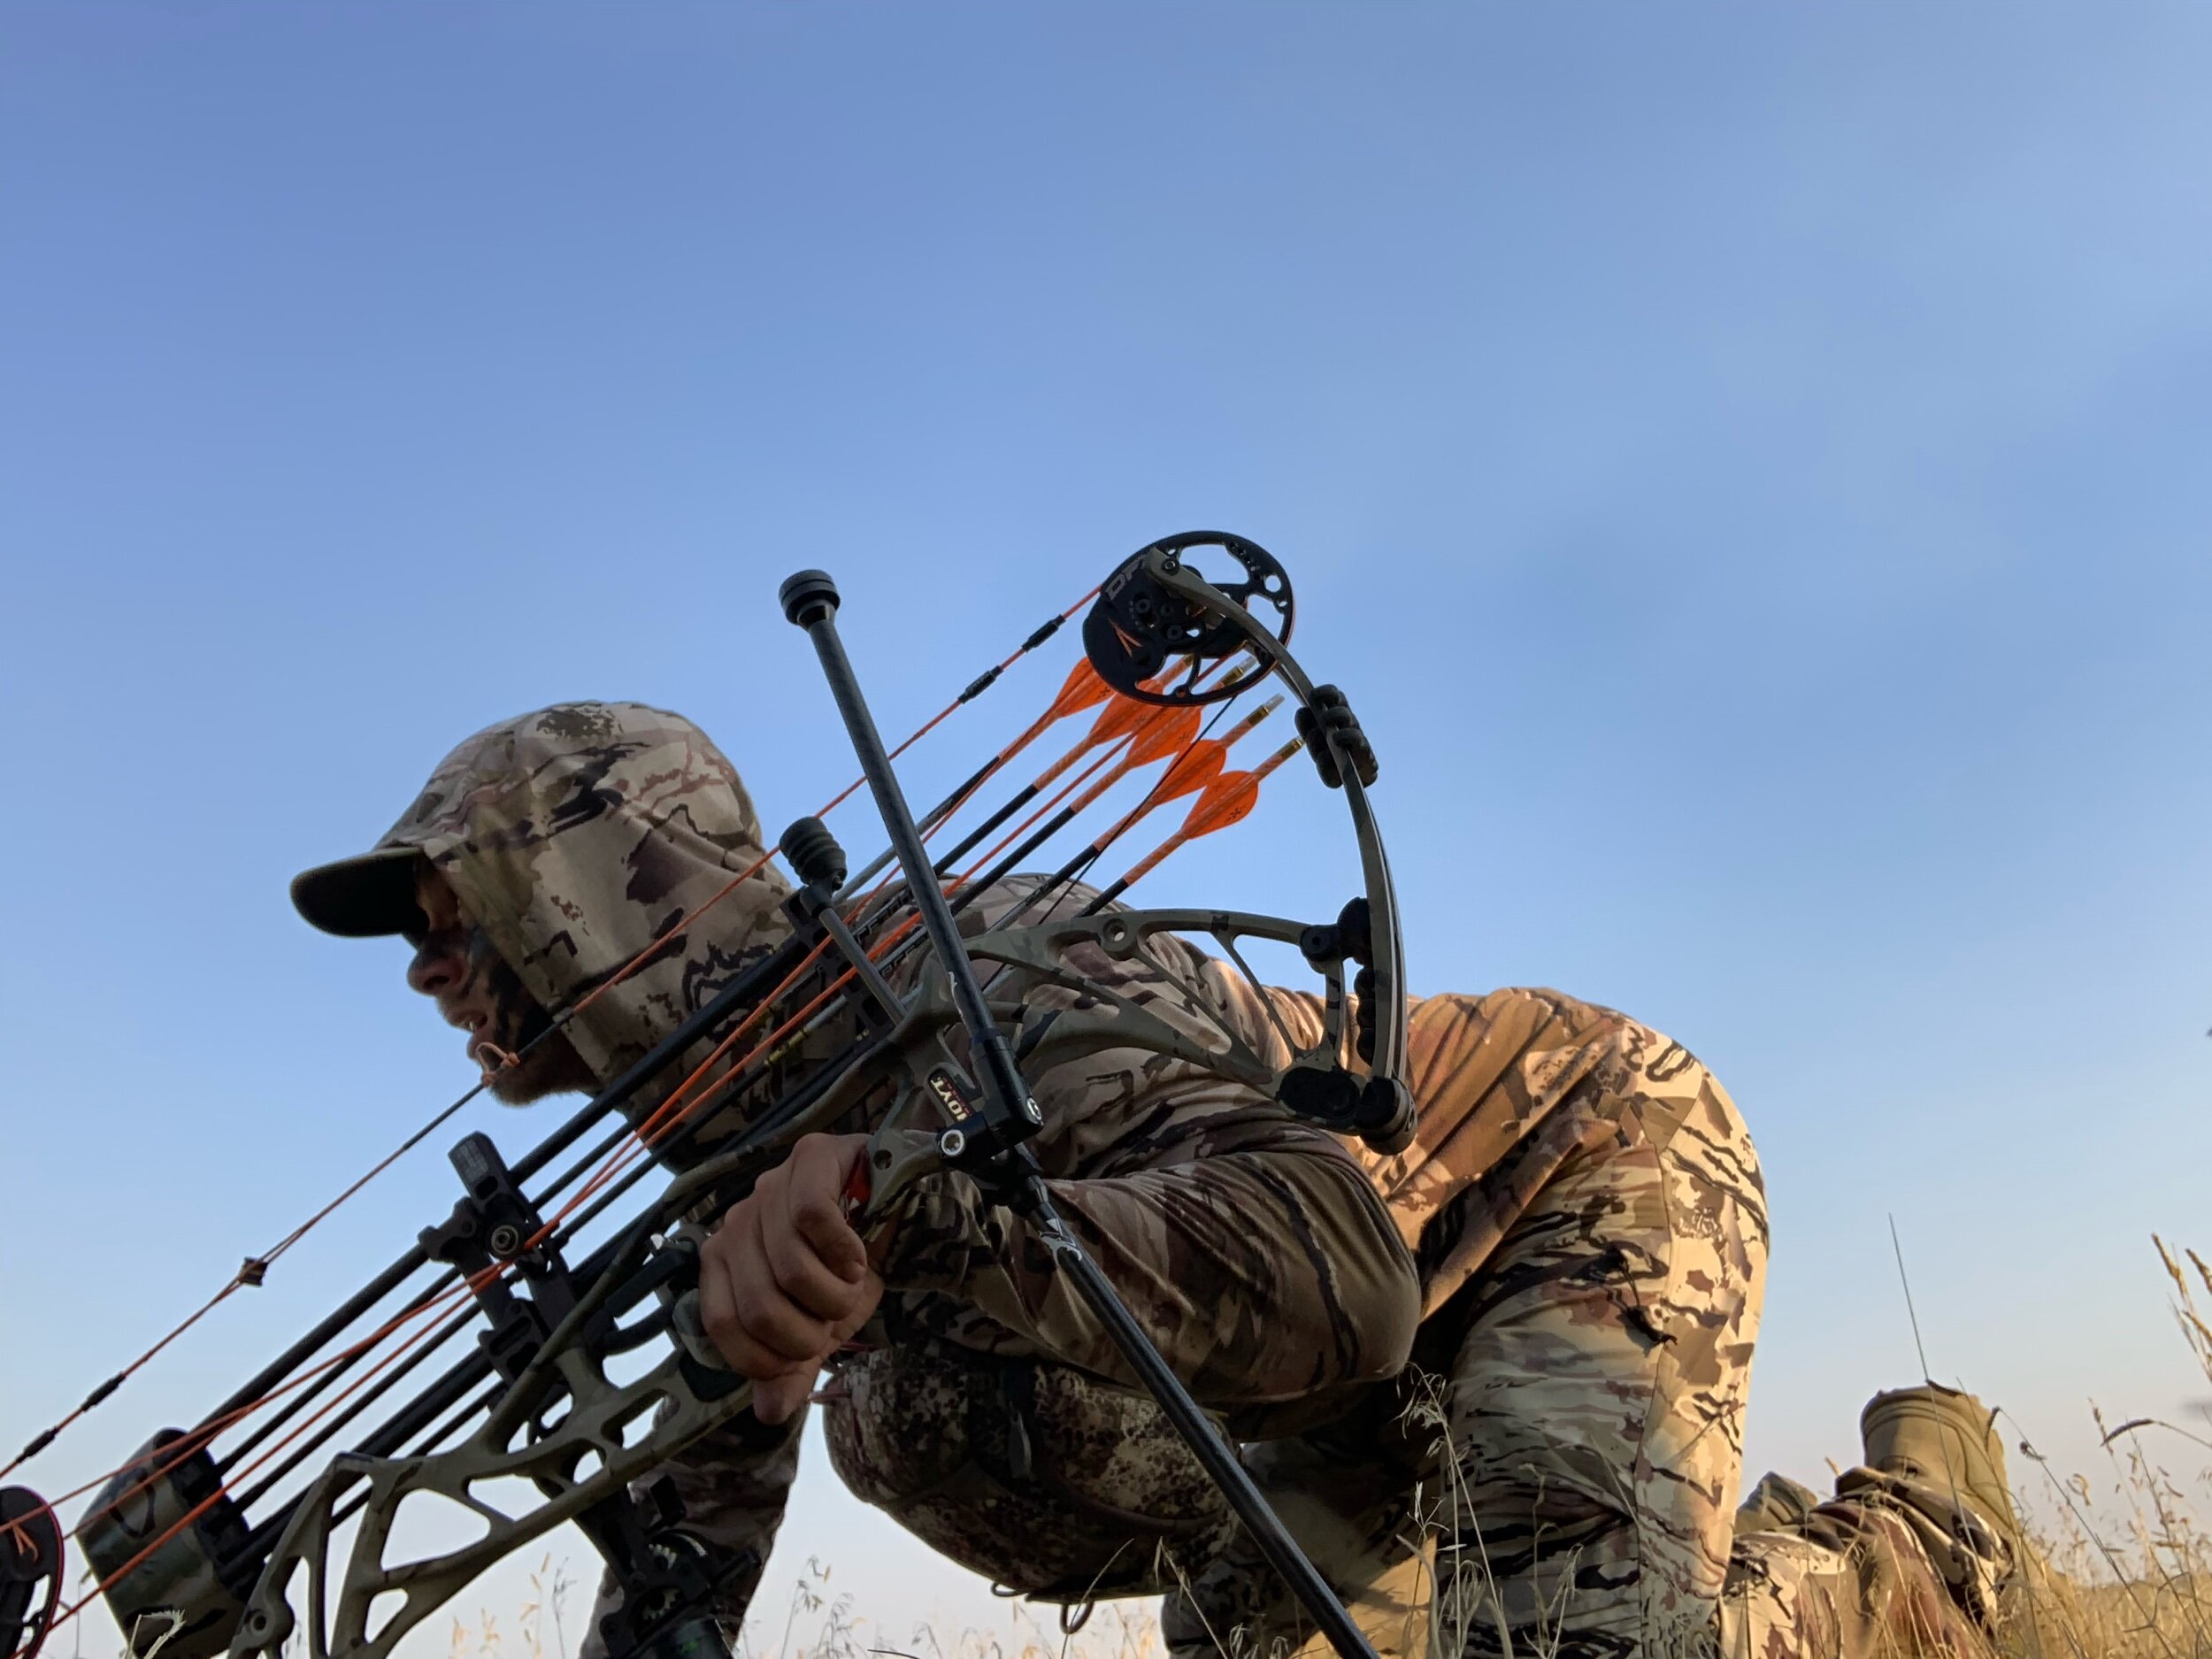
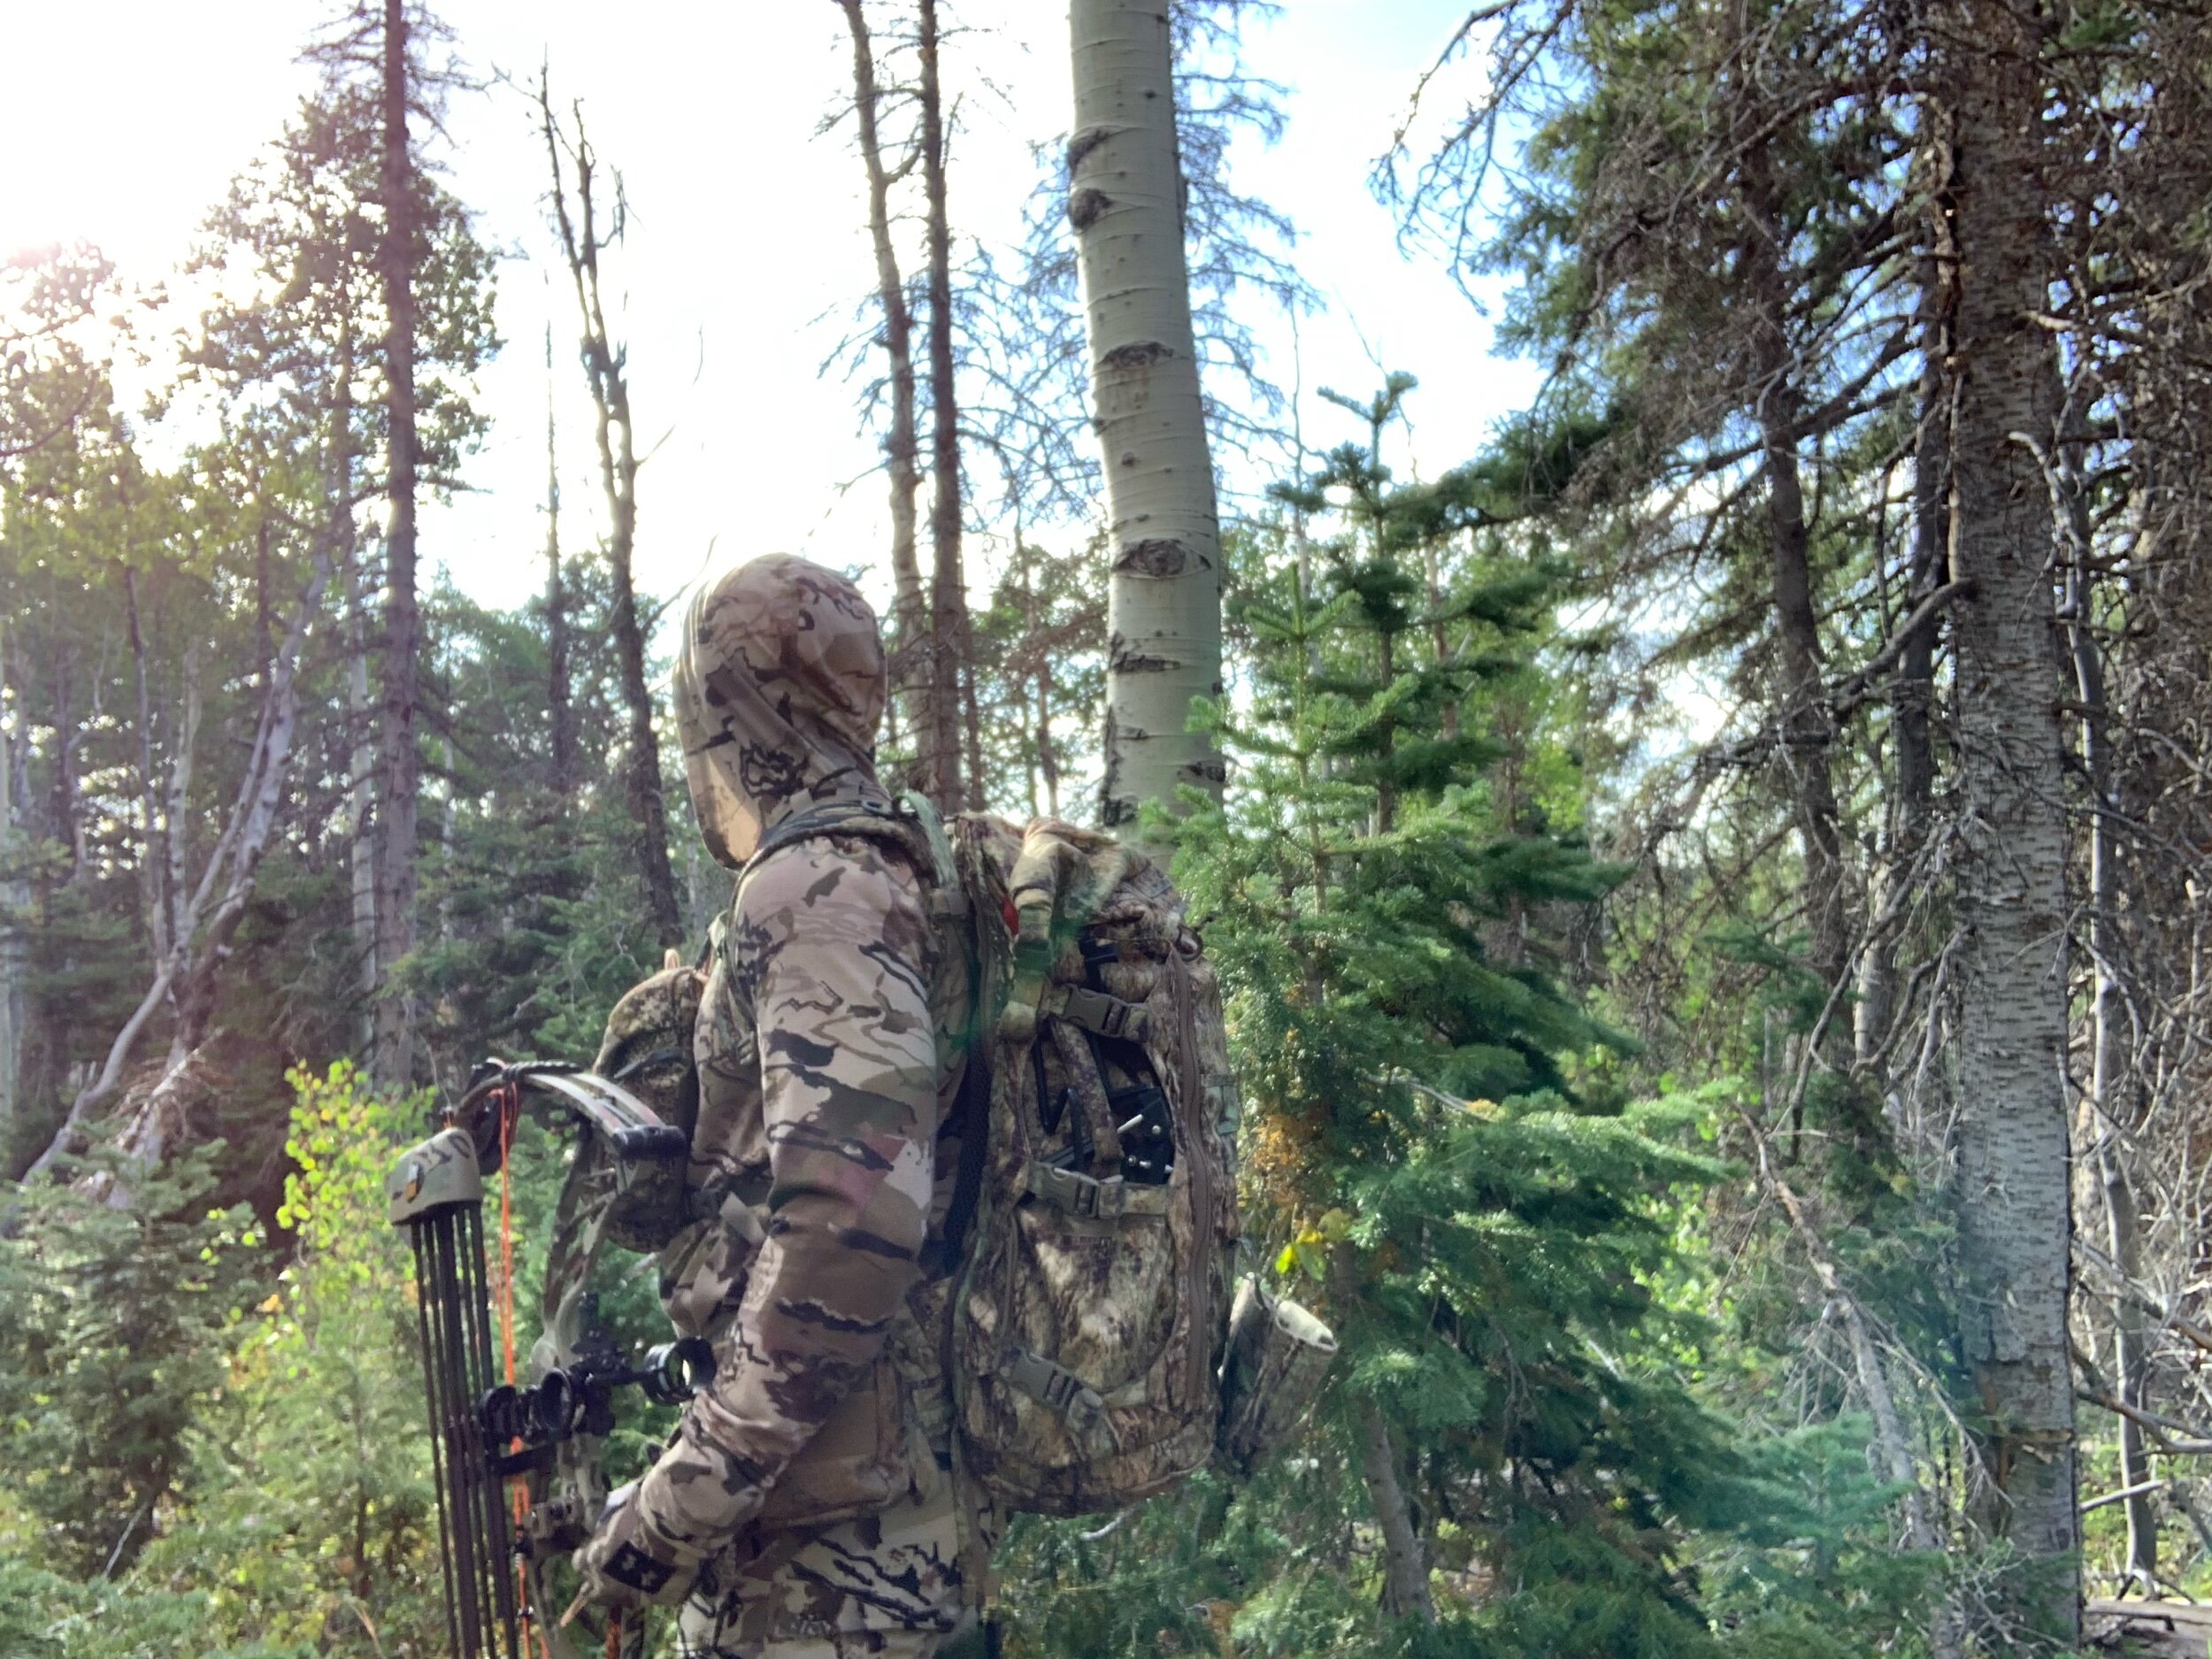
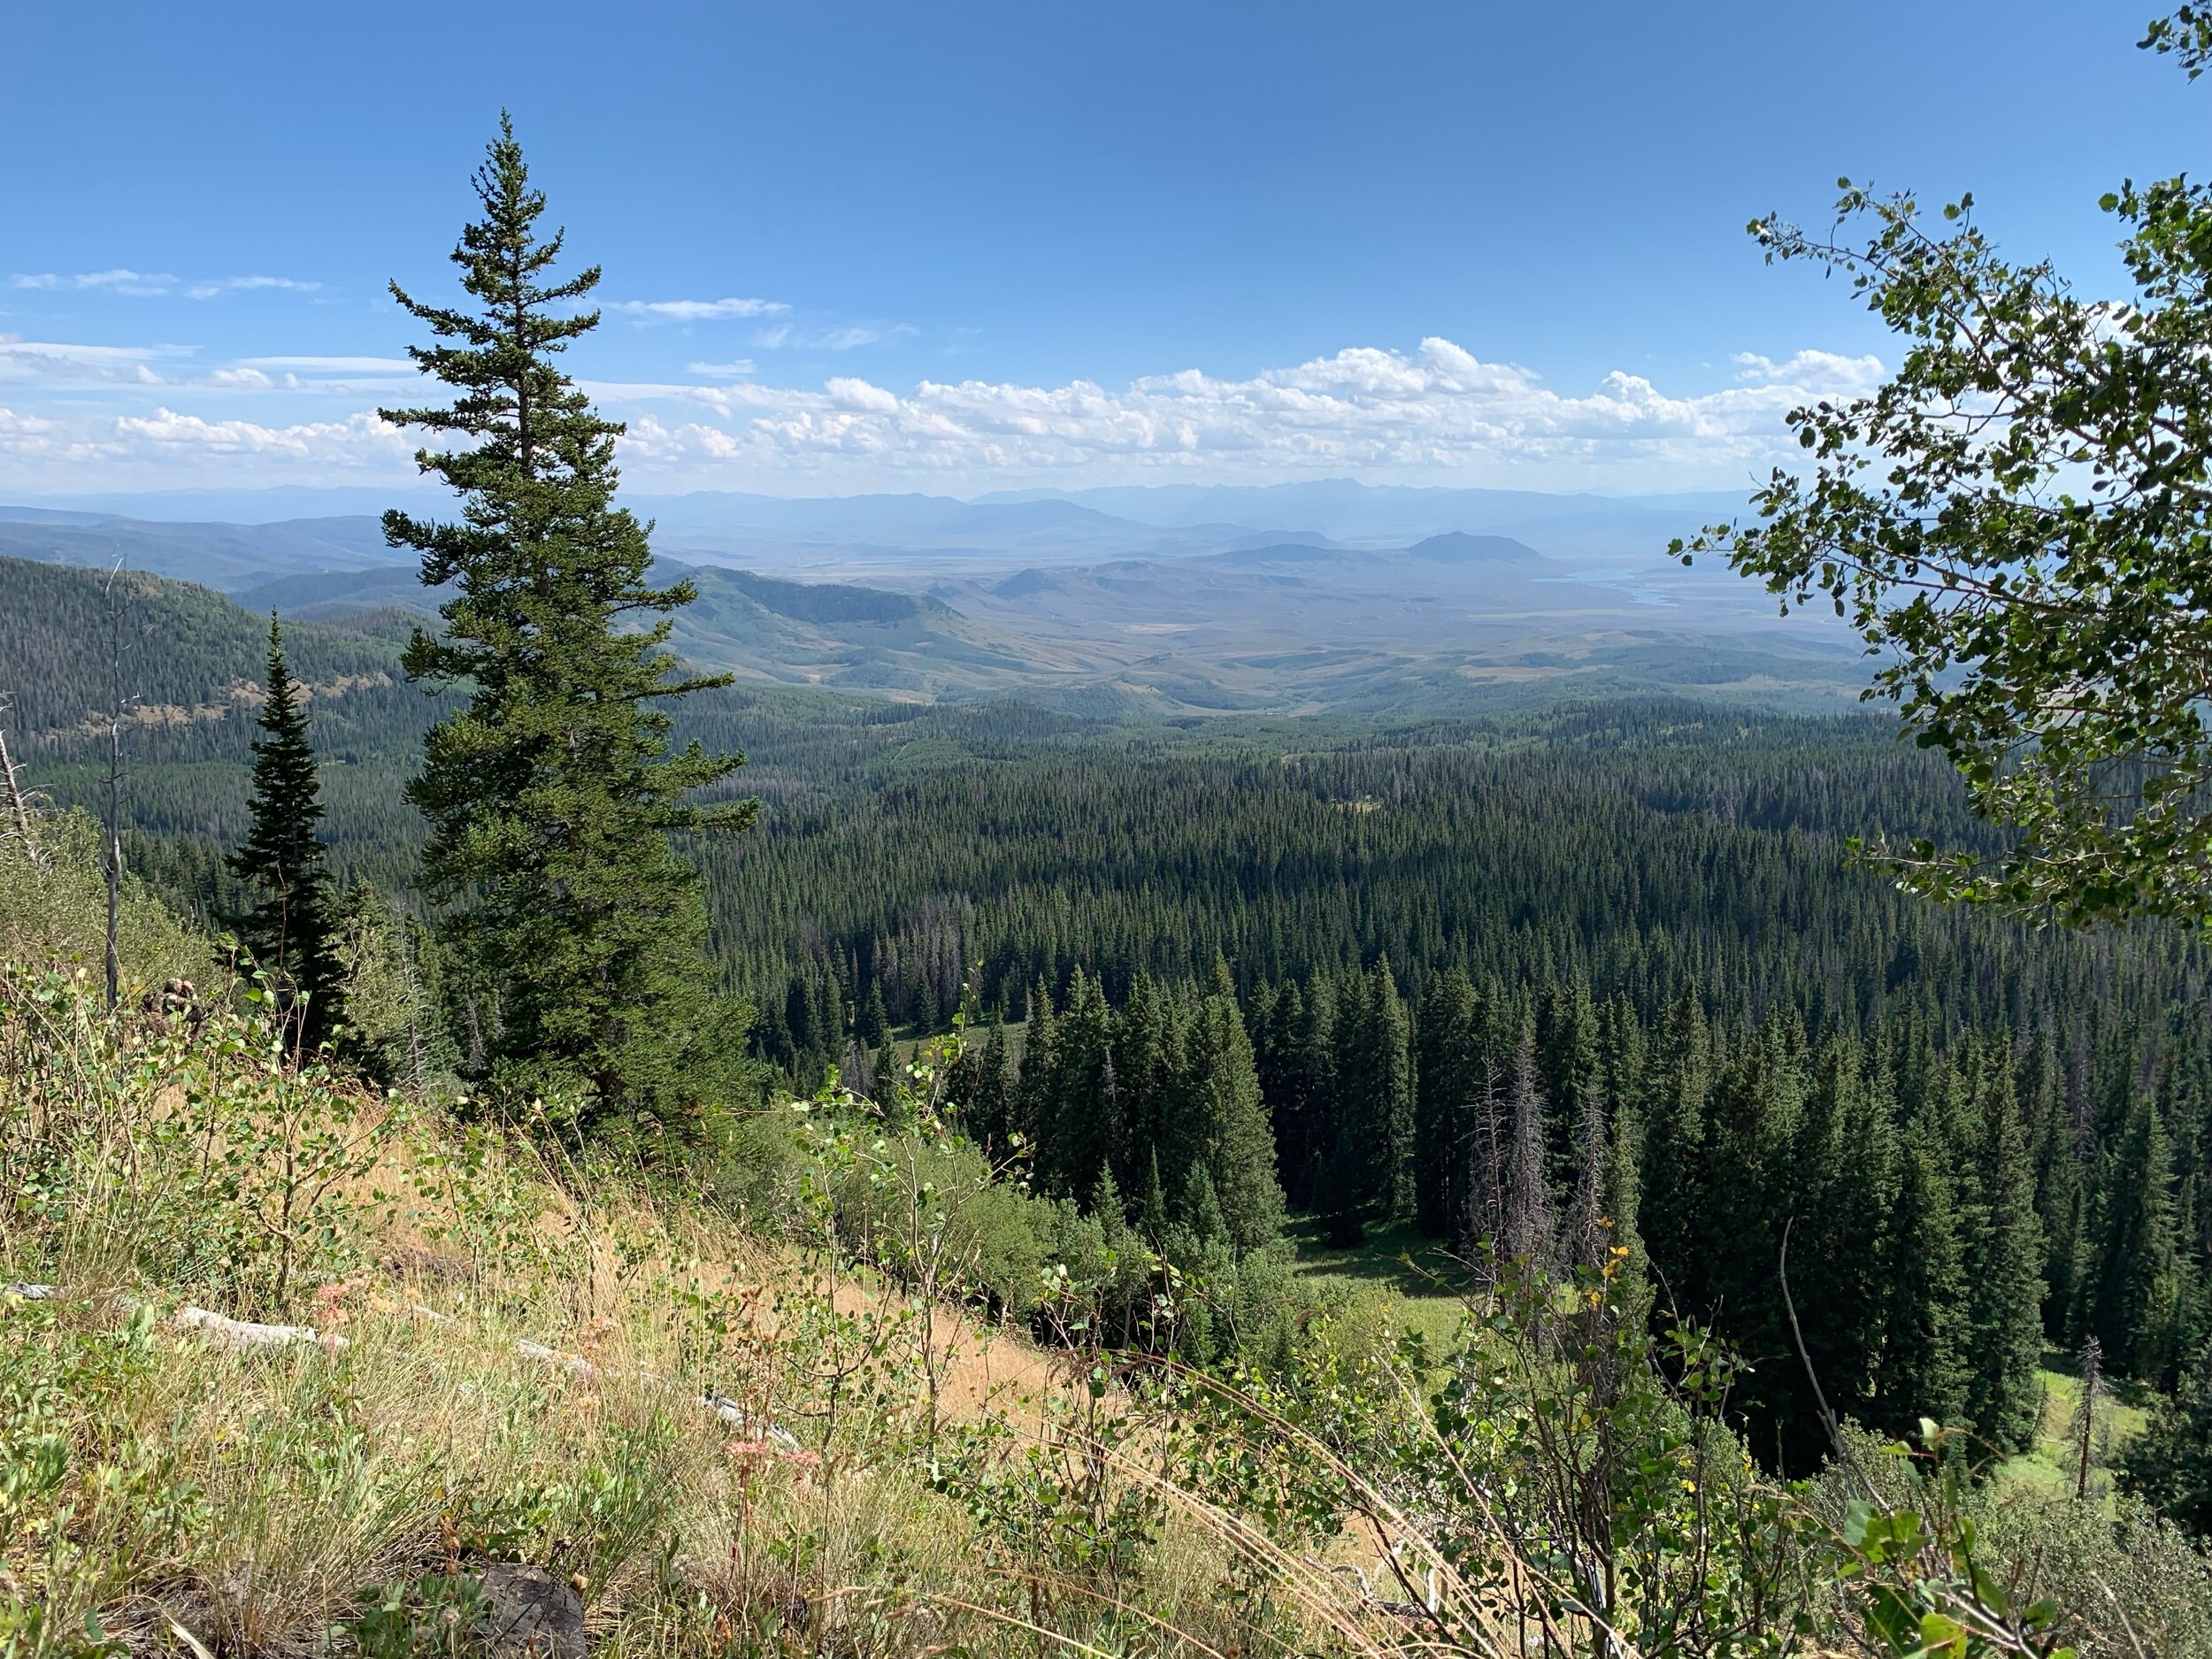
There were a few key features I knew needed to be there in order to make this product effective: strength, weight, and vibration dampening ability. First thing to do was to get these bars in the hands of some of the most hardcore bow hunters I knew, if they passed the test of being in the field 50-100 days a year, they would be strong enough. The size and materials they were constructed of ensured the weight would be lighter than anything else. In order to keep the profile small, I knew the vibration dampening material needed to be housed inside the carbon tube, otherwise what was the point? Plenty of stabilizers have rubber dampeners on the exterior, but that takes a 3/4” bar and makes it 1.5” in diameter, not good. The material itself is an extremely soft silicone rubber hybrid that disperses high and low frequency vibration, often used to isolate sensitive electronic components in medical devices. The goal was to take the idea and features of a great stabilizer and add the benefit of better performance in windy conditions. It would still do it’s job of decreasing pin float and felt hand shock, PLUS still be effective in harsh and unforgiving conditions often found in western hunting scenarios.

Adjustments.jpeg

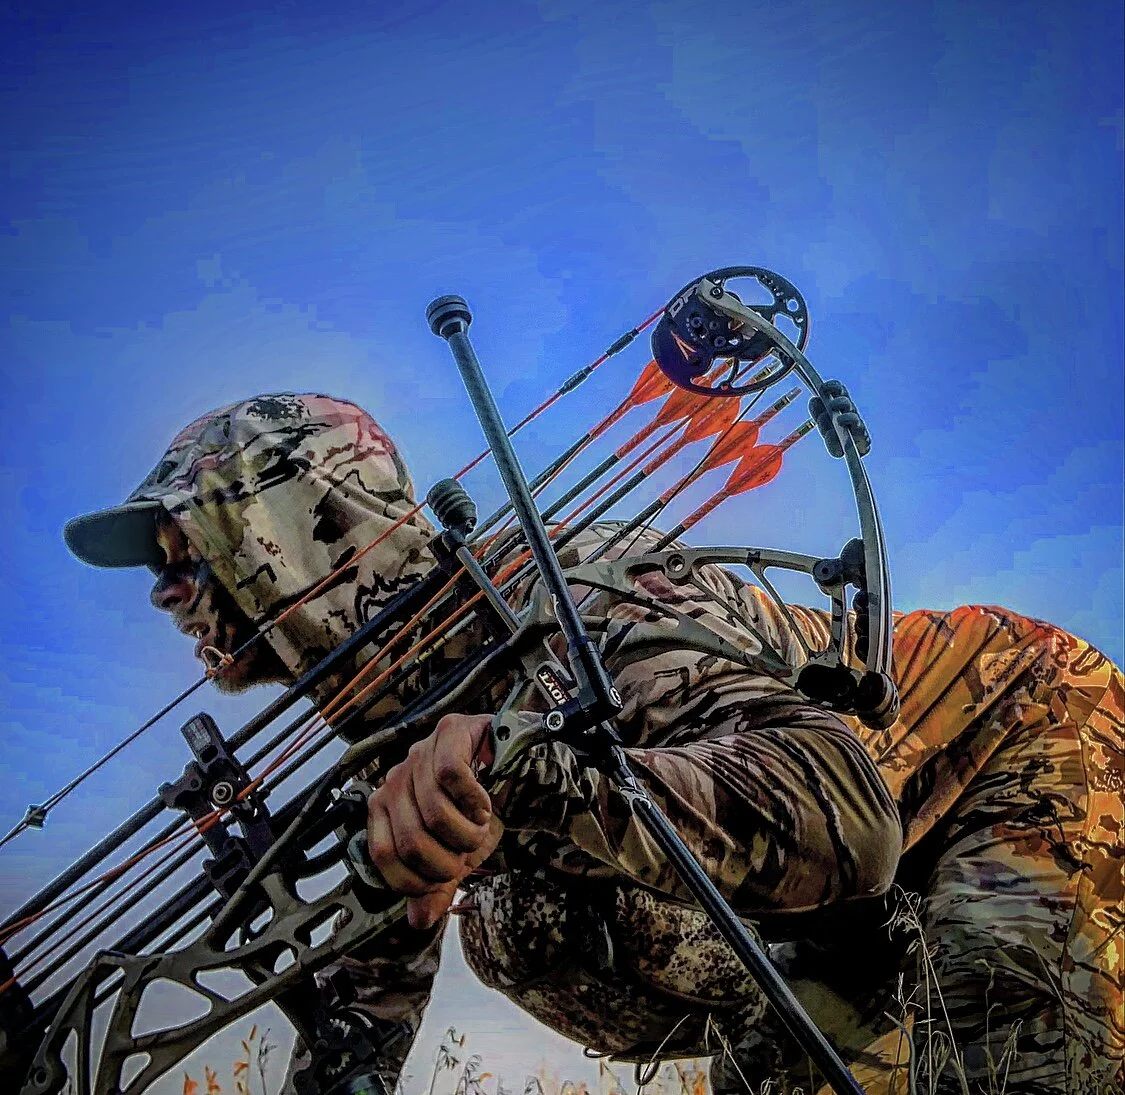
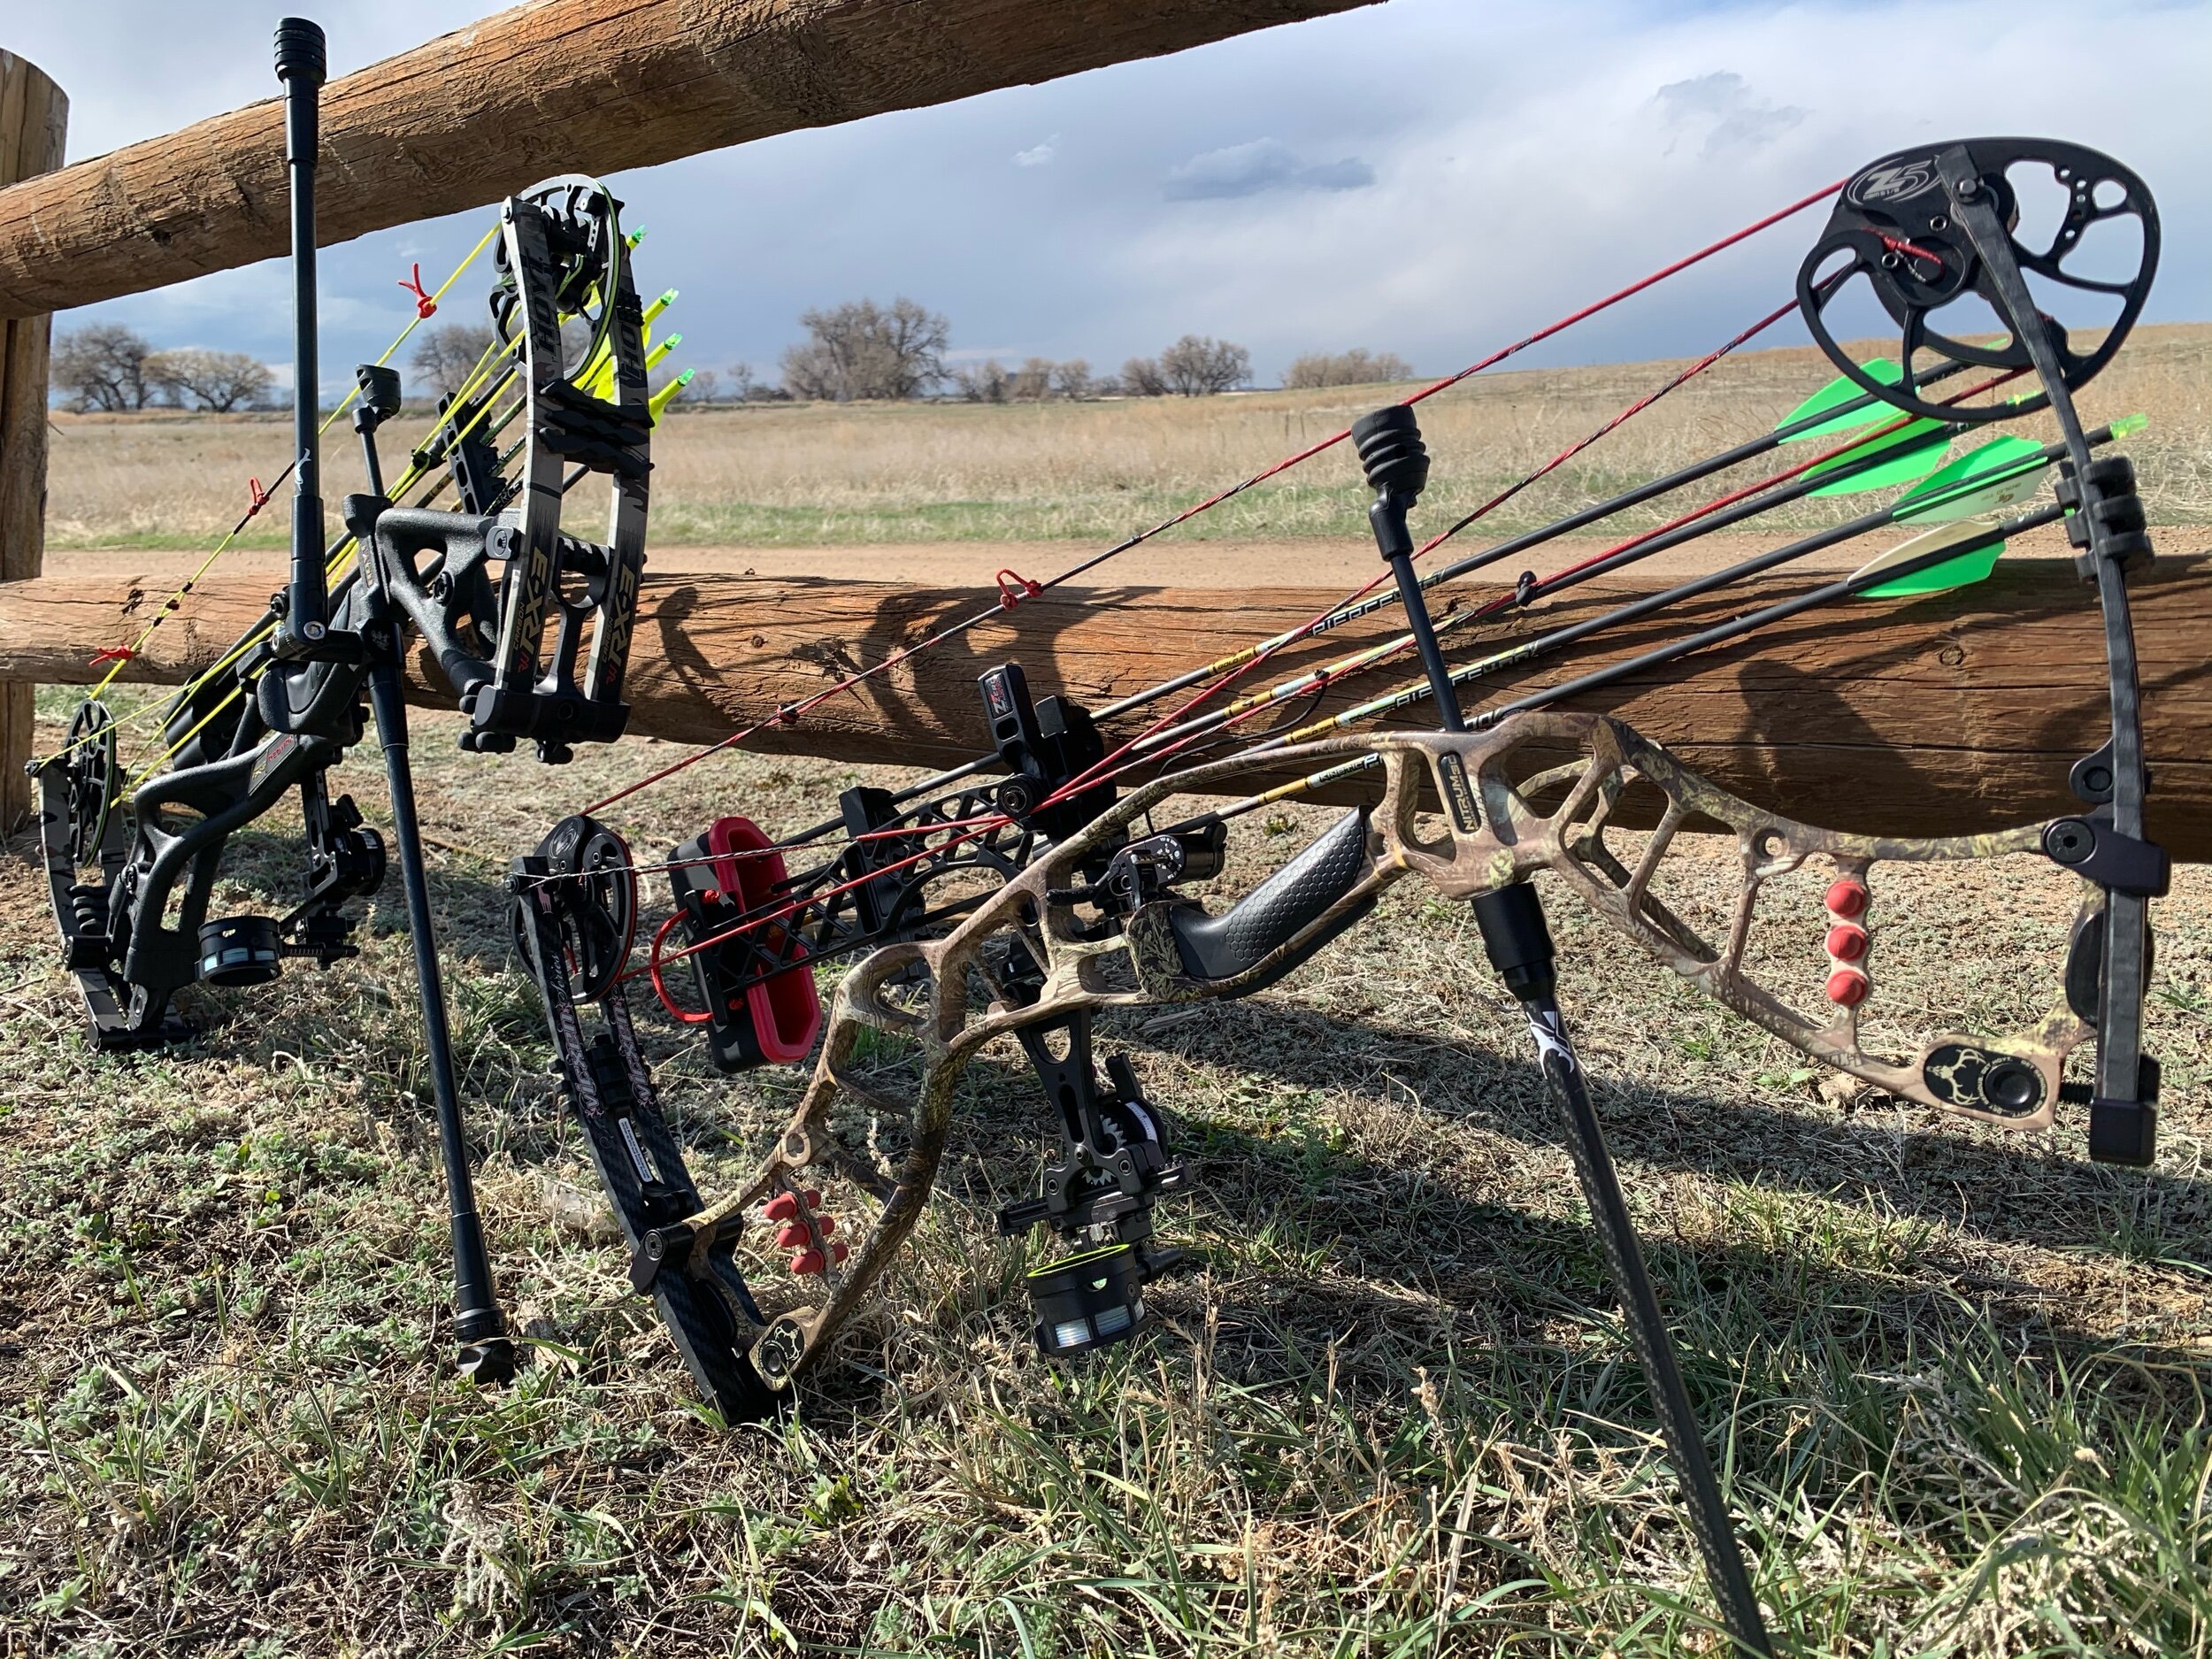
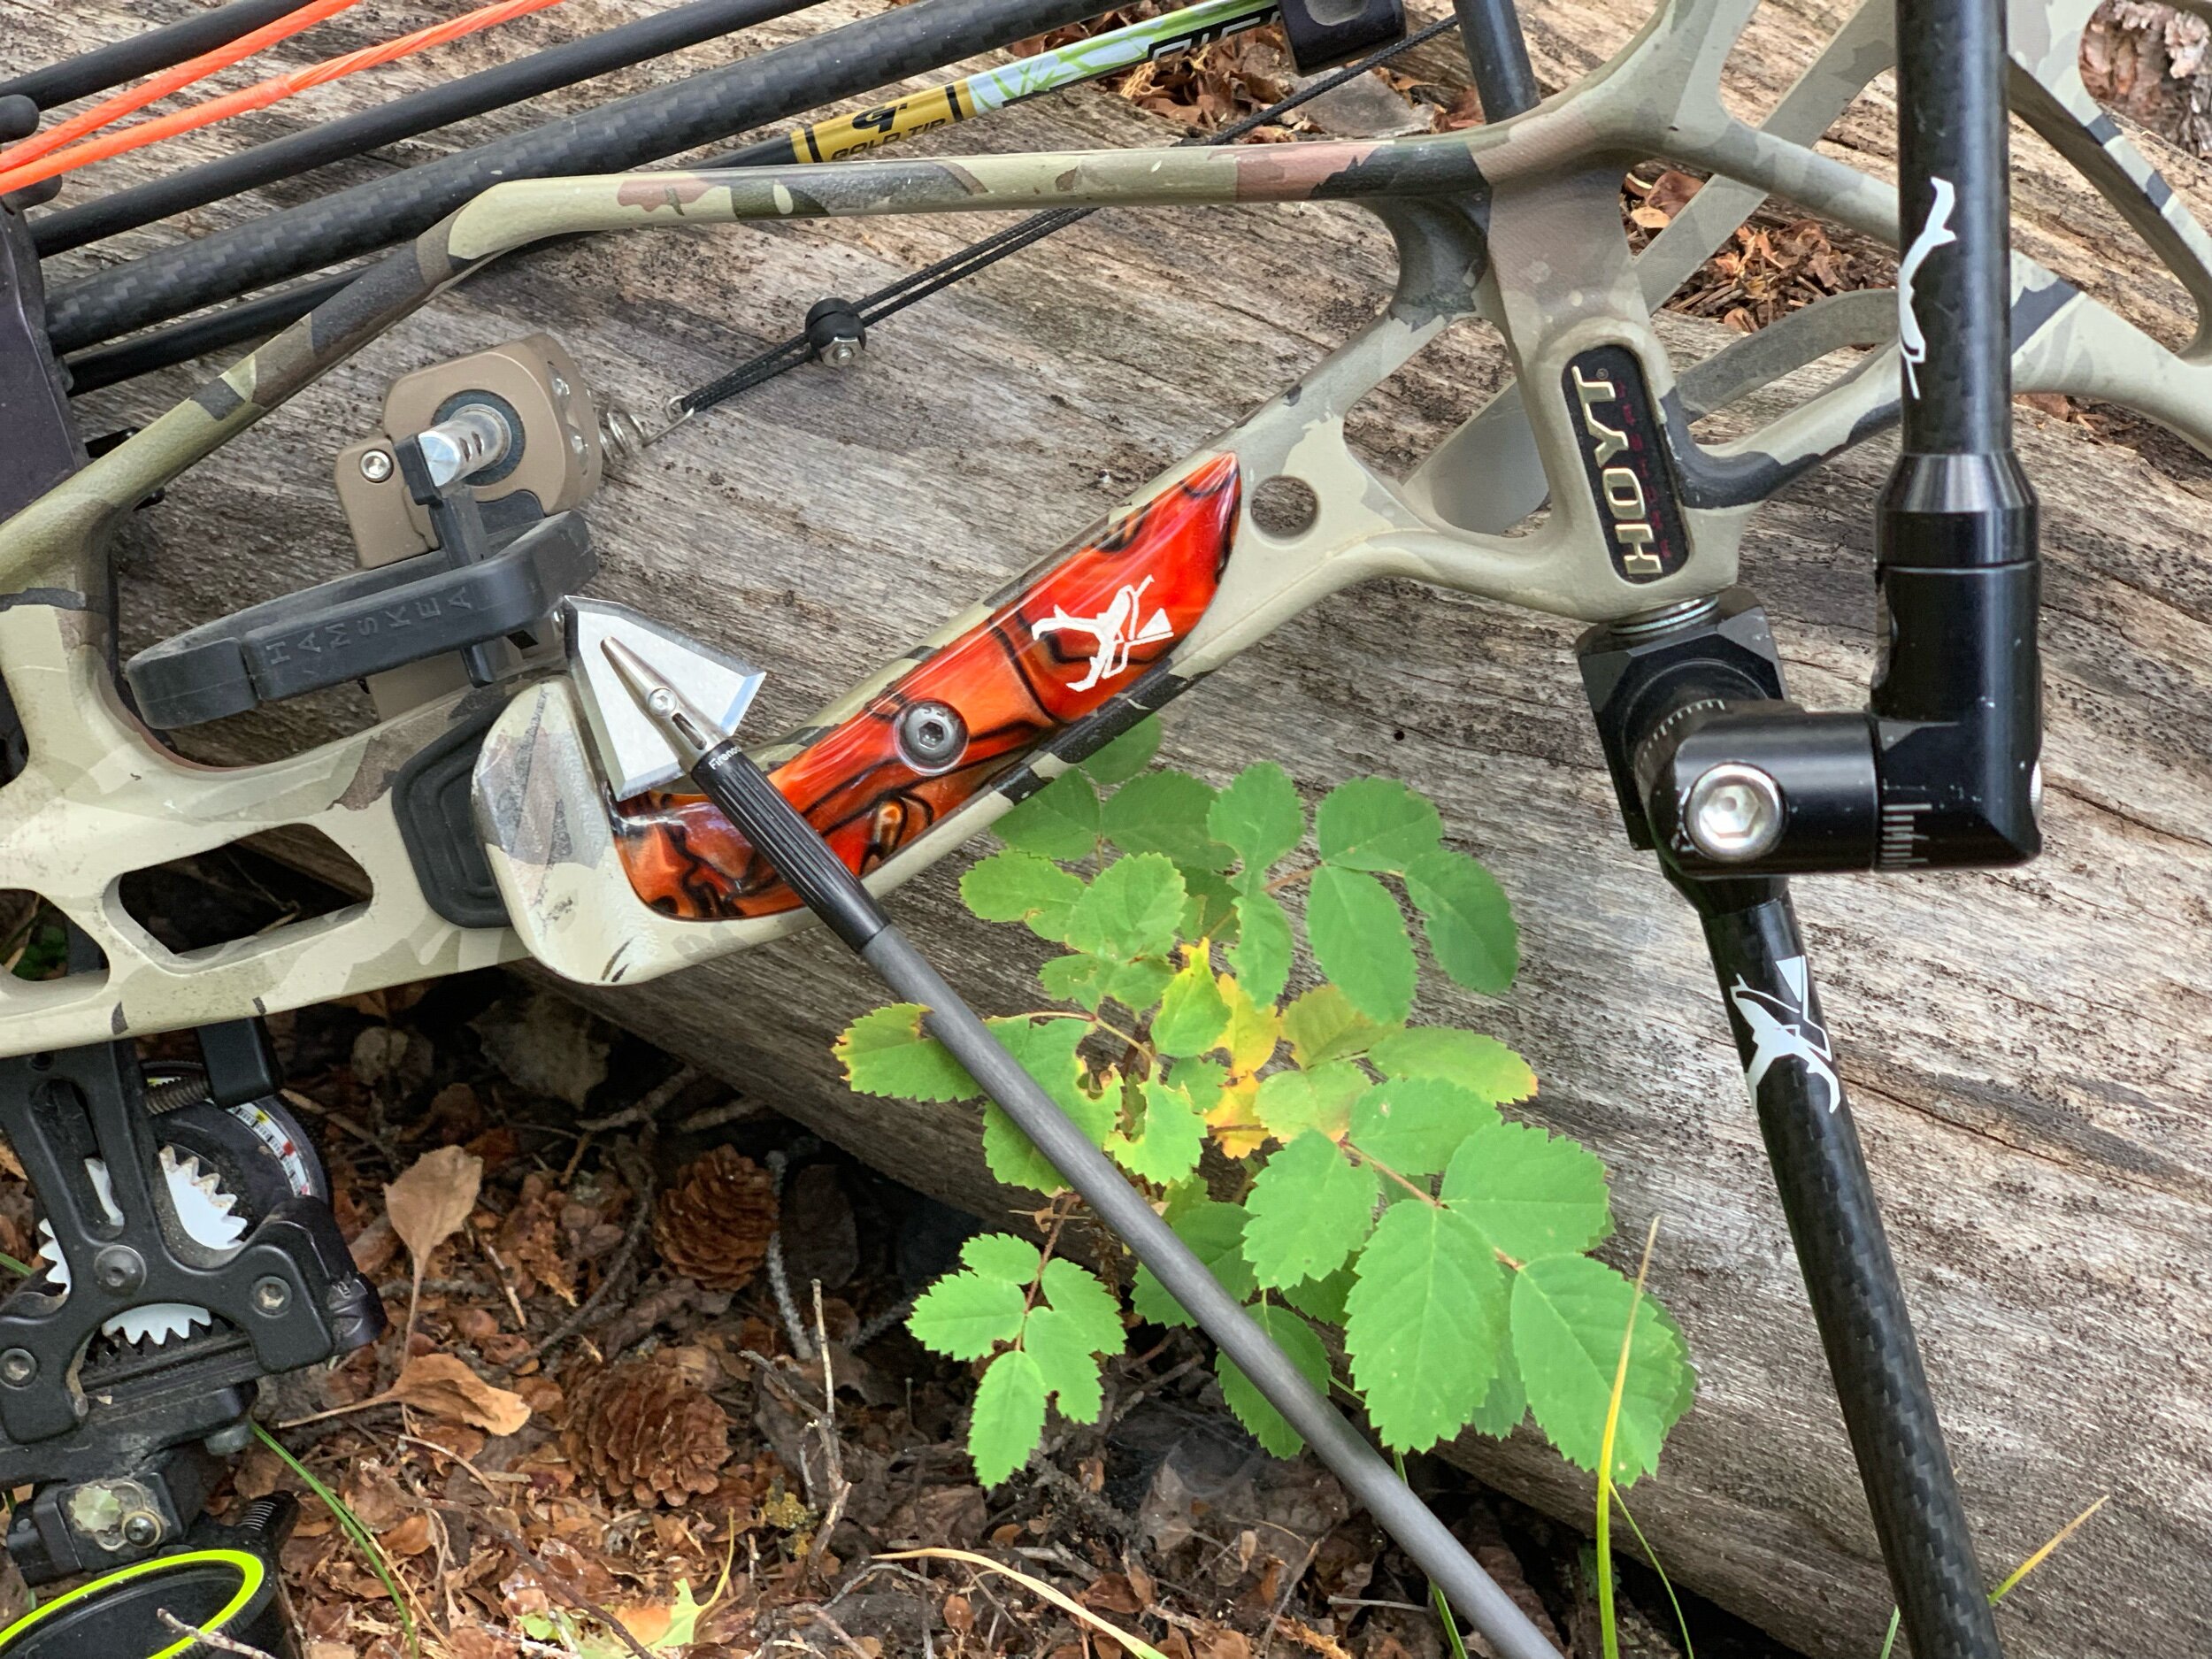
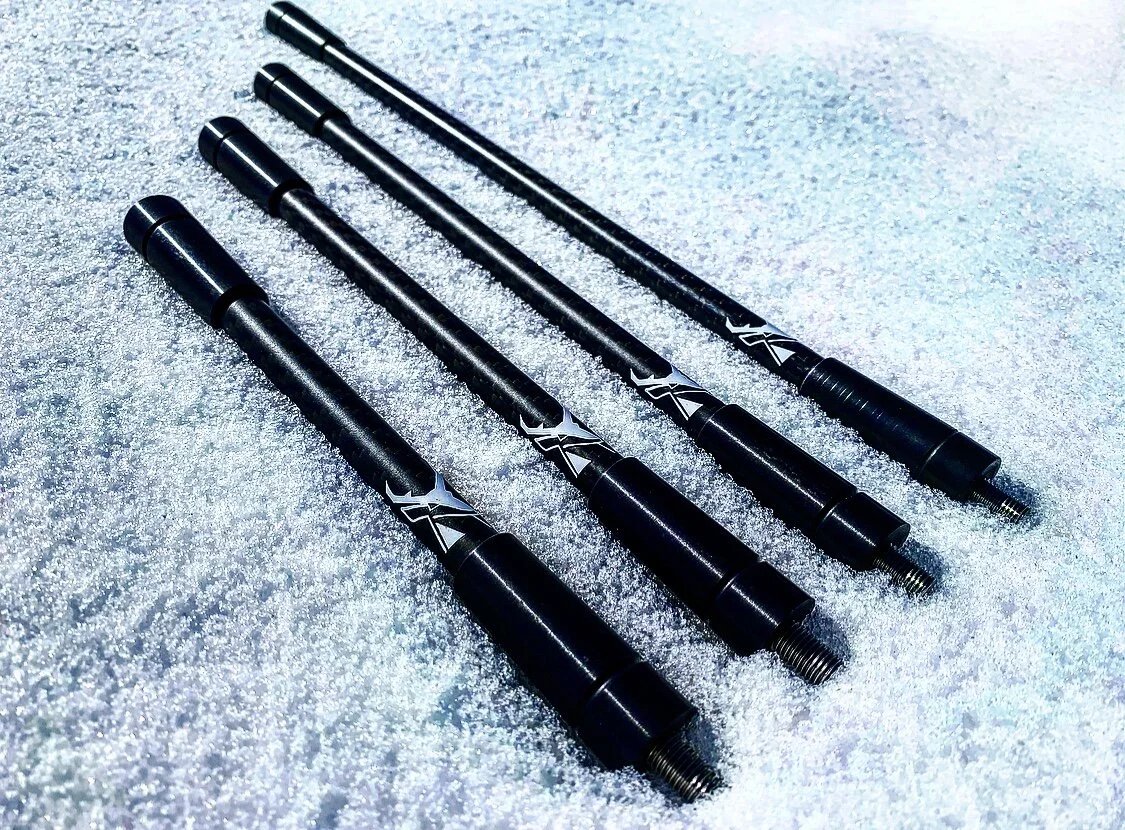
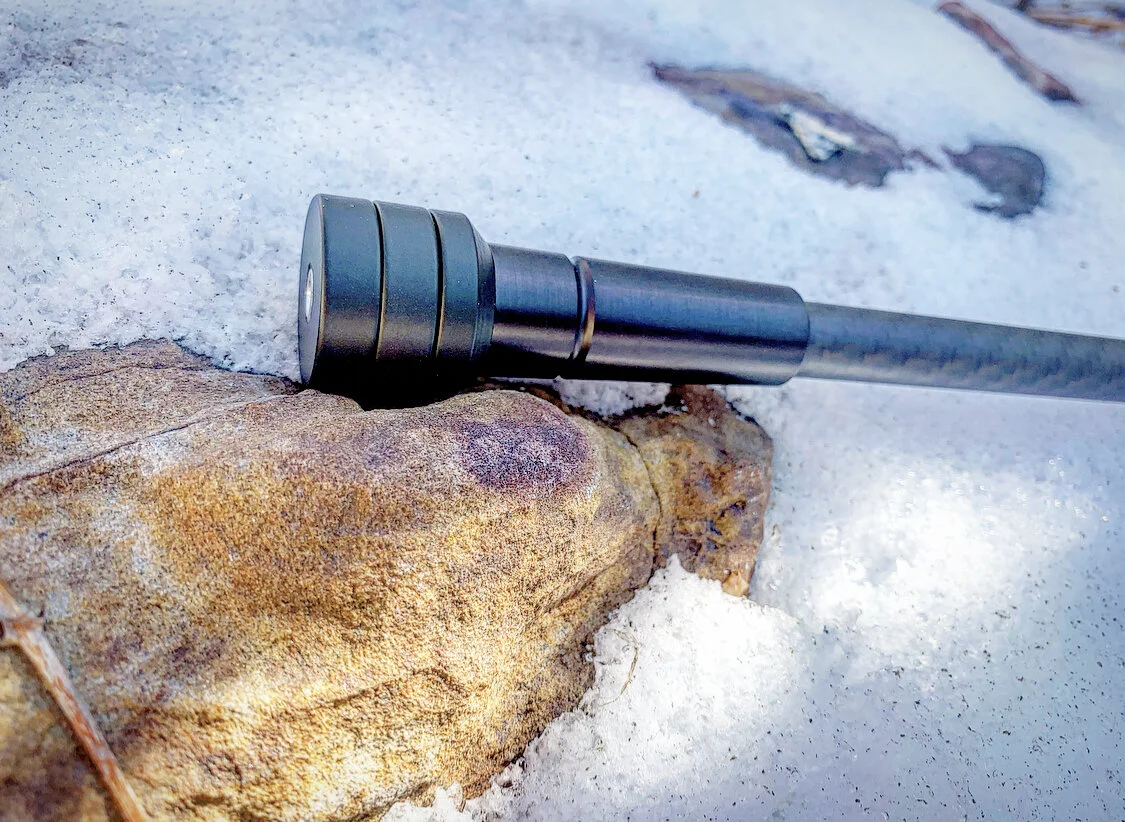
The foundation of our stabilizers is certainly the .497 OD carbon fiber tube. Thick walls and stiff construction, paired with an aesthetically pleasing weave come together to create an excellent platform to build on. 6061 aluminum is lightweight, and extremely strong when utilized properly. That part took a couple attempts, after hearing feedback from my “field team”, the necessary corrections were made to eliminate any chance of failure. These guys and gals were pushing themselves and their equipment to the absolute limit, I even heard a story of packing a bear up a mountain using their bow (stabilizer) as a walking stick! Talk about a tall hurdle to overcome, but we did it. These bars are over-engineered, and that is totally fine with me.

Adjustments.jpeg

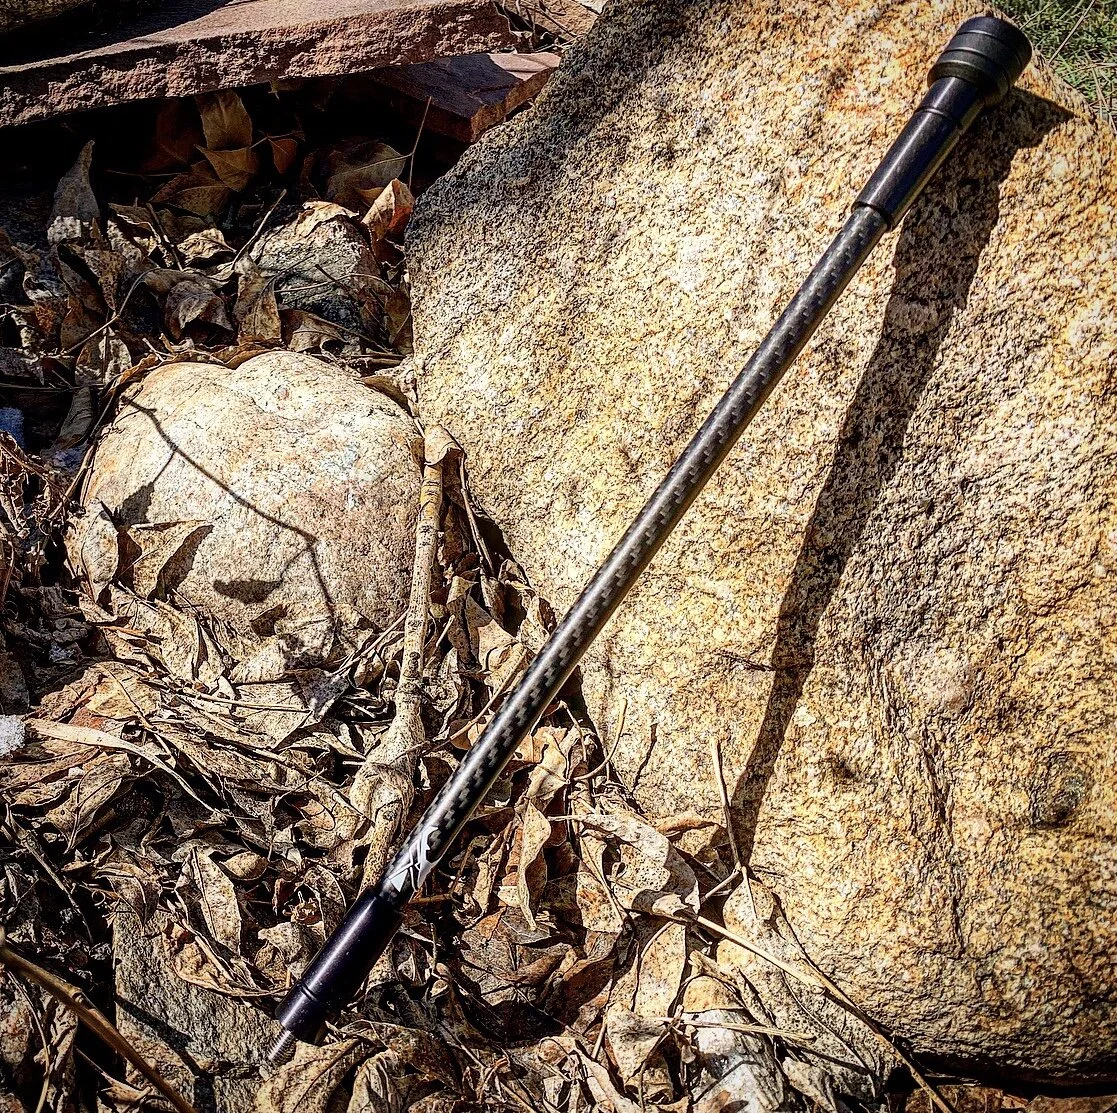
The finished product is designed to take a beating, a hard anodized finish in the aluminum components, a durable clear coating on the carbon, and stainless steel hardware all make for a bowhunting stabilizer that can withstand just about anything imaginable, even the adhesive used is rated to -30 degrees. So we had the stabilizer figured out, next was an external and modular weight system that upheld the same ideas. Believe me when I say, building a weight system to my required specifications was a tall order.

IMG_2605.jpeg

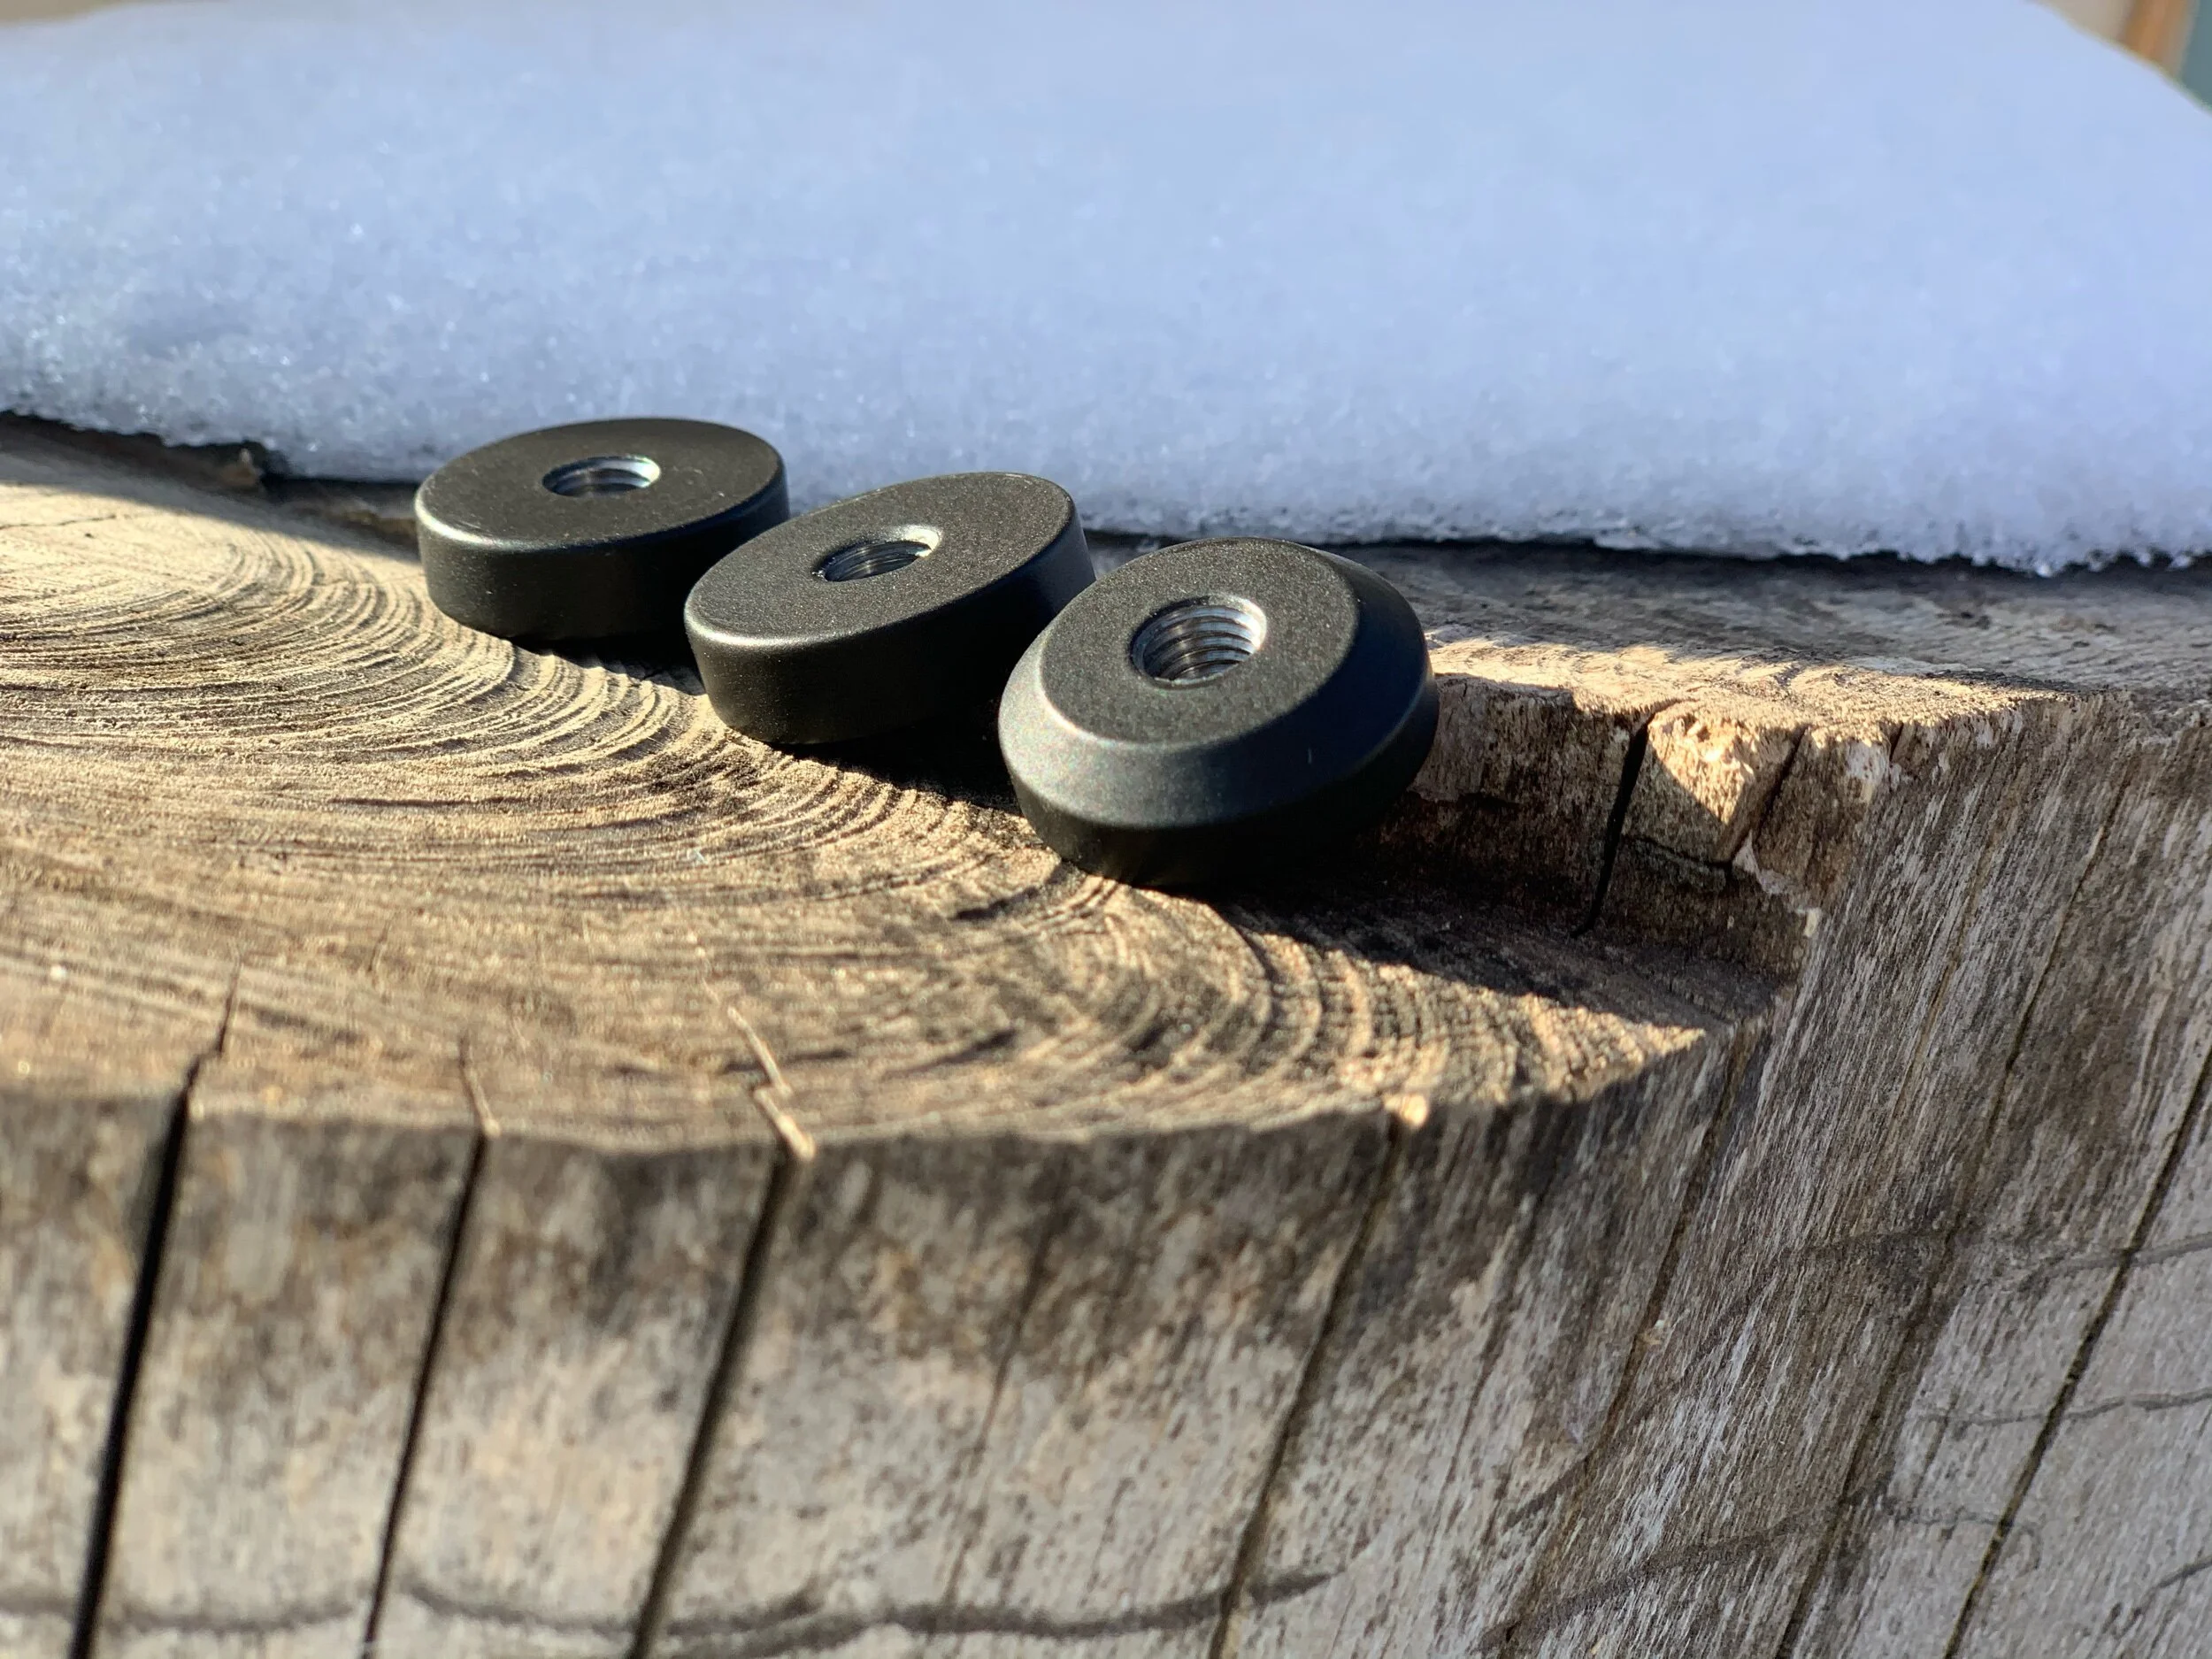
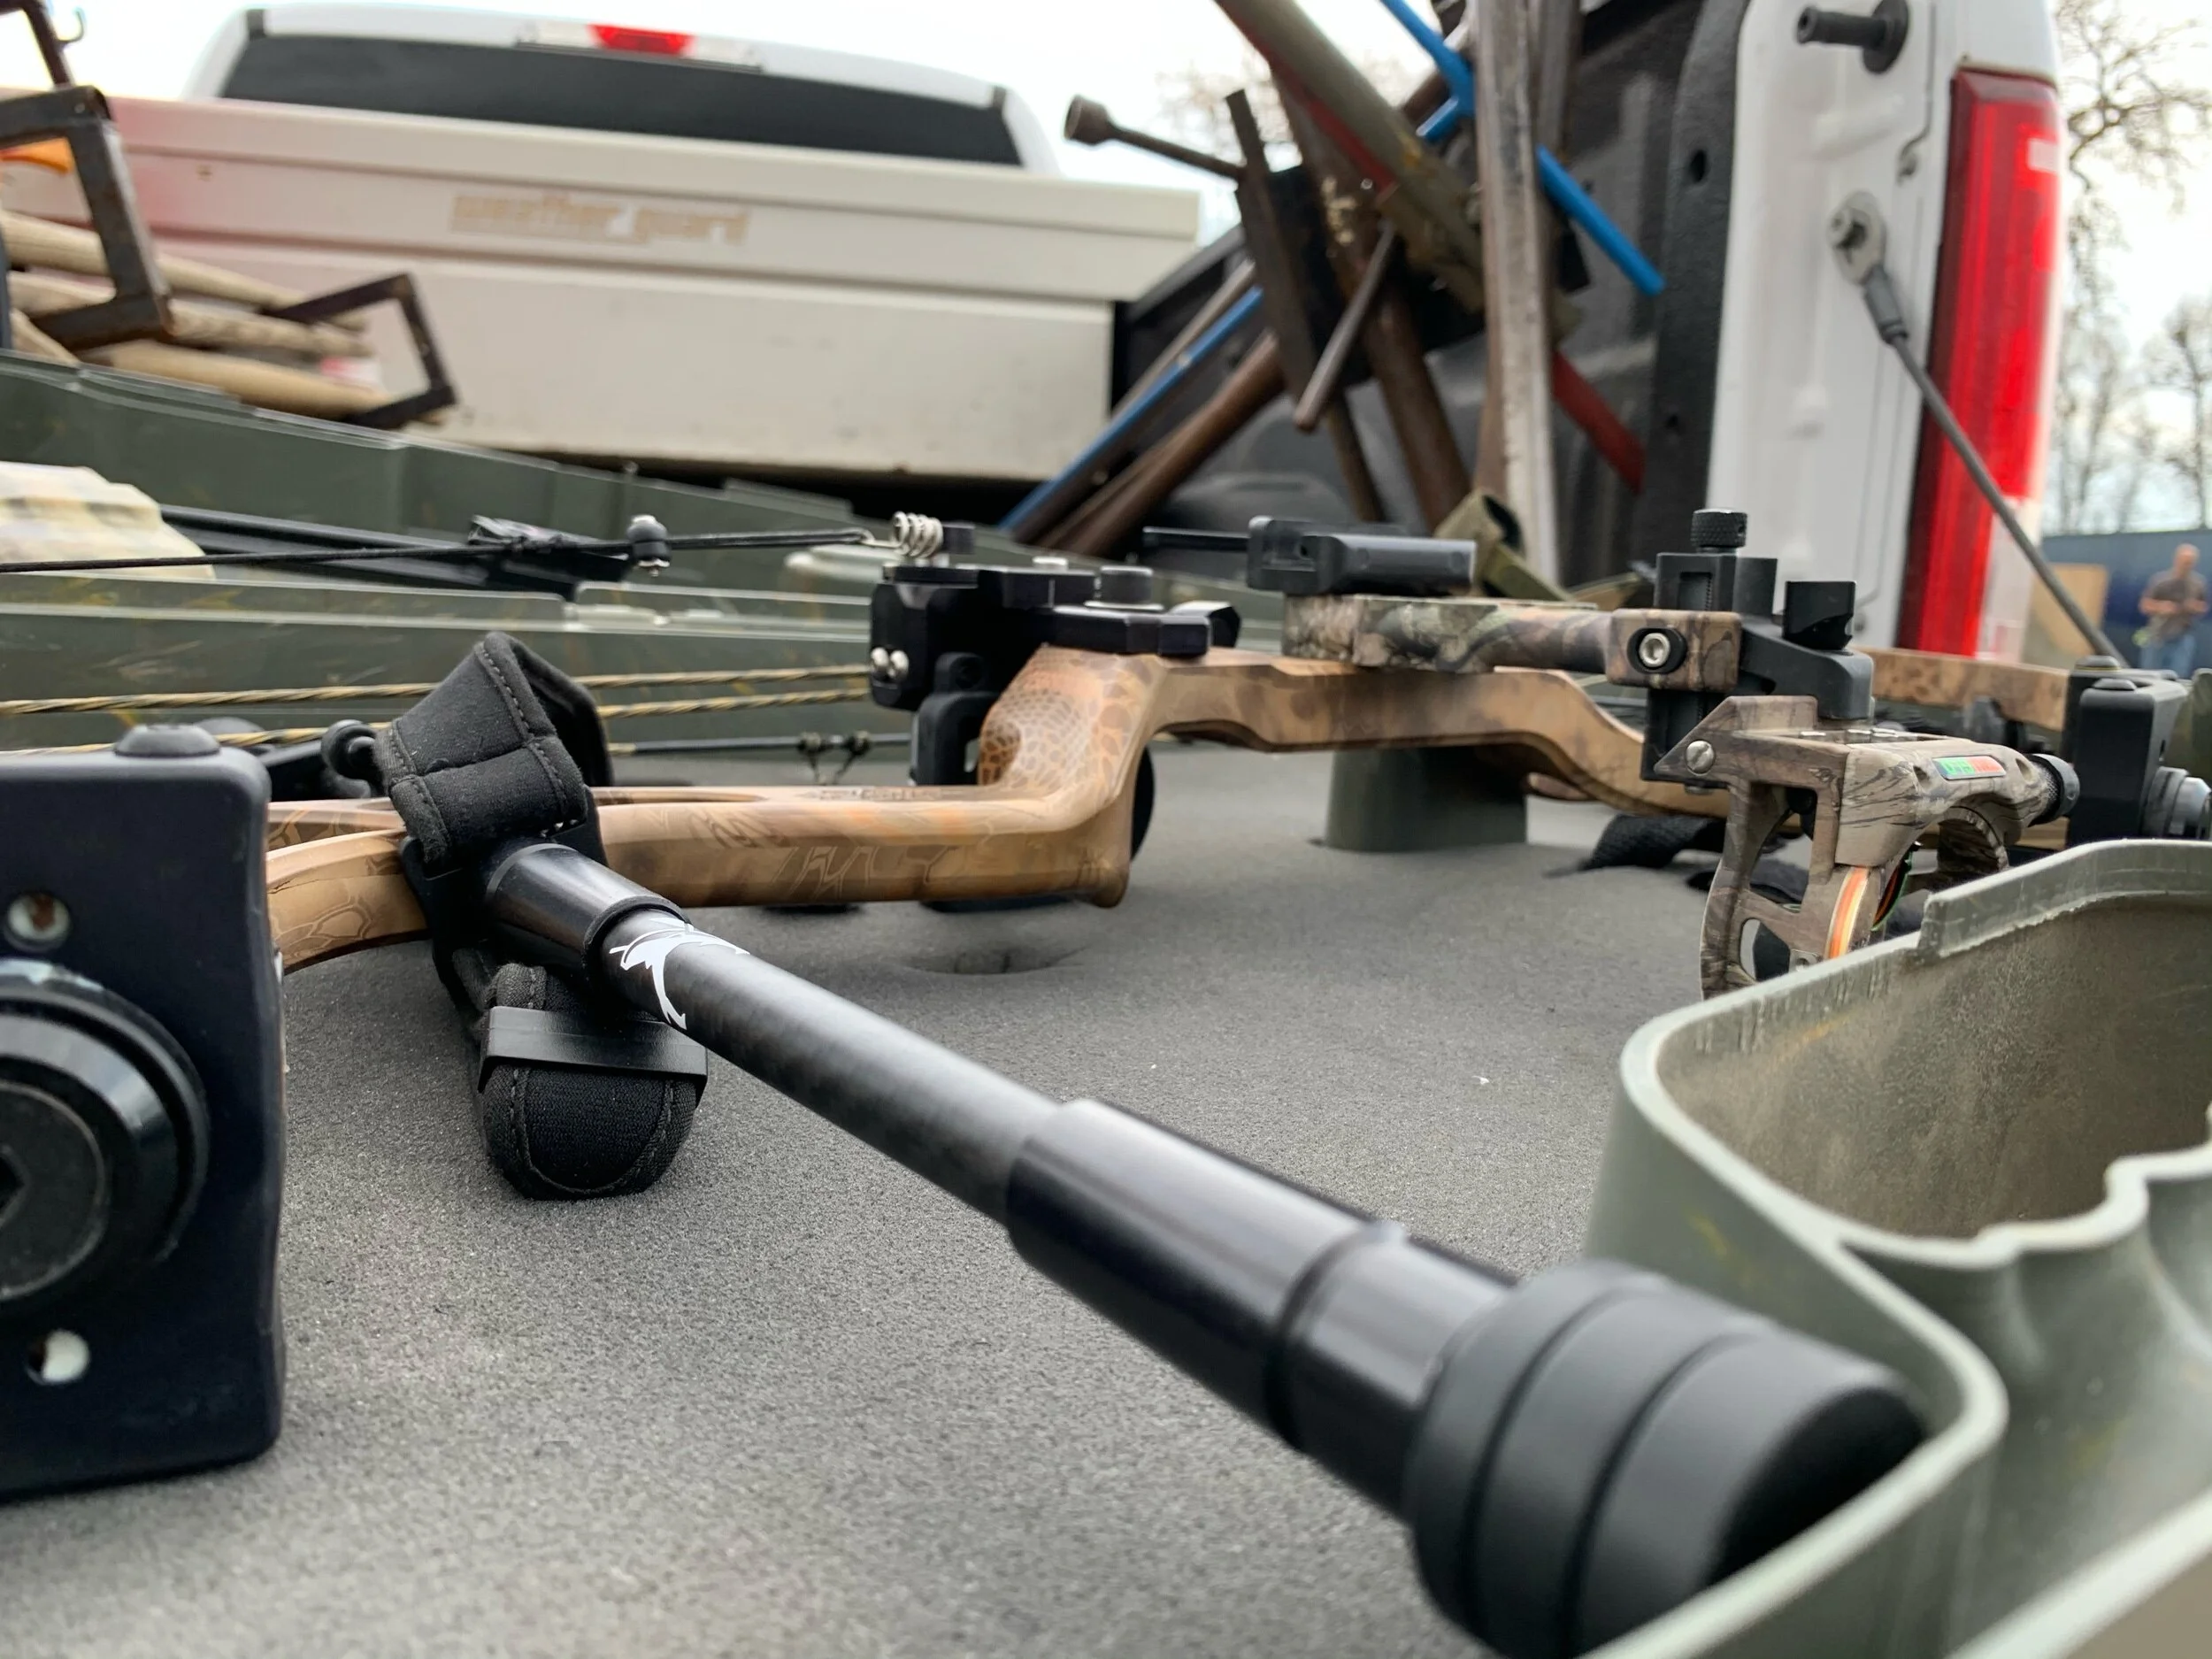
Since the day we created our first stabilizer, we knew that the smaller diameter of our carbon bars was a huge advantage. The aerodynamic profile resulted in prolific and noticeable improvements when shooting in windy conditions. Adding weight to the end of your stabilizer is one of the two main purposes of utilizing one, but we weren’t satisfied with putting our name on something we didn’t fully believe in. After a lot of time behind the computer design software, we figured it out. Using stainless steel, we were able to create a 1oz weight with a smaller overall diameter and a tapered rear weight to pair seamlessly with the end of our stabilizer resulted in a smaller side profile and increased performance in a crosswind. The finish of the weights was just as important to us, so not only did we powdercoat them, we decided to warranty that finish for life.

Adjustments.jpeg

The final challenge was probably the most difficult to sort out, and to me, the most important. Finding a way to manufacture, source materials, and build our stabilizers within the USA, all while still making some kind of profit proved difficult, but after a lot of phone calls, we did it. Keeping our production and materials local is something we are extremely proud of. Once you get your hands on one of our stabilizers, you will be proud to have it as part of your setup as well.

IMG_3077.jpeg

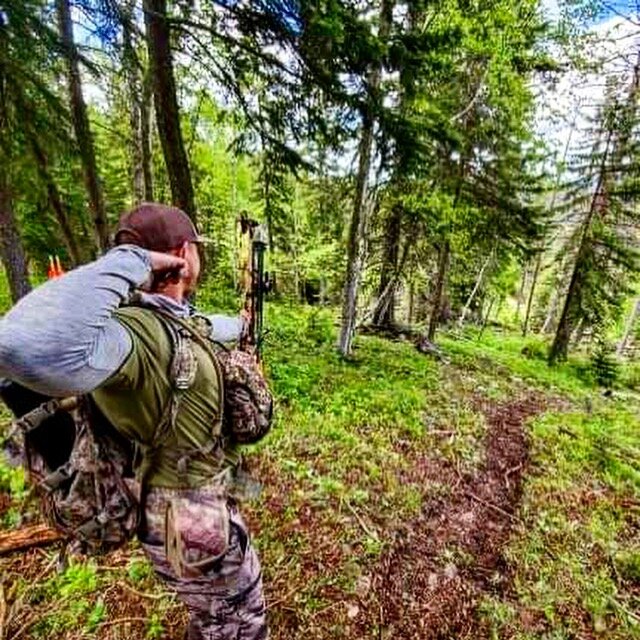
This is truly a passion project for us, bow stabilization is vastly misunderstood and underutilized. My goal with Cutter Stabilizers was to educate, while providing a superior product for bow hunters who want more from their setup without needing to be a technical genius. Time spent chasing game afield is the number one priority for us here at Cutter, and allowing our customers (and our team!) to do that without worrying about their gear is why we do what we do.

IMG_3465.jpeg

A Buck Amongst The Void

Adjustments.jpeg

The arrival of my 2019 archery season brought familiar feelings of excitement, anticipation, and joy as the sun rose on opening day. This year I had drawn a limited entry archery Pronghorn tag in a great unit, an archery mule deer tag, an OTC archery elk tag, and a NE archery either species deer tag. My schedule was full from mid August through late November. My pronghorn hunt provided multiple encounters, and even a few shot opportunities, but despite 16 days afield, I came home with an empty cooler. My mule deer tag was not a hunt I had budgeted much time for and with only a day and a half to hunt, it’s of little surprise that it also ended without success. Elk season was here, the last seven days of the season were mine to chase bugles in the wild, golden aspen sea of late September. After several vehicle problems, and next to no elk activity, the season came and went. Just like that, nearly 25 days of hunting had yielded nothing. One more hunt to go, this is the story of my first whitetail buck.

5909AB73-1871-460E-AB22-5C90CE96FE38.jpeg

The voyage East from the foothills of Colorado to the heartland of rural Nebraska is now an annual tradition that I hold sacred. This being the third year I’ve been hunting our Nebraska properties, I decided it was time to hold out for a buck, eight points or better. The five hour drive was filled with conversation amongst friends, a time when we can let go of all the stress and weight of daily life from work, and civilization. The bright reds and oranges of a Midwest sunset now echo into the golden corn fields and pour onto the asphalt in front of us. Arriving at the farm around 10pm, our stiff muscles relax as our feet hit the gravel in the yard. The deafening silence is broken by a familiar voice, my buddy’s father in law, Jerry, calls out to welcome us. After lugging our excessive amount of gear into the house, we sit on the couch, taco beef on the stove, a traditional meal that tells us we made it. Whitetail season is here.

The farm

The farm

The farm is 640 acres, made up of rolling hills, and a dry river bottom filled with massive cottonwoods and juniper thickets. Both mule deer and whitetails call it home. Most years the property is surrounded with corn or soybean fields and often a section of winter wheat right in the middle, a perfect place to grow big deer, right? Well, one small detail seems to hinder that idea. Throughout most of the year, up until late October the property is leased out to cattle grazing. For some reason, the deer and cattle do not get along. The game goes like this: October 1, we head out to set cameras, observe sign, and hang a couple stands. October 31, check cameras, and adapt or add stands in reaction to the new intel. The problem is, until the cattle are off the property our cameras often are devoid of any deer. Lucky for us, we have a second property without cattle.

The view in front of the “two man” stand at Turkey Creek

The view in front of the “two man” stand at Turkey Creek

Turkey creek is whitetail paradise, 100 acres of river bottom with CRP on each side. It has three established and proven stands in place all year, and any camera intel provided always harbors deer, often BIG deer! It is here that we focus our efforts until mid November. This year was no different, our first two trips out were focused on hunting Turkey Creek hard. I would sit in the “two man” stand. A 15 foot, two person ladder stand on the north end of the property. The stand faces north and is on the eastern edge of the river bottom, with CRP to the east and an old, overgrown road 10 yards to the west, right through the thick bottom. 50 yards in front of the stand is an active mineral lick and an often active scrape line, a deer highway through thick bedding area with feeding areas nearby. Plus with the additional space in the two person stand, it is very comfortable, often too comfortable as I find myself asleep frequently. Throughout the several trips, I had several encounters.
Whenever there is a northwest wind, this stand is perfect. The deer come through the thick bottom, hit the road, and walk right by the stand until continuing south to bedding. Several individual does, does with fawns, and a yearling buck all came by. One of the most memorable days I have ever experienced in the stand occurred on the second trip. A doe and fawn appeared out of the timber and wandered around the mineral lick. I stood, in the event there was a buck trailing them. As they made their way towards me, another three does came out of the thick stuff to the north, followed by eight more! Fawns, does, and one “excited” forky buck were literally right under my stand. The forky was practicing his rutting behavior until the unwilling doe would turn around and kick him. Two other does reared up on their hind legs and began kicking each other. Deer vocalization and behavior were on full display 15 feet below me. One doe even stopped to smell the ladder of my stand. Unfortunately no bucks showed up, so I was left with only a memorable morning in the stand.
That evening, after a midday lunch and nap, I returned to the stand. With little action, I was left to sit and absorb the silence, the sun now casting it’s rays parallel with the horizon and stretching the shadows into long and looming shapes in the timber. About an hour before sunset I saw a flash of brown in the timber in front of me. Getting to my feet and grabbing my bow, I was ready. An 8 point buck arrived on the road, hugging the edge of the trees, he passed in front of me at 21 yards. I hesitated to draw as there was no cover between the buck and I. As he passed behind a tree, I drew back. The buck turned and walked directly away from me for 15 yards, stopping at 30 to feed. Having been at full draw for over a minute I decided to let down and regroup. The buck continued walking, finally turning to the left and presenting a broadside shot. Approaching a tree I had ranged at 35 yards I let out a “MEH”, he didn’t stop, another one, “MEHH!”

The difficult shot I was presented with at 35 yards

The difficult shot I was presented with at 35 yards

He took another step and stopped. His vitals framed by a tree and an overhanging limb. I pulled through the shot and watched my nock illuminate a path right into the buck’s vitals. Having held low and watching the buck drop nearly half his body height, I knew the shot was lethal. He bounded away then stopped. I waited, listened, thought, recalled. Twenty minutes passed without a single sound. I climbed down from the stand and approached my arrow, upon arrival, I saw the buck, not 15 yards from where I had hit him! A feeling of uncontrollable joy flooded my body, and a sense of ease overcame my mind. I had provided a fast, ethical death to a beautiful deer who had tested my patience, stealth, and accuracy, a truly worthy adversary. After a prayer of gratitude and a clumsily taken photo, I drug the buck to the road and waited for my buddy Brandon to arrive. We would get the buck to the shed, hang him, and remove the guts. Two more days left to fill a doe tag and for Brandon to fill his tag passed without success. On the last afternoon we returned to process my buck before heading home.

The true look of joy when I found my buck

The true look of joy when I found my buck

A great trip is certainly a successful one by definition, and for me, the success of a first whitetail buck is a valiant one. But the season prior to this notched tag was still a success, not in the sense of a full freezer or antlers on the wall, but because of the challenges and pitfalls I overcame. Maintaining a positive attitude through a difficult hunt will be rewarded, maybe not now, maybe not the next hunt, but it will come together one way or another. The time we spend afield is never wasted, but should be cherished and interpreted as a lesson. Each day amongst the trees, each morning we get to watch the sun slowly illuminate the forest, each evening we are allowed to listen to the silence of the wild is the most profound gift we as hunters can receive, and whether or not your tag gets punched is merely a bonus.

My first whitetail buck

My first whitetail buck

Spot And Stalk Fly Fishing

Adjustments.jpeg

Dark timber, lush green grass, down trees stacked upon each other creating an obstacle course to traverse. A gentle, crystal clear stream winds and turns through the forest floor. A mere six feet across in the wide spots, this petite waterway has carved itself into the contours and wrinkles in this coniferous landscape. Approaching the edge to peer into the translucent water results in several small, dark, lightning fast shapes darting into the shadowy pockets of the creek. It is here, at 10,000 feet that you can wet a line in pursuit of some of the most beautiful brook trout in the west.

A typical brookie. This one was a little chunk!

A typical brookie. This one was a little chunk!

Nearly anywhere in the mountains you can find these small flowing gems, ready to accept any challengers equipped to test their patience and stealth. Brook trout in small streams can grow to sizes that may surprise you, in some cases a 12” fish isn’t unheard of, even in creeks that are less than five feet across. The tactics and gear required are very unique in comparison to most other stream fishing pursuits. More often than not, these streams are a fair hike from the road, at least the best ones are! It is for this reason that a traditional length fly rod is not practical. The ideal rod is packable, 3-4 pieces, 2-3 weight, and 6-7 feet in length. Since the stream is so small and often the brush is so tight, fly casting is likely not even possible. The shorter, more maneuverable rod will come in handy. As for a leader, a 5-8x tippet is required. The water is generally extremely clear, so making a subtle presentation is important. Fly selection is pretty simple, living in these small streams, the fish aren’t very picky. If it lands in the water and it fits in their mouth, they eat it! I love fishing dry flies simply for the fact that watching these little trout take a fly off the surface is so pretty dang special! My all-time favorite is a hi vis parachute Adams in a size 18-20. The pink hackle is great to keep an eye on during longer drifts and through thick brush (we’ll speak on that later). Other good flies are the elk hair caddis, and any mosquito imitations. Small flies are the ticket here (18-22), as these fish usually aren’t larger than 8-9” on a good day. Always crimp your hook barbs in case you want to practice catch and release, as these fish are fragile. Try to minimize time out of the water, but don’t be surprised if a brookie flops out of your hands onto the forest floor. For that reason, try to keep them in the water.

The “ninja” rod. A 6’6” 4 piece 2 weight. I hand built this rod from a blank.

The “ninja” rod. A 6’6” 4 piece 2 weight. I hand built this rod from a blank.

When it comes to hooking one of these beautiful little fish, some of the same tactics we use in stalking big game apply. Remaining out of sight is crucial, as is being quiet when approaching the stream edge. When you have the chance to stand back, away from the bank, do so and let your fly rod tip barely reach the water’s edge. Kneeling or sitting down next to a tree often works, as does standing next to or behind a tree.

A few sneaky tactics to avoid spooking the wary little trout.

A few sneaky tactics to avoid spooking the wary little trout.

Traditional casting techniques can be used when the terrain and surrounding vegetation allow, but often the roll cast, and even more often, the slingshot cast are the most productive. Slingshot casting is simple, let out about a foot more line than your rod is long, grab onto the line and pull back until a gentle bend in the rod is achieved, use the direction of the rod to aim, then let go! The result is a gentle roll of the line into a precise location. Be sure not to let out too much line before you launch, as you don’t want the fly to go shooting into the back of your arm. Ask me how I know.

The “slingshot” cast.

The “slingshot” cast.

When no cast is possible in the thickest of timber, use your rod to slip in through the trees or bushes and dangle your fly onto the water’s surface, utilize whatever room you have to follow the current. It often doesn’t take long for the fish to grab your fly if the presentation is adequate. In such small streams, these fish need to be “go-getters” if they are to grow and survive.

A few rare spots to employ a traditional fly cast. The small riffles require precise fly placement.

A few rare spots to employ a traditional fly cast. The small riffles require precise fly placement.

Adjustments.jpeg

Whether it be to take a break from a frustrating day of hunting, to procure a fresh meal, or to simply enjoy the mountains in a new way, small stream fly fishing is amazing. The challenge of precise casting and wary fish captivates the mind and sharpens the focus of any outdoorsman. No matter if the fish are small, they fight hard, and on light tackle are just as fun as any other fish, not to mention, they are beautifully colored and earn every meal they eat, much like us hunters.

Adjustments.jpeg

Where The Rubber Meets The Trail

Adjustments.jpeg

Spring has sprung, the snow of the high country has begun to melt, and your aggressive tag strategy has paid off. Successfully drawing three tags in three different units, none of which you have ever set foot in, it hits you. Off-season scouting is crucial to success come hunting season, but what is the most efficient way to approach it? In this article we will discuss some tactics to scout new areas for elk, deer, and antelope.

Early morning glassing is crucial in finding any game that may be using the area in question.

Early morning glassing is crucial in finding any game that may be using the area in question.

On a macro level, there are certain strategies that pay dividends no matter the species you are pursuing. E-scouting is a solid approach to take before you apply for a tag, and also can be implemented in conjunction with in-person trips. No matter the species, a good rule to remember is that game animals need three things: food, water, and cover. These vary depending on which you are chasing, but the principle rings true nonetheless. For mountain ungulates, particularly elk, look for heavily timbered, north faces with topo lines that are close together in close proximity to flat benches with emerald green vegetation. Google Earth is great for this since it allows the user to select the time of year the photo was taken (desktop only). For Mule deer during early archery, look for south facing alpine bowls above tree line with patches of timber and nearby cover. Antelope e-scouting is essentially locating road access and water sources.

This large canyon had a small creek running down trough the bottom, lots of green grass, and dark timber and rock outcropping. No wonder we found mule deer here!

This large canyon had a small creek running down trough the bottom, lots of green grass, and dark timber and rock outcropping. No wonder we found mule deer here!

Once the time comes to head out into the unit for the first time, I like to break it down into three initial trips. The first trip will be purely exploratory, so pack light and prepare to log some big miles. It seems to always be the case that Google Earth makes things appear much smaller than they are, so that alpine bowl that you can “get to in an hour or so” often becomes an all day affair. Not only will you need to inspect your online spots, but also become familiar with water sources for camp water, predominant wind direction, glassing points, and access. The second trip will be solely to locate animals, sign, and potential honey holes. For this reason, you need to be at the glassing point you feel most confident in at first and last light, the middle of the day can be spent looking for sign, and trails. A good rule is to give a spot two mornings and two evenings of real, hard, productive glassing before ruling it out. The third trip is to expand your knowledge on the animals you located on the previous trip. Establishing a pattern for a particular buck, bull, or group of cows or does is important to closing the deal come season. Any additional trips are to increase your familiarity with a particular animal even further. The more time you can spend watching and getting to know a specific animal, the better your chances are of finding an opportunity to catch them in a vulnerable position.

Rubs and sign from previous year’s rut activity often means you’ve found a good spot come September.

Rubs and sign from previous year’s rut activity often means you’ve found a good spot come September.

Elk are particularly difficult to scout for because the bulls are never with the cows in the summer or early fall. Often staying in the alpine until the rut begins, these bachelor herds of bulls can be difficult to pattern. The cows are often lower in elevation, typically between 8000-10000 feet here in Colorado and will remain there until winter pushes them down.

Open pockets amongst dark timber are a great place to find elk sign.

Open pockets amongst dark timber are a great place to find elk sign.

Locating old wallows, rubs, and other rut sign from previous years is a good plan to learn where the bulls may be once the rut begins as elk typically rut in the same locations. Depending on your local regulations and laws, trail cameras are a great tool to learn where elk are in the early season. Wallows, well used trails, and natural geographic funnels are all great places to start.

The high alpine is sure to take your breath away, in more ways than one!

The high alpine is sure to take your breath away, in more ways than one!

The high country mule deer bucks call home in the early season is some of the beautiful terrain in the west. Their delicate, velvet covered antlers need to be protected, which is why they stay out of the thick timber until they become hard-horned in mid September. Lime green basins with a south facing slope are great places to start. Find a good vantage point to glass from and look at pockets of timber on nearby north facing slopes. Whatever you do, DO NOT camp in the basin you plan to hunt or scout. Try to stay out of the wide open as often as you can.

We sat out a rainstorm in this cave, a mule deer bed was also under the ledge.

We sat out a rainstorm in this cave, a mule deer bed was also under the ledge.

Also look for ridge tops and benches that could provide the buck with an easy escape route. Look for beds at the bases of cliffs, boulders, and other rock outcroppings. Deer love to bed facing downhill with something to their uphill side, so keep that in mind as you glass later into the morning.

Driving through antelope country typically involves lots of wire cattle fences.

Driving through antelope country typically involves lots of wire cattle fences.

Antelope scouting is typically the lowest on my priority list and can often be thoroughly completed with a single day trip. Learning the road system and layout of the terrain is generally pretty straightforward and locating a few groups of goats should not take too long. Antelope tend to travel within a five to six mile loop most often so if you find a herd, they will likely be around the area until pushed out. A large part of antelope hunting is driving, and it is pretty common to cover 100-200 miles in a day of hunting, so you’ll have plenty of time to scout even when the season is open. If you choose to hunt from a ground blind near a water hole, look for one that is at least 3/4-1 mile from any roads, farther is better as other hunters will not be as eager to hike in that far to set up or sit in a blind. Locating good vantage points in the flat, seemingly desolate prairie antelope call home can often feel impossible, but there are usually a few, and when you find them, utilize the view as long as required to glass. Sitting on top of a hill and using the roof of your vehicle as a perch is another viable option to elevate your position. Antelope dislike the wind just as much as we do, so locating some broken terrain out of view of the road is a great place to find bedded goats midday.

Utilizing a high point in open country is a sure way to cover country with your eyes.

Utilizing a high point in open country is a sure way to cover country with your eyes.

The season always seems to fly by just as it arrives, so maximizing your knowledge of the area you plan to hunt will exponentially increase your odds of success. By putting in the time to learn the unit, pattern and locate the game, you will be able to utilize your hunting time more effectively trying to build a plan. The country these animals call home is some of the most awe inspiring terrain in the world, and frankly it is a gift to be able to immerse ourselves in it whenever possible.

A World Of Options

IMG_2934.jpeg

The realm of hunting and archery gear is vast and often overwhelming. When choosing equipment, the factors of functionality, personal preference, and application all should be considered. Unfortunately, most hunting gear cannot be tested and returned if it fails to meet your standards, and purchasing and selling used gear will turn your wallet upside down in a hurry. In this article I will try to provide a look into my personal gear choices and the reasoning behind each choice, hopefully helping the reader in selecting gear that will work for them. There are so many subcategories of gear that this article may run a little long, but I would like to cover as much as possible without diving in too deep.

My lightweight, high mobility western kit

My lightweight, high mobility western kit

My high warmth, quiet fabric whitetail kit

My high warmth, quiet fabric whitetail kit

A clothing system is often the most subjective gear category as the application largely dictates the pieces within the system. My application is mainly comprised of early to mid season western mountain hunting with some mid season whitetail hunting at the tail end. Camo pattern is the first choice that needs to be made, and actually is not as important and one might think, so choosing a pattern you feel confident in is about all that matters. I use Under Armour Barren and Forest pattern for all of my hunts. The number of close encounters that I’ve had where animals were unaware of my presence is enough to provide the confidence I desire. For my early season antelope hunts I predominantly wear the Raider pants and the Early Season Threadborne hooded top. The flexibility and breathability provide comfort and moisture wicking that makes hot weather hunts more enjoyable. For high country archery hunts in early September into mid September the Raider pants remain in my kit, however I layer with the Midseason Wool reversible top and bottom base layers. For my outer layer I utilize either the Under Armour 2 in 1 Primaloft convertible jacket or the Gore Tex Pro shell. For socks I like the Smart Wool hunter, and the Under Armour All Season Wool and they remain the same throughout all early season hunts. Footwear is often something that changes depending on the hunt I am going on, Pronghorn I use a goretex lightweight Under Armour tactical boot, high country I use either the Salomon ultra mid gtx, or the Salomon X ALP MTN GTX. The ultra mid is flexible and lightweight, yet provides adequate support while remaining waterproof. The X ALP MTN GTX is a much stiffer mountaineering style boot with better support and a more purpose built chassis for navigating more rugged terrain. On any western mountain hunt, I am always wearing gaiters. It’s hard to explain how amazing a good pair of gaiters are until you have a good pair. I choose the UA Ridge Reaper gaiters, they are waterproof, stay in place, and fit snugly thus not rubbing together causing excess noise.
Once midsession whitetail comes around, everything changes. My base layer remains the same, however I then switch to the Under Armour Timber Pants and Midseason Hooded mid layer. My 2 in 1 jacket is a good insulation layer to run under a UA Forest pattern pull over hoody. I then switch socks to the Smart Wool Ultra Heavy Wool over the calf, and Cabelas 1200g Thinsulate rubber boots. I utilize a Hot Hands Hand muff in exchange for my Under Armour Early Season gloves. I’ll also use a UA late season Primaloft beanie and neck gaiter. Changing out certain articles of clothing for others allows for a versatile system that can be layered for a wide variety of conditions.

597E83C5-1AB5-4EA7-B034-2038EE82479C.jpeg

A bow setup is not something that can be chosen off the preferences of someone else, however there are characteristics that can carry over across all brands and models. I shoot a Hoyt bow because they are typically easy to tune and the carbon risers are great for colder conditions because they retain more warmth to the touch. They are also one of the few manufacturers that offer 80 pound limbs and with a short draw, (27.5”) and the desire to shoot a heavier arrow, the added speed helps. In my opinion, a bow with yokes is my preference for tuning because they are often easier to micro tune than a bow with cam shims. The sight and rest I have chosen have been decided through years of testing and watching lesser components fail. For a rest, I choose the Hamskea Hybrid Hunter Pro. It uses a sealed ball bearing for movement, is easy to set up and tune, and provides the accuracy and durability I desire. For a sight, I have settled on the Spot Hogg Fast Eddie Double Pin. It is a heavy sight, but the durability is unmatched by anything else out there. Last season I took a tumble down a steep mountain, falling directly on top of my sight, and unlike my pride, the sight was not harmed. The double pin provides an extremely clean and uncrowded sight picture while allowing for a functional and useable pin configuration for most hunting applications. My stabilizer setup is of course, made by Cutter Stabilizers. Up front I run a 12” Altitude Pro and out back I run the 10” Utility Pro. The micro diameter carbon rod paired with full internal vibration dampening and machined aluminum components make for the best hunting bow stabilizer out there. I also utilize a Bee Stinger Elite offset bracket. My quiver of choice is a Tight Spot 5 arrow. The adjustability, light weight, and lack of added vibration make the hefty price tag worth while. Arrow selection is one of the most debated conversations out there, but for my personal choices, yes CHOICES, I have settled on what I have found to work best for my setup and what has proved the most accurate and durable. My main arrow of choice is a Gold Tip Pierce, the micro diameter flies well in the wind and penetrates well behind a quality broadhead, which we will get into later. My second arrow of choice is an Easton Axis Match Grade. The 5mm diameter allows for a more stout connection point for front end components, which is why it is my elk arrow of choice. For both arrow systems I utilize an Ironwill impact collar, they improve arrow durability and provide impact protection for both 3D and hunting applications. On the Gold Tip arrows, I substitute the factory front end components for a Firenock Aero Outsert. The precision machining and quality provide perfect concentricity and allow for much better arrow tuning and broadhead flight. I utilize two broadheads throughout my hunting season, for a mechanical head (antelope and whitetail) I choose the G5 Deadmeat, they fly great at long range, and do not take a ton of kinetic energy to deploy. For a fixed blade (Elk and Mule Deer) I choose the Ironwill S125. They are by far the sharpest, most durable, and best flying broadhead I have ever shot. Two seasons ago I had one CUT through an elk rib and shoulder blade from 42 yards. Often bones will shatter or crack, however this broadhead sliced through the bone, providing a short, easy to follow blood trail.

My Ironwill S125 after passing through and elk rib and shoulder blade, still able to shave hair.

My Ironwill S125 after passing through and elk rib and shoulder blade, still able to shave hair.

Both arrows are fletched with Vanetec Super Spine vanes in a 4 fletch configuration. For mechanical heads and 3D applications I have found great flight with the 1.8” length, for fixed blades, the 2.3” are the winner for me. This year I have been testing the 3” vanes in a 3 fletch and have been pleased with the results. Release aids are one of my favorite pieces of gear to tinker and experiment with, however through my testing I have settled in on a few winners. For spring and summer training, I shoot a hinge in the Tru Ball Fulcrum Flex Quicksilver. It has a ton of adjustability, and fits my hand well. When hunting season comes around I switch over to a Scott Pursuit thumb trigger release. The trigger is heavy enough to achieve a good back tension release and it can also be attached to a wrist strap for hunting.

A sturdy tripod is a great way to exponentially improve your optic system.

A sturdy tripod is a great way to exponentially improve your optic system.

Optics are a great piece of gear to spend some good money on. High quality glass will make you much more effective in glassing. Brands are pretty subjective, but a good rule of thumb is that you truly get what you pay for. I have chosen to run Vortex glass for most every optic in my system. My binoculars are the Razor HD 10x42s, the quality is great for the under $1200 price point and for me, they fit my needs. They live inside a Badlands Bino XD harness, which also carries my rangefinder and a small assortment of survival gear. The Ranger 1800 rangefinder has great range acquisition speed, and is accurate, while having good battery life and waterproof construction. My spotting scope is one of the few optics that I have from another manufacturer, that being Alpen, a company no longer in business. It cost me all of $110 through a pro deal and at that price point and with my frequency of use, it is perfect, all with glass quality that competes with optics up to the $500 price point. Unfortunately with them going out of business, their warranty no longer exists, so the shopping is back on for a new spotter. This past season I also purchased a pair of 15x56 Vulture HD binos and I am now a believer in 15 power binoculars being far more effective for long range glassing that a spotting scope. However at $500, the glass quality left something to be desired. The Khaibab 18x56 will be my go-to “big glass for this coming season. The optic quality and low light clarity are exceptional for the price point. For western hunting applications when glassing for hours at a time is often the best way to turn up game, a sturdy tripod is a vital piece of gear. Running a quality pair of 10 power binos off a tripod is sometimes better than a spotting scope. I run two different tripods for two different applications. For the backcountry, I choose the Vanguard VEO 2GO 204CB. It is a carbon tripod with an integrated ball head that weighs in at 1.5lbs and is built incredibly well. This tripod is also very easy and fast to set up, which is why I leave my iPhone mounted on it when still hunting, in the instance that a shot opportunity presents itself. For applications such as pronghorn or open country hunting where the wind is typically howling and I often find myself glassing while standing, I choose the Vanguard ESPOD CX203AP. With a weight around 2.25 pounds, it is still sturdy enough to be steady in strong winds along with being a taller tripod.

IMG_2718.jpeg

Camping/backpacking gear is obviously only needed if you plan on hunting from a remote camp away from your vehicle, which I do for the majority of my mule deer season. Regardless if you choose to take on the backcountry or not, a quality pack is a necessity for western hunting. I have chosen to go with the Eberlestock Little Big Top paired with the F1 Mainframe. The bag can be ran with or without the frame and carries weight up to 60 pounds comfortably. Once the frame is attached, loads over 100 pounds are very manageable. With an empty weight of nearly nine pounds, there is a little to be desired, but the load carrying capabilities make it worth every ounce. The Little Big Top is a bit large for simple day hunts, so for this season I decided to test out the Slumberjack Hone daypack. It offers a lot of organization pockets, a lightweight internal frame and can carry around 50 pounds without issue. Field use is still to be decided since summer scouting season has not yet arrived, but I am optimistic on that pack’s capabilities. For a sleep and shelter system I have two main kits, for overnight and quick trips I found a non-freestanding tent made by Andake and sold on Amazon. It weighs 1.2 lbs and is built well. Paired with a Tyvek ground cloth, the durability is adequate for mountain hunting applications. For multi day trips including hunts with potential foul weather, I choose a Kelty Grand Mesa 2 person. The additional space allows room to relax if I find myself confined to the tent due to poor weather. At 4.5 pounds however, it is a touch heavy. My sleeping bag is a Marmot Helium 15 degree bag. With a weight of 2 pounds 3 ounces, and a compressed size slightly larger than a big Nalgene bottle, it cannot be beat. The 15 degree temp rating is often overkill for early season and summer trips though, but using it as a “quilt” and leaving it unzipped is comfortable enough. My sleeping pad is a Thermarest Pro Lite Plus. At 1 pound 12 ounces, it is heavy, but the thickness and insulation provide a good night’s sleep. For water purification I use a Platypus Gravity Works system. It is just over a pound so the weight is heavier than other systems, but the ease of use and convenience of not needing to pump water is unrivaled. My stove is the Optimus Crux Weekend, it allows me to boil plenty of water for coffee and dehydrated meals while remaining efficient on fuel.

Set up with Kelty Aluminum trekking poles, this solo tent is perfect for quick trips into the backcountry.

Set up with Kelty Aluminum trekking poles, this solo tent is perfect for quick trips into the backcountry.

All of the gear listed within this article is of course my personal preference that I have tested and decided on based on my results. Some of the items are new this year, but most have been chosen based on years of experience. On average, I hunt around 55 days per year and with that much time afield, I cannot risk a failure. The gear I have chosen over my hunting and archery journey may provide a starting point for your personal journey, but I would highly recommend doing your own testing where you can to determine what is best for you. Now is the time to dive into your gear and find what works and what does not. Hunting season is right around the corner and knowing your gear is dialed now will provide you with confidence come opening day.

The Blank Canvas

IMG_3032.jpeg

Last summer I found myself in a very stressful yet exciting time, Cutter Stabilizers was in its infancy and the stress of starting a business was weighing on me quite heavily. Having to borrow money from my girlfriend to invest in the business, purchase raw materials, and begin production was not something I was thrilled about. When the time came to pay her back, she uttered a phrase that made me incredibly happy: “why don’t you just use the money to put together a bow setup for me?”. I was thrilled, with a very generous budget, and an insatiable obsession with shopping for archery equipment, I was like a kid in a candy store. A few weeks later and she had a complete setup with top-tier accessories, including a stabilizer from the company she helped get going. In this article we will be discussing how her journey of learning archery differed from mine and the amazing opportunity she had starting with a “blank canvas”.

Back in 2003 I got my very first compound bow, my father had taught me to shoot, and it was off to the races. The standard was that once the bow was sighted in, it was okay to let it sit until a month or so before season started. Looking back, this was a massive hindrance to my archery improvement. I found that my maximum effective range was around 40 yards, and at that range my confidence was still not exceptional. The fall of 2004 was my first archery hunt, and it wasn’t until 2014 that I successfully filled a tag, not for a lack of trying, but simply for a lack of opportunities. My first shot opportunity was at 8 yards on a 6x6 bull elk. He expired quickly and after that, I was HOOKED! Diving down the rabbit hole of both archery and hunting, I found that I had developed several poor habits within my shooting form. Those habits took a very long time to overcome and correct, and finally I feel confident in my accuracy and shot mechanics. My effective range went from a shaky 40 yards to what is now, a confident 100+ yards. Had I invested in my practice and archery education, I would’ve been leaps and bounds ahead of where I am now. So when my girlfriend Heather said she wanted to learn archery, I was going to ensure she started out on the correct path, from the beginning!

A sunny day on the 3D archery range

A sunny day on the 3D archery range

The first thing to address was the fundamentals, a proper back tension release, and correct bow fit. The poundage of her bow started out light, her first release was a tension activated handheld release. The most critical element to developing proper shooting mechanics is learning that it is okay to let down on any shot that does not feel right. She learned this quickly, and along with the release she was shooting, there was no opportunity to develop target panic or shot anticipation. One of the most difficult problems to overcome is in fact, target panic, so forcing her to start with a release aid that eliminated that possibility was pivotal to her early success. Having a coach that is extremely diligent on proper mechanics was also a large advantage for her. Watching her shoot, I would look for any and every possible form issue she may be displaying, and if I found one, she would need to let down and start over. If you are just beginning your archery journey, the most valuable thing you can purchase is a lesson from a good coach.

As the weather began to warm this spring, we were able to get out and shoot some longer distance finally. Before this point, Heather had not shot further than 30 yards, and on this day, we were going to be shooting 60. A large backstop and a generous target face (8” circle) provided a forgiving and easier to acquire sight picture. Her first arrow sailed high right, I reminded her of the mechanics and necessity for perfection at longer ranges. The next two arrows hit the 2.5” orange circle in the center of the larger circle. I was so happy and proud! Throughout the following rounds of arrows, she hit the center on an average of 2 out of 3 shots, a spectacular feat for her first time ever shooting at that range. I recall, a handful of years ago when my father first got a pin for 60 yards, I was in awe of his ability to shoot that far and even hit the target. With the advances in both technology and my ability, 60 is a warm up, and soon, with practice, Heather will be warming up at long range as well.

Looking back at my beginning, I realize that technology has come a long way in 17 years. I also know that the cost of my first bow setup was approximately a third of Heather’s first setup. Having access to someone who had all of the tools and resources to tune and build an accurate bow is also a huge advantage for her. In order to get the best possible start in your archery journey, you need to be stringent on several non-negotiable principles. First, do not shoot a single shot that does not feel perfect. No matter how you “look” or no matter how “silly” you may feel at the public range, the advancement in your ability is worth being strict. Second, do not try to figure it all out on your own, hire a coach and LISTEN! Take notes so you can refer back to them later. Third, take more notes when you are shooting on your own, when a shot breaks and it feels great, immediately write down everything you can remember. What was your pin doing, how was your form, how was your breathing, which muscles did you feel were engaged, how long did the shot take to go off? In order to make the most of your “blank canvas”, you need to hold yourself accountable and accept the help of those qualified to help you, find a good pro shop and ask questions! By being honest with yourself and taking the time to develop your fundamentals, you will progress quickly and see the results down range. Happy shooting.

Heather and my current bow setups

Heather and my current bow setups

The Ones That Got Away

DF0AB760-9544-4FA3-AAF7-ABCD017F5C33.jpeg

Success in bowhunting comes to those of us who can persevere through challenges and pitfalls that often encompass an archery hunting season. For many of us, sharing the stories of triumph and success come easy. What we do not often do is address, or even more seldom, share the stories of our failed hunts. In this article I will be reliving all of the most memorable misses, blown shots, and situations that I simply screwed up. My hope is that the reader will learn from my mistakes and take something useful from them.

September, 2006:

The woods were dark as my father and I left camp in pursuit of elk, the moonless sky echoed the darkness over the plateau as our legs carried us into the void. Dawn broke just as we hit the timber and began to approach the trail that went to our secret “elk hole”. A small opening became visible in front of us with a row of chest high pines on our right, forming a corner to go around to make the meadow fully visible. Upon hitting the second to last tree, I saw him. The largest bull elk I had seen in my young life stood broadside at 15 yards. Main beams sweeping back for what seemed like an eternity, brow tines well over 16 inches in length hooked up towards the twilight sky. I ducked down behind the trees to nock an arrow, as I rose the bull took off. Had I nocked an arrow without moving my entire body I could’ve at least had a shot opportunity, but in my inexperienced nature, I blew it. It is important when approaching an animal that can see you to move as slowly and as little as possible. Their eyes are made to pick out movement, so remaining still as long as necessary is crucial to getting a shot opportunity.

August 2019:

The dawn had just broken as I arose from the memory foam bed roll in the back of my 4Runner. The sun had yet to cast it’s rays onto the prairie grasses. As I stood outside admiring the view and thinking about the day’s hunt, a truck approached from the oil worker camp to my north. He called out from his window “do you have a buck tag? There’s a nice buck right off the road at the bottom of the hill.” I replied with a yes and headed down the road to the lip of the hill. As I got closer, I dove off the road into the ditch on the right side. Upon arriving at the lip, I looked out into the vast prairie to be rewarded with nothing. I took a few more steps to confirm, and there he was, a very respectable 70” pronghorn buck at the very base of the hill, looking right at me. I ranged, 104 yards, nocked an arrow, got to full draw, and released. I had committed the cardinal sin of archery, peeking up from behind my peep right after the shot broke. The arrow hit in the dirt at the buck’s feet. No matter the situation and how close or far your target might be, it is vital to always pick a spot, the smaller the better. I also could have potentially gotten closer if I had played the situation more cautiously, however, I didn’t know how to interpret the fellow in the truck’s word. Nonetheless, always assume the animal you had located is still there until you can confirm they aren’t.

August 2017:

Opening day of archery deer season in Colorado had arrived just as I had to the familiar trailhead of the backcountry basin I had spent all summer scouting. The early morning air was cool, anticipation and excitement buzzed through my mind as I laced up my boots and strapped on my pack. I hiked in just under two miles when I was greeted by a pair of hunters on horseback. The were stopped on the trail at the bottom of an immensely steep hillside covered in aspens. The sun’s rays had just begun to cut through the trees, casting long shadows that made spotting anything nearly impossible. The hunter leading the pair asked if I had a deer tag, of course I said yes. As they were hunting elk, he revealed to me that he had spotted a nice 4x4 muley buck bedded on the hillside 200 yards off the trail. After several minutes of looking with his assistance, I finally saw the deer, bedded down, only his head visible. I wondered how the heck he spotted that buck! My amazement subsided and I began to formulate a plan, slowly walking back the way I came, using the pair of horseback hunters as cover to get around the bend of the hill out of the buck’s view. I then ran down the trail, arriving at a cut in the hillside large enough to hide my approach. I began working back towards the buck, glassing every few steps until I crested a small rise, another smaller buck was bedded down with the large buck, and was staring right at me, I froze. The buck eventually turned away and forgot about me, so I removed my pack, nocked an arrow and got down to all fours. I was even with the bucks in elevation, the smaller buck was at 85 yards, the larger one was several yards beyond him. Painstakingly slow was my progress as I inched closer in the hip high grass, trying to keep a tree between us. I rose to my knees and saw the smaller buck was now up and feeding. I began crawling forward, stopping behind a tree to glass, the large buck was now also standing, staring at me. The gig was up and soon then both bounced off after a loud snort. The lesson here is patience. My approach could have been much more calculated and slow, but the excitement of stalking in on a buck got the better of me and I pushed the issue. The correct thing to do in that instance would’ve been to simply observe the bucks and wait for them to make the move. I was in a good spot to stay downwind and the thermals would not be a problem since I was at the same elevation as the deer. Lesson learned, as Brian Barney says, “patience kills the buck.”

August 2018:

After fourteen days of hunting an over the counter unit for antelope in northeastern Colorado, my last day to hunt had arrived. Dozens of stalks had come and gone and I found myself sitting atop the roof of my Camry, glassing the expanses for signs of pronghorn. I glassed to the north, a fence line cut across the top of a plateau and dropped down into a prairie dog town. A flash of white and tan caught my eye. As I focused in, I saw a buck chasing two does, game time. If I drove down the road another 500 yards, I could park out of sight of them, my car being behind a large rolling hill. I got out, bow in hand, and dropped down into the small valley, prairie dogs barked as I walked past, surely tipping off the antelope that I was approaching. I arrived at the base of the plateau, only 15 feet of elevation different from where I was in the bottom, but spot and stalk antelope hunting is a game of inches. At the top lip was a hip high yucca bush, I belly crawled up to the bush, the antelope were still there and had no idea I was there! The does were walking directly at me, the buck trailing 75 yards behind them. I rose to my knees next to the bush, the does arrived at the lip to my right, my rangefinder said 39 yards. They continued towards me, eventually spotting me and running out to the buck. I now had his attention, he came straight to me, I ranged multiple times, 117, 96, 79. My fast eddie double pin was set for 67 and 79. He kept coming, I ranged one last time, 69. I came to full draw as I counted two more steps that he took. As he turned broadside, I began to settle my pin, the shot broke and I saw my arrow impact the ground right behind where the buck was standing, he had literally ran out of the way of my arrow! Shooting 278 feet per second, my arrow got there in .75 seconds. The lesson here is, antelope are really REALLY fast. I licked my wounds and went home to a cold bowl of tag soup.

November 2019: I saved the best (worst) for last.

The afternoon started slow, I was sitting in a tripod stand, overlooking river bottom to the west with a large CRP field behind me. The tripod stand offered zero cover and in all honesty, was set up for rifle hunters. Coming off of a successful Nebraska hunt, my confidence was high as I sat there in the fading daylight, silence echoing through the unseasonably warm air, it was 76 degrees in north Kansas, on November 20th. The evening was boring but peaceful until 5:21pm. I saw him coming from the south, a flash of ivory through the scrub brush, appearing and vanishing with the contours of the terrain. Then I got a good look at him, a GIANT 8 point buck. He was walking the edge of the CRP field dropping down into the scrub brush just outside the tree line. I rose to my feet when he walked behind a large clump of bushes a hundred yards away. There was a large white bloom on a bush in front of me, my rangefinder told me it was 44 yards away. The buck continued on his path towards my shooting lane. One last large bush allowed me to get to full draw. The buck stopped and ATE the blossom I ranged, I knew exactly how far he was. He took two more steps, the stopped again, my pin settled behind his shoulder. There’s a moment at full draw, right when you know the shot is going to break and you can feel the sear of the release let go to send the arrow on it’s way. At that very moment, I saw the buck take a step. My arrow impacted behind the last rib, not where you want to hit a whitetail. As I watched my green lighted nock bounce away through the trees, I felt sick. I knew I had hit that deer poorly and he was going to suffer. We backed out for the evening to begin tracking at first light. We followed blood for nearly a mile, eventually losing the trail onto a neighboring property we couldn’t access. The feeling of disappointment, anguish, and failure weighed increasingly heavy on my mind. As a hunter, we want to provide the quickest, most ethical kill we can, and unfortunately, that simply does not always happen. The lesson here is that bowhunting is hard!

No matter how many arrows you shoot in preparation for hunting season, how well tuned your bow may be, how excellent your shooting form and mechanics are, the animals don’t always read the script. It is up to us as hunters to put in the effort to be as ethical and respectful as we can, but the ways of the wild are unpredictable. Situational ethics are a very difficult concept to convey through words and paragraphs, but time afield, and experience in the wild will teach you when and when not to let an arrow fly. Hindsight is always 20/20, and given the opportunity, I would approach each of these situations with the added knowledge of situations past. In the end, if you haven’t missed a shot, lost an animal, or blown a stalk, you haven’t been hunting long enough. It’s part of the journey, and as long as you learn from your mistakes and implement those lessons, you will always be a better hunter than you were before.

Adjustments.jpeg

Confessions Of A Novice Backpacker

E344E9E9-BEF9-4B0A-B15A-909A7ED1EBB8.jpeg

It’s safe to say that hunting the backcountry is a dream everyone has had once or twice. High mountain peaks bellowing out to you in the early morning twilight as you arise from your tent with nothing but solitude around you is truly something to behold. For many, the thought of being alone, truly alone, is not a comforting thought, and before attempting a backcountry adventure, you really need to consider the logistics of doing so. If you can get past the fear and uncertainty however, I promise you there is nothing quite as liberating. In this article I will recall several of my very first experiences and lessons learned in the high country of my home state of Colorado, enjoy.

I was first drawn to backpacking four years ago, when dreams of velvet muley bucks filled my mind and pulled at my soul. Mid March had me choosing a unit, simply by looking at google earth and various other online map resources. Come June, my tag arrived in my mailbox, this was really happening. A week later I was heading out to the trailhead to get boots on the ground for that first voyage into uncharted wilderness. I had chosen an open basin three miles from the trailhead to begin my scouting. My arrival was greeted by snow covered peaks and sloppy trail conditions, but my enthusiasm carried me to my predetermined destination. Spotting some bucks along the way, I saw their velvet antlers were still small with much growing to do. Breaking through the timber to lay my eyes on my basin for the first time, my jaw dropped and my breath was taken from me. I had never seen anything so beautiful and had never felt so small. I was a mere 3 miles away from my vehicle and felt like I was in the middle of nowhere, just the wilderness and me.

A first taste of the backcountry

A first taste of the backcountry

Two days and 23 miles later I had wandered much of that basin, seeing very few deer, but learning a lot about my new backpacking gear and how it all worked. Every creek and spring was absolutely raging with the ice-cold waters of late spring, the emerald green foliage that contrasted the still snow covered peaks captivated my soul and beckoned my return. Two weeks later I found myself breaking through the trees to view that magnificent sight I had seen the previous trip, the same feeling of awe rained over me. This time I decided to venture further back into the valley and by 8:00am I was five miles back and growing weary from the 43lb pack I was carrying. Finding some shade on the steep hillside I shed my pack, used it as a pillow and laid down for a short nap. When you have nowhere else to be, time is of very little importance, so when I arose at 9:00 I decided to eat lunch. One of the most unique aspects of backpacking is that you always have everything you need to survive right there on your back. Food, shelter, and water, all right there and waiting to be deployed at any time. Well, that whole water thing sometimes isn’t so cut and dry.

When venturing deep into the backcountry, water is typically procured from sources out on the mountain. Seeing as it is so heavy to carry, transporting more than you need for a day is illogical. The following year I decided to go back to that same valley, only this time I was going to scout up high on the peaks and ridges above tree line. I had located a spring on my map about 100 feet below where I had intended to camp. A grueling 4 mile hike, gaining 2500 vertical feet placed me at the bottom of an alpine basin at 11,000 feet. Sparse grasses and clusters of pines covered a seemingly unexplainably steep face which towered above me in the late morning heat. I had packed in 24oz of water to get to the spring where I would filter water and refill my hydration bladder. Crossing the basin I arrived at where the spring appeared on the map, but it was dry! At this point I had traveled 5 miles, and had been hiking and bushwhacking for nearly four hours. My water was gone and I was exhausted. I knew there was water about 1200 feet below me at the place I had camped last year. Begrudgingly I started my descent. The mountainside was steep, and by steep I mean if you reached back behind yourself, your hand was on the mountain. I arrived at my final obstacle, a rock slide, remnants of an old mine.

The view from atop the rockslide

The view from atop the rockslide

Peach pit sized gravel covered the 50 degree slope for some 150 yards. I took my first step, sliding down a few inches. Proceeding forward I was successfully traversing the slide, then the size of rocks shrunk, making travel much more unstable. The slope grew steeper as well, each step I found myself sliding several feet downward before stopping. The next flat spot below me was 75 feet down. My muscles clenched tighter with every step, knowing that at any moment my feet could slip out from under me and I’d be tumbling with my 40lb pack propelling me downhill. As I approached the edge of the slide, a small willow reached out it’s branches as to offer me a hand. I jumped, upon landing my feet slid down the hill. So here I am, in the middle of this breathtaking landscape, on my belly, hanging from a 5 foot tall willow. Sometimes solitude is priceless. I would make it down to the spring unscathed except some light bruising to my ego. Exhausted, I sat, drank some water and decided to pitch camp.

A well deserved rest after the rockslide

A well deserved rest after the rockslide

A real, quantifiable concern when hunting or exploring the backcountry in the summer and early fall is lightning, particularly at high elevations. Being closer to the sky comes at a price, that price being heightened responsibly and awareness of the potential dangers a lightning storm possesses. My first experience with a high country lightning storm in the backcountry occurred on my third trip out. The hot midday sun was beginning to give way to afternoon clouds, growing darker by the minute. 4pm found me at my camp spot at 10,500 feet of elevation. The sky had grown increasingly dark as I scrambled to set up my tent and tarp. At 4:30pm the first crack of thunder erupted over the peak to my west, shortly followed by the flash of lightning. As I sat under my tarp holding a cup of freshly brewed coffee, the rumbles grew increasingly close until the storm was directly on top of me. As I prepared to take a sip of the coffee, the thunder cracked, causing a ripple inside my cup. My ears rang, and hair stood on end. FLASH…BOOM! FLASH..BOOM! A light rain began to fall, increasing in strength by the second until I found myself getting pelted with dime sized hail. In a matter of minutes the ground had been covered with hail, appearing as if a snow storm had come through. As fast as it came, it was gone and the sun had returned. Unfortunately for me, my inexperience had compromised my gear. I had placed a second tarp under my tent in lieu of a ground cloth. The tarp essentially funneled the water from the storm directly under my tent. My down sleeping bag was soaked. Reluctantly, I wadded my wet gear into my pack and hiked out with a feeling of defeat and a newfound respect for the mountains echoing through my mind.

The setup of my demise

The setup of my demise

It would take two seasons for me to find hunting success while backpacking, and coincidentally it was a last resort trip that yielded a notched tag. The 2018 deer season had arrived and my plan was to hunt an area conducive to car camping. My ultralight backpacking gear remained at home, since I wouldn’t need it. As I pulled up to the turnoff to head to my spot, a flashing traffic sign read “ACTIVE WILDFIRE AREA…NO PUBLIC ACCESS TO FOREST.” One of the most prolific wildfires in recent history raged literally over my planned hunting area. I had no backup plan, and scrambled to come up with a solution. The one thing that I had going for me was that my tag was good for six different units, essentially a 75 mile stretch of north and south running highway was huntable to me on either side for 10 miles each direction. I drove to the northernmost unit and began to hunt. Failing to find any deer, I traveled south unit by unit until I had reached the last evening of my allotted hunting time. I had one morning left to hunt and I was back to square one, my backcountry basin. As the day dawned, I found myself at 10,500 feet, right where this all began. I took the main trail back towards the parking lot, cutting off and heading up the mountain into a small meadow. Large aspen trees cover the hillside, each one only 2-3 feet apart. Once the sun rises, the shadows cast make it nearly impossible to see a deer before it sees you. Lucky for me the sun was still behind the mountain and the dawn was just beginning to break. I hiked to a large bench that runs along the hillside like a belt around a lumberjack’s waist, 50 yards deep, and 1/4 mile long. Catching movement I froze and looked up the hill to see a doe staring at me at 56 yards. She circled downhill and now had a large pine tree directly between us. I was only two feet behind the tree when a pine squirrel appeared 3 feet away from me. He began to sing his song of betrayal, doing his best to give up my position. The doe, now looking in my direction, decided to come investigate. She came downhill directly at me, stopping at 12 yards before bounding back up the hill. I remained frozen, she turned back, circled again, this time going past me walking to my left. She cut through an opening I had ranged at 39 yards too quickly for a shot. Then, she turned around AGAIN, coming right at me, I ranged a tree in front of her, 28 yards. She stopped a few yards past it, at what I had guessed 23ish yards. I was already at full draw, I released, only to watch my arrow hit her high in the spine. She dropped, then began kicking and rolling down the mountain. I ran around to her downhill side as fast as I could, stopping at 15 yards, then sending an arrow through her vitals. She expired in seconds. My heart was pounding out of my chest, adrenaline was racing through my entire body. I had succeeded, after a hard five days of hunting it all happened on the last morning.

The steep aspen hillside where my doe was taken

The steep aspen hillside where my doe was taken

The next step was figuring out how to get a full deer, and my camp off the mountain from three miles deep. Since originally I had not planned on backpacking, my gear was not the specialized, ultralight equipment system I had developed through trials and multiple trips into the backcountry. Typically with my ultralight kit, my pack will weigh approximately 35 pounds for a 3 day trip, on this occasion it was north of 50. I started by deboning the deer and putting the meat into game bags, then propping it up on logs and large rocks to cool. I then made the 3/4 mile hike back to camp with an empty pack, upon arrival, I tore down my tent, tarp, and other gear and returned to the place where I had cut uphill. After stashing my pack and bow in the bushes beside the trail I hiked back up to my doe with my meat frame on my back. The slope is incredibly steep, in some places it is nearly 60 degrees! After loading up all the meat, I stumbled down to the trail to reattach my pack to the frame. A full deboned mature mule deer doe, and my 50lb pack made for an entertaining spectacle as I tried to get the pack onto my back. Lying down on top of the pack I strapped in, then rolled onto my stomach, finally doing a push up and using a tree to reach my vertical position. The trail out is well maintained and downhill, however my pack was over 100lbs and the progress was slow. Nonetheless, I had filled my tag and had nowhere to rush off to, victory had been achieved, one trip, everything out.

The challenges of the backcountry are some that I have learned to overcome in my still limited experience, however, through meticulous attention to detail and stringent assessment of my gear and skill set, I feel confident in my abilities. A new backpacker will always bring too much gear, so learning what you do not use is crucial to getting your pack weight down to a manageable weight. There are also items that need to be in your pack no matter the weight, as stated in a previous article (The Western Mountain Gear List), you will need to decide where your loyalties lie and where you want to make sacrifices as far as heavier gear. For me, my sleeping pad is not ultralight, but it is comfortable and I always sleep well on it. My Platypus Gravityworks water filtration system is also heavy, but the ease of use and ability to store water is worth it. Backpacking is a pursuit that does not yield a quantifiable measure of progress, but always possesses different challenges each new trip. The mountains are unforgiving, beautiful, rugged, and command respect. When it comes to knowledge and experience with backpacking the wilderness, there is a lesson to learn every single time your boots leave the trailhead.

Sunset from atop the highest peak in my hunting area

Sunset from atop the highest peak in my hunting area

Peaking For Primetime

IMG_1290.jpeg

Throughout the course of a year our involvement with archery changes with the seasons. From the hot summer months when daylight is long, to the winter months when temperatures plummet, to the golden days of fall when we set out with a tag in our pocket, the number of arrows we shoot changes. It cannot be argued that we want to shoot our best when our hunting season arrives to provide an ethical shot and honor the animals we love and respect so much, but how do we get to that point at the right time? In this article we will be addressing a strategic approach to off-season shooting that will result in your tightest groups occurring on opening day of archery season.

December 1st brings below freezing temperatures, snow, and holiday shopping to the forefront of our schedules. Shooting in these times often proves difficult with such limited daylight and free time, however, there are things we can do to stay acquainted with our bow. It is in the winter months after hunting season has come and gone that I assess my setup from top to bottom, addressing what equipment worked well and what left room for improvement. Once I decipher what will be changing, I begin shopping and researching other options. The shortcomings of your setup are fresh in your mind and the thoughts of failed shots or equipment malfunctions still sting. My archery season runs from mid August in CO for antelope, through late November for NE whitetail. December is a good time for me to hang the bow up and let my mind rest from archery entirely.

Usually by late January I am having severe archery withdrawals and just want to get out and shoot some arrows! My new equipment choices have likely been purchased by now and the eagerness to test them is overwhelming. February is the time to begin focusing on the fundamentals. I start at 20 yards, once a week, shooting a Vegas 3 spot target for score. It allows me a baseline for my shooting abilities and at 20 yards, the demand is not as great. Keeping detailed notes of shots, mental cues, and releases that “feel” good is crucial at this point. We are working towards perfection, and need something to reference.

Late March brings warmer temperatures and the opportunity to get outside in the afternoons to shoot longer distances. At this point I have shot 6-8 Vegas scoring rounds and began seeing improvements. I am fortunate enough to have several excellent 3D courses nearby. My new equipment is now familiar enough to start asking more from, so outside we go! Carrying over the fundamental notes and cues to longer distances, and being as strict with yourself as possible is crucial. This, in my opinion, is when you either make or break your year! If a shot feels wrong, LET DOWN AND DO NOT SHOOT IT! As the distances get longer, self control must become sharper. We are still developing perfect shooting technique as we progress back to top form and do not want to start practicing poor habits. Addressing any equipment conflicts now should also be part of your routine, since adding some distance may expose some shortcomings in your setup.

The first 3D outing of the year

The first 3D outing of the year

Late April brings springtime and plenty of daylight to shoot in the evenings. At this point I am shooting long distance at or near my max effective distance and pushing past it when possible. For me, long distance means 80 yards or more, and in peak form, my max effective distance is 90-110 yards depending on whether I’m shooting fixed blades or mechanical broadheads. Establish your max effective distance based on your setup and abilities, but don’t be afraid to challenge yourself. Being mindful of the correct fundamentals established in earlier months, it is crucial to not get caught up in dropping long bombs at the expense of proper technique. Anyone can hit the center once or twice at 100 yards, but doing so consistently takes perfect form, flawless shot execution, and a well tuned setup.

June brings summertime and all of the fun 3D events, such as TAC and Mountain Archery Fest. These events take 3D targets, incorporate challenging terrain, and real-world shot scenarios you may encounter while hunting. Steep uphill and downhill shots are a staple out west in the mountains that elk and mule deer call home, and knowing how to adapt your shot process and execution to find the center will vastly increase the likelihood of filling a tag come September! At these 3D events it is very common to encounter shots well past your max effective range. Three years ago at a Total Archery Challenge event in Utah, I recall a 35 degree downhill shot on a bighorn ram target at 73 yards, for those of you who are familiar with cut charts, that’s a whopping 95 yards line of sight. Anytime you are shooting up or downhill, your body’s natural tendency is to shorten itself and compensate with shoulder and arm positioning. Not only will this affect your anchor point, but it will also add bow torque to your front hand. Both of which do not heed well for accuracy. Come to full draw, aiming at something level with your body, then bend at the waist, up or down to the target. One new variable that is introduced in these types of events is the necessity to trust your sight bubble, I’ve mentioned it in previous articles, but in off camber shots, your top limb wants to fall to the downhill side. A good back bar stabilizer setup helps combat this, but will not fully solve the problem in extreme instances. Trusting your bubble level is crucial to not missing left or right on side hill shots, particularly at long distances.

July is a pivotal month in the journey of improving your shooting abilities. At this time, any variables in your setup, such as releases, arrows, stabilizers, or broadheads must be decided upon. For example, all offseason I shoot a hinge style release, but come July, I transition to my thumb trigger release since that’s what I like to hunt with. I will shoot it exclusively, along with the exact setup I intend to hunt with. Tinkering and experimenting with your setup needs to stop now, make adjustments to your sight, rest, and stabilizers to ensure they are all tuned to shoot the arrows you intend to hunt with and LEAVE YOUR BOW ALONE! Confidence in your equipment is paramount to success afield. Practice sessions in July should involve all distances, from close range fundamental intensive focused shooting, to long range accuracy shooting. Broadheads should be incorporated into your practice sessions now as well. A full 45 days of shooting them will reveal any tuning issues in your setup and allow you time to correct them before season. Shooting from awkward positions should also be added in, seated, kneeling, and standing on uneven surfaces are all important to practice since the the animals we will be pursuing do not live in well kept, flat archery ranges.

August, the days are long, the temperatures are hot, and hunting season is just around the corner. Practice sessions should not exceed 50 arrows in this time frame. I personally focus on 2/3 of my max effective range for the few short weeks before the season kicks off. For example, if my max range is 100, I will focus on shooting mainly 70 and in. This keeps confidence high and allows for the good habits we have worked so hard to establish a chance to sink into our subconscious. Long range shooting should not be neglected altogether either. Add in 10-15 arrows at or past your max range to ensure you are still proficient, WITH BROADHEADS! Continue to practice awkward shooting positions and even incorporate some “hunting scenarios” such as nocking an arrow quickly and executing your shot in seven seconds or less. Practice moving your bow at full draw onto the target to emulate following a walking animal. Raising up from a kneeling position, sitting on your feet to upright kneeling is another good exercise. The more prepared for various scenarios you can become, the lower the chances you have of losing sight of your fundamentals in the moment of truth.

Mid to late August means one thing for me, archery antelope hunting! I’ve written an entire article on the subject and it truly is my favorite hunt of the year. With the demand for max effective range being the highest of any hunt, it is important to stay brushed up on your shooting. At least twice a day while hunting I will stop, throw the target out at my max range and shoot 5-10 arrows. I always shoot 2-3 arrows first thing in the morning, and again at last light. The vital area of an antelope is roughly a 10” circle, and at the distances they often present you a shot from, that can get really small. Perfection is not an option, but a requirement!

A 110 yard group I shot while antelope hunting

A 110 yard group I shot while antelope hunting

Sweet September, the golden sea of aspen leaves illuminate the high country, crisp morning air fills the lungs. On my elk and deer hunts I shoot my bow once a day, usually mid day, for 10-20 arrows. Nothing crazy as far as distance goes here, just keeping the form tight and focusing on execution, 40% of max range is adequate.

November brings a transition to whitetail hunting, and new gear, clothing in particular. Throughout October it is important to practice in the clothing you will be wearing, typical whitetail gear is often bulkier than western clothing, so string slap and sleeve contact needs to be addressed. Gloves are another piece of clothing that may affect your anchor point, and the way your release feels in hand. “Cold bore” shooting is an element that I add in for whitetail hunting. Coming outside, and shooting a single arrow 2-3 times a day several hours apart at 30-40 yards is great practice for what you will likely encounter while hunting. There are no warm up shots in hunting so it is important to make the most of of that one single arrow.

Adjustments.jpeg

The season comes and goes in what seems like a flash, memories made, tags filled, and freezers stocked up for the long year ahead. The journey through the months preceding hunting season should not be wasted, but systematically utilized to improve and adapt your shooting skill. Each month has different benefits and by following the steps outlined in this article, I am confident that you will be the most prepared, confident, and accurate you have ever been. Seize the opportunity to invest in your craft and become a student of the game, after all, hunting season is less than 5 months away!

The Perfect Shot

Adjustments.jpeg

It is a feeling of triumph, a feat that we as archers strive for every single time our bow hits full draw, the perfect shot. The release breaks, the bow falls forward slowly towards the target, the arrow pierces the air in a precise arc directly into the center of the bullseye, whether it be paper, foam, or the vitals of a game animal. When it happens, we are reminded why we love archery so much, but often it doesn’t. This article will showcase several ideas and tips to make that perfect shot occur more frequently.

A shot process is the most crucial elements to repeatable and consistent accuracy with a bow. Performing the required actions precisely the same each time yields tight groups and notched tags. The initial element is finding a sequence of mental commands that help you as the archer accomplish the aforementioned task. No matter the situation, no matter the conditions, this sequence must be adhered to. In hunting scenarios, this becomes the most difficult.

September 25, 2018 was the sixth day of my Colorado archery elk hunt. The shadows were growing increasingly long, and with only one more day to hunt, the pressure was beginning to weigh heavy on my mind. As my father and I crested a small hill into a meadow surrounded by profoundly large aspen trees, that pressure turned to opportunity. My father saw the bull first, I saw only his two cows. The bull was to my left, around the corner behind a group of trees out of my view, feeding into the meadow. As soon as his chocolate brown antlers came into sight, the surge of adrenaline flooded my body. Snapping back into reality, I heard my dad say “42 yards”. As he fed into the middle of the meadow, quartering away from me, I began to run through my checklist while nocking an arrow. After dialing my sight to the correct yardage, I recited it in my head. “Feet. Grip. Draw. Anchor. Peep. Get on target. Pull. Pull. Pull. Pull.” The shot broke and I watched the green nock illuminate a trail through the gray evening atmosphere and disappear into the bull’s lungs. I distinctly remember how perfect the shot felt, the fall away of the bow towards the elk, the familiar feeling of my release hand thumb brushing my back shoulder after the shot broke, then I saw the bull bed down and expire 50 yards from where the arrow had made it’s initial impact.

B029F406-F063-46F7-857F-0554CF90373D.jpeg

During the off-season I shoot a LOT, it’s how my shot sequence becomes engrained in my mind in times when it otherwise would vanish into the black cloud of adrenaline. Stemming from “perfect archery form”, it is fundamentally sound. Feet are shoulder width apart, with the front foot turned slightly towards the target. Grip is light, with the bow sitting just inside the meaty part of the thumb. Draw is smooth, ensuring the front shoulder stays low, and allowing the string to gently come into the face once at full draw. Anchor point is the string touching the very tip of the nose, corner of the mouth, and release hand rests with the jaw bone between the index and middle finger for a handheld release, the index knuckle touches the sharp point on the back of the jaw. Peep alignment is established AFTER anchor point is acquired, perfectly eclipsing the bright yellow ring on my sight housing. The pin is then placed on the target, not slowly lifted up or down to it, but immediately placed on where I want to impact. It floats around, but my eyes stay focused on that spot. The slow pull of the release arm rearward, combined with increasing tension of the rhomboid and middle trapezius muscles of the back force the shot to break. Finally, the bow tips forward and I feel my release hand thumb brush my rear shoulder. This is how I know that the shot was executed correctly, the momentum of a proper tension activated shot will cause the release hand to travel straight back and behind the head towards the shoulder.

15123A45-9DA5-484B-93A3-1093B497EBE4.jpeg

The smallest verbal or physical cue can be the deciding factor in establishing a shot sequence that can withstand distraction and adrenaline. At the end of every practice session I always finish at ten yards. Utilizing a baseball sized spot, I focus solely on execution of the shot, as my pin will remain on the spot throughout the duration of time at full draw. Ten arrows is adequate to leave the session by reaffirming good habits and proper adherence to your shot sequence. Blank bailing, or shooting at a blank target from very close range is not as effective due to the fact that in any accuracy dependent situation, you will always need to pick a spot to aim at.

Proper technique is paramount to building a good shot process, but the real “lightbulb moment” occurs when you learn to dissect those principles into steps that you can personally understand and adhere to. The most critical element is that you develop a process that works every single time you draw your bow back. It is very easy to simply shoot 50 arrows in a practice session, but how easy is it to shoot 50 PERFECT arrows? Next time you hit the range, focus on each individual arrow as if you had that public land bull in front of you on the last evening of the hunt. Attention to detail is what separates those of us eating backstraps from those eating tag soup, and I’ll tell you right now, backstraps taste exponentially better.

Release Aids: 101

Adjustments.jpeg

Brand new bow, new sight, new rest, and a fresh dozen arrows sit on the counter in front of you at the archery shop. Tuned to perfection, ready to drop archery bombs, but there’s one thing missing: a quality release aid. For the last ten seasons you have relied on ol’ faithful, an index finger release from the early 2000’s. Accuracy with your old bow was consistent, but seemed to plateau lately. Release aids have come a long way in the past few years, crisper triggers, more adjustability, and increased comfort. With the surge in popularity of 3d archery, a large number of bow hunters are seeing the benefits of utilizing more and more equipment from the target world. With that, more than just the index finger, wrist strap style are now hitting the woods. In the following paragraphs we will showcase the four primary styles of releases along with their unique benefits.

The index finger, or wrist strap release is by far the most used style of release. With an easy crossover from the trigger position a lot of us grew up learning on small bore rifles as kids, it’s a comfortable place to start. Keeping the release ready for action in a hunting scenario is simple because it’s right there on your wrist. This style of release aid often gets a bad rap for causing target panic, or shot anticipation, and for good reason! The majority of archers who shoot this style of release are doing so incorrectly. The tip of our index finger is one of the most nerve receptor dense places on our entire body, so often it becomes linked, touching the trigger makes the shot break. The result can be catastrophic for accuracy and you may find yourself “locked off target” or holding low or high, then dipping your pin into the center and hammering that trigger. By removing the fingertip from the equation, you are greatly improving your ability to execute a surprise shot, which is what we always are striving for. To set up an index release correctly, the trigger should be inside your first knuckle of your index finger, creating a deep hook. In order to do that, the trigger sensitivity should not be so hot that you are afraid to apply slight pressure. Once your “hook” is formed, begin driving the rear elbow back and expanding through the chest to allow back tension to cause the shot to break. By simply decreasing trigger sensitivity and shortening the neck of the release, you can greatly improve your accuracy and consistency with a wrist strap style release aid.

A deep “hook” around the trigger

A deep “hook” around the trigger

The next most popular release aid style for a hunting application is a handheld thumb activated release. By eliminating the sensitivity issues associated with the index finger, archers often find their shot sequence remains clean and uninterrupted by shot anticipation. A handheld release in general will change the anchor point of the shooter since the hand will be flipped upwards. By placing your jaw bone in the gap between index and middle finger created by the release aid, a more consistent and repeatable anchor point may be established. It is still possible to “punch” a thumb activated trigger, and often the results of a punched shot are worse than with an index trigger! It is for this reason that proper setup and execution are utilized. There are several ways to adjust a quality handheld thumb release to fit the hand of the shooter, but for this instance, I’d like to highlight what has worked for me. Moving the barrel forward as far as possible and placing the peg or trigger in the middle of my thumb pad, I then make contact with my index finger. By holding this position throughout the shot and pulling with the rear elbow while expanding, I am able to utilize back tension to get a surprise break. One of the downsides of a handheld release is the possibility of dropping it or losing it while hunting. For this reason, I choose one that can be connected to a wrist strap or paracord strap. It ensures the release is there for me whenever a shot may present itself. For whitetail hunting, most thumb activated releases can be clipped on the string once in the tree stand. The only negative of that is how cold a metal release can get in mid November if you aren’t wearing gloves! I keep mine inside a hand warmer muff along with my bare hands.

Contacting the index finger with the thumb

Contacting the index finger with the thumb

The next two styles of release aids often get interchangeably called “back tension” releases. Within this umbrella title are the hinge style release and the tension activated release. The hinge is activated by movement of the shooter’s hand, where the tension release is activated by pulling against the string of the bow. It is not out of the question to hunt with these styles of releases, and as a matter of fact I know a lot of people that do! Let’s take a look at the hinge first.
The hook of a hinge release slides along a “half moon” shaped steel piece when, once reaching the edge, it falls off thus opening and firing the shot. To draw the bow back, the release must be tilted forward and pressure must only be on the index finger and thumb. Once at full draw, the thumb is removed and pressure is slowly shifted from index to middle finger, rotating the release and allowing the hook to slide off the edge of the half moon. The benefit of shooting a hinge is that your shot process needs to remain coherent enough to rotate the hand while allowing the pin to float resulting in a slower, more controlled, and often smoother shot execution to occur. The downside, is of course if you forget to rotate the hand and focus too much on aiming, the shot will not go off. This can be frustrating, but in the end, it really forces you to focus on your execution rather than your pin.

Drawing back, keeping pressure on thumb and index finger only.

Drawing back, keeping pressure on thumb and index finger only.

Transferring pressure to middle finger and rotating the release in hand.

Transferring pressure to middle finger and rotating the release in hand.

Tension activated releases, such as the Carter Silverback sold by Nock On Archery, have exploded in popularity in recent years. A true surprise shot is almost guaranteed, and executing a clean break is nearly automatic. The shot is fired by pulling against an internal spring set to slightly more tension than the holding weight of the bow at full draw. A safety is engaged while drawing the bow back, then released once anchor is established. In order to get the most from a tension release, a few things need to happen; consistent pressure needs to be kept on the back wall at full draw, and front shoulder position needs to remain the same. If either of those two things change, it can feel substantially easier or more difficult to make the release fire. It is for this reason that a tension release is a great training tool. There are plenty of people who hunt with them, and if you practice generously in the months preceding season, you can find hunting success with a tension release as well.

Disengaging the safety once at anchor and beginning to pull.

Disengaging the safety once at anchor and beginning to pull.

With all of the hundreds of release options available to the archer, it can seem to be a daunting task to choose one. Find yourself a good pro shop that will allow you to try several and find which feels the best in your hand. The ergonomics of a release make all the difference in the shootability for that particular person. A great way to learn a new release is to get some paracord that matches your draw length and tie a d-loop on the end. This will allow you to practice without worry of shooting a bad arrow. If picking up a hinge release in particular, use the practice rope for at lease a few days before even attempting to draw back your bow. It is possible to punch yourself in the mouth if you do not draw back correctly, and nobody likes getting punched in the mouth.

Experimentation and personalization are two of the aspects of archery we all love, and having a high quality release is paramount to getting the most accuracy out of your bow. You wouldn’t want a gritty, 12 lb, mil-spec ar-15 trigger in your custom built, long range, precision rifle, would you? Good releases are not cheap, and cheap releases aren’t… well, you get the idea. Shoot straight!

Ten Years In The Making

79DD1BC7-FBB5-4688-A018-D7184EA5E934.jpeg

   The following story is of my very first successful archery big game hunt. After ten years of bowhunting elk with my father without so much as a shot opportunity, my confidence and, if I’m being totally honest, interest in bowhunting was beginning to come into question. Nonetheless, throughout the five day hunt, I enjoyed the beautiful country of the west, focused on the lessons that were presented to me, and finally got my shot at filling a tag. This hunt is what I attribute my outright obsession with bowhunting, archery, and the pursuit of western big game to. After tasting that irreplaceable, indescribable feeling of triumph, my life shifted to begin revolving around hunting with my bow. I wrote this story in September of 2014, enjoy.

The day started just like all the other Colorado archery elk hunts of the last ten years. Waking up to my father's alarm clock in that old 1960's camper, lying half asleep, secretly wishing for silence as he stands up. 5:00 am shakes my weary body too quickly, it reflects on the ridges and plateaus I forced it to ascend the day prior. Water begins to bubble within an aluminum coffee pot as the darkness tells us to remain inside. Steam pours out onto dry oats as a glass of orange juice stands by observing. The late September air is sharp and brisk as I lumber down the creaky wooden stairs to crawl into my cold, damp hunting clothes, saturated with the morning dew and the scent of pine. Within our changing tent, the Coleman lantern provides some heat, but my muscles remain tight until the initial chill subsides into the warmth of my two layers of camouflage. By headlamp and a small mirror I create the black and green diagonal lines across my face with sticky face paint. It's day five of my southwestern Colorado archery elk hunt.

Home sweet home

Home sweet home

  My father John introduced me to bowhunting at the age of 15, when trips were more of an inconvenience than a privilege. As I observed the vibrant yellow of changing aspen leaves, distant glimpses of the golden tan of elk moving through the timber, and the rugged, unforgiving beauty of elk country, I began to see that I had much to learn.

  Throughout the years I'd had my fair share of close encounters, including a spike at two yards, a doe at four, and a 360-class bull at 15. I'd never had an opportunity to draw my bow on an elk, but that was all about to change on the morning of September 25th, 2014.

Descending “The Hill”

Descending “The Hill”

   We set out from camp at 7am, the sun supplying just enough light to see our descent down "the hill", an old logging road that winds down a steep hillside lined with head-high pines, and eventually opens up into a large meadow in the bottom of a vast canyon. A small creek runs through the bottom, winding and babbling under deadfalls and alongside pine saplings and vibrant green ferns. Both sides are steep and the woods are thick, the ground still damp from evening's humidity. Trails carved into the hillside provide a corridor for both us and the game we pursue, encircling vegetation forcing me to replace each game track with one of my own. As we follow the creek, the woods close in on us until our route becomes impassible. We head up the daunting hill to our left and hit an elk trail littered with deadfall that only the long legs of a wapiti could overcome. Walking along, a fresh set of tracks catches our eye, the edges cleanly pressed into the earth, soft from the repeated impressions of hooves.
We reach the top of the plateau and begin to walk an old irrigation ditch that winds through thick pines and fifty-foot aspens. As we walk along as slowly and quietly as we can, cutting up and down the hillside around the tree-littered irrigation ditch, down the hill I spot a small spring with what looks like a possible wallow. We head down to investigate. A clear trail heads right down to it with huge pines and trash can-diameter aspens on all sides of us. As we circle the edges of the small spring, our feet leave impressions that appear out of place in the soft moss among dozens of elk tracks. Down the hill we can see the creek trickling through the bottom some 400 feet below between gaps in the massive pines. Suddenly in the distance we hear an elk chuckle. So many emotions occur all at once, hope, skepticism, excitement, nervousness. My father and I creep up the hill to sit beside a few aspens and he lets out a bugle. We take turns cow calling a few times before sitting in silence for around ten minutes. No response. We stand up to move on and then the elk yells back with a bugle that sent chills up my spine and a slight grin appeared on dad's face. Dad bugles back and I walk down the hill to an aspen with a small bush beside me. I nock an arrow and get ready. As my dad rakes a tree behind me to enrich the idea of a bull with two cows, the nerves start to kick in. I picture all the possible entries the bull might appear from. Silence again. "Let's move up." My father says. So I begin to stalk my way forward as quiet as possible, while my dad proceeds to step on every branch in front of him while he advances. I wish he would've told me he wanted to sound like an entire herd of elk before I nitpick my steps around the smallest of twigs. Another bugle sounds off in the distance, he's getting closer! We get to a small clearing with a spring at the downhill end and thick timber between it and the irrigation ditch. I kneel next to a large pine as dad sets up fifteen yards behind me. Another bugle sounds off. This time I could tell he was less than 100 yards away. The shakes start up. My dad answers, then I let out a cow call. I'm kneeling in front of an aspen, with two big pines about five yards to my left and a down tree five yards in front of me. Then my dad whispers three words I'll remember forever, "Here he comes!" That intense, adrenaline fueled chill races through my body like it was shot from an epi pen. I catch movement about 40 yards away on the other side of the small meadow. A cow elk wanders to the edge of the timber and stops. I see the bull trot through an opening in the thick stand of timber between me and the trail above me then out of sight behind another stand of pines. The cow continues forward past a tree I had ranged at 20 yards and into the meadow coming right at me! She stops at 15 yards and has me pinned. My dad lets out a soft cow call behind his back with his hoochie mama call. The bull comes crashing through the timber, I pull back on my 62 pound PSE Nova as slow as humanly possible and look out of the corner of my eye to see the cow still burning holes through me. The bull continues down the hill and stops in a small opening, eight yards away! The two pines to my left are the only thing between him and I. I lift my bow to his vitals and look through my peep sight, only to see a perfect glare from the sun filling it up and making my pins invisible. I look at the bull, slightly quartering to me, look at my pins, look back at his vitals and let my arrow fly. My orange fletchings vanish into the right side of his chest as he crashes up the hill and out of my sight. My dad let's out a bugle and I follow with a series of cow calls. We join up on the edge of the clearing and go over the mayhem that had just occurred. As we're talking we hear a loud crash in the distance. My heart skips a beat. I'd never drawn my bow back on a big game animal, let alone shot at one.

The old irrigation ditch, now essentially a trail

The old irrigation ditch, now essentially a trail

  Thirty minutes pass and we begin to follow the trail of upturned earth and blood spots. Fifteen yards and the trail disappears. My heart sinks and mind races. Did I hit him good? Are we even going to find him? I turn downhill and find a drop of blood, then another, then a log COVERED with blood. I look to my right down onto the irrigation ditch and see my bull lying dead, on the trail!!

37C07ABD-465C-4C79-A5BE-EAA8BDCF0D94.jpeg

  My very first big game animal with a bow is a 6x6 bull elk that my father and I called in together! We celebrate, take pictures, and thank God. After eight hours and four trips, we had ten game bags full of meat. What a truly amazing experience, after five days of seeing absolutely nothing, we hear a bugle and the events that followed were, in my mind, nothing short of magical. Everything worked, from the calls, to the wind, to the shot (which ended up being heart, right lung, and liver). My first elk ran less than 50 yards before expiring on the trail.

  In years prior, and even this trip, I've questioned if I would ever get a shot at an elk. Persistence and a positive attitude go a long way, and having my father by my side for it is something I'm eternally grateful for. The elk woods aren't an easy place to be, but come September, I wouldn't want to be anywhere else.

My father, John and I this past season

My father, John and I this past season

The Western Mountain Hunting Gear List

174B3DD1-A719-43BE-B8EE-0F57533865E4.jpeg

For a lot of hunters, the pilgrimage west is a sacred journey towards the promised land of big game hunting. Venturing away from the comfort of the treestand towards the unforgiving terrain of the western mountains can prove to be a daunting task from a logistical standpoint. With the seemingly endless sea of gear options, it can be challenging to know where to begin. Even the western local that is new to hunting can be overwhelmed when it comes to selecting a gear list. In the following paragraphs I will cover several different hunting options and styles while showcasing the most useful and practical gear for the application. Being predominantly a bowhunter, my experience is catered mainly towards that time of year and style of hunting. 


The most popular and common western archery hunt is by far Elk hunting. Chasing bugling bulls through golden aspen forests with bow in hand is simply something you need to experience. The price of admission is certainly the largest barrier to entry, as most nonresident elk tags are over $600. This is of course not accounting for travel costs, throw in elk hunting specific gear and suddenly you’re in over $1,000. However, by simply budgeting in the months prior to your western adventure, and selecting gear that you NEED, it is certainly a very achievable hunt for the blue-collar hunter. 


There are two general schools of thought when it comes to hunting elk in September: hunting from a base camp, and hunting from a backpacking camp. The first option is, in my opinion, the more productive of the two. Utilizing either a camper, large tent, or something big and comfortable and camping near the truck is a great approach to take. If the area you are hunting doesn’t have elk, its much easier to relocate than if you are five miles deep in the backcountry with a 60-pound pack. When hunting from a base camp and venturing out 2-3 miles to your hunting area, the gear you need isn’t much different from what you’d need for hunting whitetails back home. I’d like to mention one key piece of gear that you DO NOT need to bring: a game cart. You will not be able to use it, and you’ll be upset that you wasted precious space in your truck. One of the largest differences in gear between treestand and western hunting is the clothing. You are going to be hiking several miles throughout the day and if you wear the same clothing as you would on an all day sit in Iowa, you will sweat your butt off! Below is a general list of clothing that will provide warmth, breathability, moisture wicking, and comfort for a September Elk hunt. 

-          Merino or synthetic base layer top and bottom

-          Synthetic or merino calf height socks

-          Lightweight top layer

-          Lightweight, breathable, flexible pants

-          Midweight insulating layer

-          Waterproof outer shell

-          Waterproof, uninsulated boots

-          Warm beanie hat

-          Baseball cap

The key word to clothing selection is LAYERING, or having the ability to add or remove clothing layers based on the activity or weather conditions. As you set out in the morning before first light, the temps can often be below freezing, only to warm into the mid 70’s in the afternoon. It is crucial to be able to adapt your clothing system to the changing conditions. 


Hiking deep into the backcountry with everything you need on your back provides a freedom and solitude that cannot be topped. Hunting from a backpack camp can be very effective when you’re in an area that is holding animals consistently. However effective and romantic the idea might be, this style of hunting poses a very unique challenge logistically. For this style of hunting, we can include early season high country Mule Deer hunting in the conversation as both require almost the same gear. Backpack hunting is a labor of love where the weight of your gear can literally make or break your hunt. The balance between keeping weight to a minimum while remaining comfortable is a difficult line to walk. Below is a basic list of backpacking gear items:

-          Backpacking tent

-          Sleeping bag

-          Sleeping pad

-          Backpacking stove

-          Lightweight pot

-          Water purification system

-          Food

The most important pieces of your kit from a comfort standpoint are your sleep and shelter system. A good, lightweight tent with a vestibule can go a long way when the weather turns bad. In Colorado where I hunt most often, the weather is typically mild in late August and early September, however most afternoons will produce a thunderstorm thus confining you to the walls of your tent. For that reason, it is crucial to spend some money on a good quality tent, sleeping bag, and pad. There are countless tents on the market, and for the sake of not diving in too deep, we can simply set a few guidelines for selecting one. A single person shelter should be in the 2-3 pound range, with one vestibule, and a two person tent should not top five pounds. It is worth looking into a non-freestanding design that utilizes trekking poles. Prior to last season I personally hadn’t considered this, but trekking poles prove the most beneficial when you have your heaviest loads, going in, and hopefully coming out! While you’re hunting, simply leave them at camp supporting your tent. My solo tent is 1.8 pounds without the poles, and that is a very achievable weight number when going non-freestanding. For an early season hunt, a 15-20 degree bag is great. Down insulation is lighter and compresses smaller but can be rendered useless if it becomes wet. Since Colorado early season is typically pretty dry, the choice for me is easy and I go with an 850 fill 15 degree down bag. The sleeping pad is where I personally deal with carrying a heavier item. A good night’s sleep is paramount to being effective while hunting and for this reason, I choose a thicker pad with an “R” value (insulation value) of 4.0. Knowing that your “home base” in the backcountry is one that you can rest comfortably and recover from a hard day of hunting can make all the difference between going home early and filling a tag. 

Adjustments.jpeg


Food and water in the backcountry can be one of the most difficult systems to nail down because both are HEAVY! Save weight here by selecting an ultralight stove and mess kit, not by bringing less food. You are going to be physically exerting yourself every single day and calories need to be considerably higher than normal. A good rule of thumb is to try and get food to two pounds or less per day. I utilize gallon freezer bags to organize my food for each day. Freeze dried meals are a popular option, but can be high in sodium and some simply just taste awful! For this reason, I try to only eat one per day that I have tasted before season to ensure I can tolerate it. Breakfast can be instant oatmeal, meal replacement bars, or cereal pre-mixed with powdered milk. Snacks such as trail mix, protein bars, jerky, tuna packets, dried fruit, and instant mac and cheese are good choices. Dinner will be when you eat the dehydrated meal, as they are highest in calories and won’t weigh you down midday during your hunt. Water purification is extremely important in the backcountry, you do not want giardia. Trust me, I’ve had it and emptying your body of every last solid and liquid from ever available exit for three to five days is not fun at all. Pumps, sterilization pens, tablets, and my personal favorite, gravity filtration systems are your options here. The gravity system I use basically encompasses two water bladders, linked by tubing with an inline filter between them. Fill up the “dirty” bag, attach the hose, hang it in a tree and let gravity do the rest. This system works best when hunting from a stationary camp, but can also be effective by replacing the “clean” bag with a water bottle to filter only the water you need for the day. One vitally important detail that can be overlooked when choosing an area to hunt is locating a water source. Obviously hunting the desert will not provide you with any sources of water to drink, where hunting the high country in Colorado will yield creeks and springs in most mountainous areas. 

Adjustments.jpeg


Hunting gear, although similar to eastern hunting, requires a few specialty items not needed on a whitetail hunt on “the back 40”. A high-quality backpack is an absolute necessity, whether hunting from the truck, and more obviously, from a backpack camp. For a base camp type hunt a day pack in the 1500-2000 cubic inch range is sufficient as long as you also have a meat hauler frame to pack out your animal. You are not going to roll an elk over easily by yourself, let alone drag one out whole. For backpack hunts lasting 1-2 nights, aim for 3000-3500 cubic inches, 3-4 nights, 4000-5500 cubic inches, 5 nights or longer, 5500-7000 cubic inches. As you get into the packs larger than 3000 ci, most quality packs should harbor an internal frame thus allowing for better load carrying capabilities. 


Optics best suited for western hunting vary slightly from those of a treestand hunter. The necessity to glass several miles in some cases deem bigger magnification necessary. A spotting scope, although beneficial, is not required. By simply attaching a QUALITY pair of 10x binoculars to a sturdy tripod, it is possible to glass effectively while leaving the heavy spotter behind. When choosing a tripod, remember that a lightweight tripod will not be as stable as a heavier one, so find a good middle ground. A rangefinder with angle compensation is a definite requirement as many of your shot opportunities will likely come at steep angles where cutting yardage is needed. For high country hunting above tree line where you are able to glass extremely large distances and success could mean picking out an ear flicker from 2000 yards off, a pair of 15x binoculars can prove to be invaluable. In the timber of the elk woods however, a pair of 8x or 10x binoculars are perfectly adequate.


Once you have successfully filled your tag, you have a large task ahead of you. An elk can produce 200-400 pounds of deboned meat, and getting that meat back to the truck from five miles deep is exhaustingly rewarding. There are two basic ways to prepare meat for the hike out: deboning and quartering. Deboning is my personal favorite, as I just do not see the need in carrying bones, just to throw them away later. No matter the method you choose, a high-quality knife is a necessity, whether a fixed blade or replaceable blade knife is chosen is a matter of preference. The benefits of a replaceable blade knife are having the ability to always have a razor-sharp knife without carrying a sharpening stone, however most replaceable blades are thin and do not work well for breaking large joints or performing heavy chopping. Personally, I carry a replaceable blade along with a lightweight folding fixed blade that I only use for the aforementioned heavy stuff. Once you have finished processing your animal, the meat will go into game bags. I recommend a reusable, synthetic bag. With a drawstring closure, breathable material, and better shape retention when full, they provide protection from insects and debris, while still allowing meat to cool quickly. 

The last items are small, miscellaneous pieces that should not be overlooked. A quality headlamp and secondary light source can be lifesavers in countless situations. Two seasons ago, I was fortunate to shoot a nice 5x5 bull about 30 minutes before sunset. Needing to process the entire animal in the dark, we utilized headlamps along with one of the small LED lights that you can get from Harbor Freight affixed to my tripod like a flood light. Needless to say, I will carry that little light in my pack from here on out. Paracord can be used for countless applications from a shoelace repair to hanging meat. Bring 50 feet. Leukotape, duct tape, or athletic tape is great for emergency gear repairs and blister protection. A small roll is sufficient. A basic first aid kit with ibuprofen, super glue, butterfly closures, and bandages should also be in your pack. Firestarter of some kind should also be included, whether you choose a putty, a lighter or matches, or other system. I personally prepare small baggies of shredded paper coated in Vaseline. They’re lightweight and burn long enough to act a suitable tinder. 

 
When heading out on your western adventure, the items you bring can mean the difference between being comfortable and miserable. The best way to hone your system is with experience, and learning what you do and do not need will eventually result in the lightest possible pack for whatever hunting style you choose. Comfort is relative in western mountain hunting, and entering the hunt knowing that you will be mildly uncomfortable is important. As your experience increases and your system evolves, you will learn where you can skimp and which items simply need to be in your pack. By building and testing your gear kit in the offseason, you will enter hunting season confident and prepared for the hunt, ready to make memories that will last a lifetime. 

A105B676-7841-4187-84FA-719B9B8A5D4C.jpeg

Fitness For Bowhunters

Adjustments.jpeg

For many hunters, September is the time when the rubber meets the road. A full year of waiting, wishing, and reflecting all come down
to this spectacular time that we as bowhunters get to turn our legs loose on the beautifully rugged landscapes of the west. The first ascent from the trailhead to the timberline is always breathtaking, either figuratively or literally. How you prepare leading up to hunting season can really mean the difference between an enjoyable adventure, or getting your butt kicked. In the following paragraphs, I’ll be covering some of the elements of my personal
fitness routine in preparation for my western archery hunts. There are many different perspectives on fitness and hunting, and my intention of this article is not to argue it’s necessity, but to simply outline my personal outlook. Think of it this way, if you want to win a Nascar race, you don’t need a racecar, but
it sure helps!

For the past sixteen years of my life I have been bowhunting out west, nine of those I have been a certified personal trainer. It was easy to connect the dots as to how being in better shape can equate to success afield. One specific example of when I wasn’t in good enough shape comes to mind. It was 2pm, my father and I were at camp shooting our bows when suddenly a bull elk started absolutely going off up on top of the hill, bugling nonstop for over ten minutes. We threw our camo on and split up. The bull was working the ridge from left to right, dad went left, I went right. The hillside was gradually steep and extremely thick with timber. As I gained elevation, hurdling down trees and sprinting through the openings in the timber, finally reaching the top, I was gassed! The bull had already crossed in front of me at what I guessed to be 45 yards. I had missed my chance because I had to stop in order to catch my breath. Lesson learned.

There are three key areas of fitness that tie into hunting success; cardiovascular endurance, muscular endurance, and flexibility/balance.
Each of which can be easily improved with consistent effort in the months leading up to opening day. When it comes to my personal program, I begin tailoring my gym efforts to hunting around late May. Throughout the year I typically train six to seven days a week with more of a focus on building muscle. I will
tell you right now, muscular strength has VERY LITTLE carry over into hunting. For that reason, come July, I cease all muscle building workouts to add in more time for the aforementioned “big three”. The following program will show exactly how I achieved my best hunting shape ever. If you decide to follow this program, be sure to consult your doctor first, as all exercise programs carry
some sort of risk depending on the individual.

June 1st, the warmth of summer has arrived,
signaling the time when cardiovascular workouts need to become a priority. On average, cardio improvements can be felt in about 21 days with consistent training. One
of my favorite starter cardio workouts is to simply run a mile at a comfortable pace (5.0-6.0mph) 2-3 times per week for two weeks. After the two weeks have passed, time to step it up. The next workout I typically utilize is one I call “3 in 30”. Three miles in 30 minutes, on the treadmill, that means a 6.0 speed
throughout. I will perform this 3-4 times per week for two weeks. At this point, we are into late June and should feel substantially better during these workouts than we did four weeks ago. Our foundation is now built, and we can
continue progressing.

Before moving forward with the program, I’d like to touch on the flexibility portion of the big three. Flexibility training is boring, painful, and just not enjoyable. However, when it comes to injury prevention, proper body mechanics, and overall physical efficiency, there is no substitute.
For those reasons, some sort of flexibility training should be performed DAILY! Prior to your cardio and muscular endurance workouts, spend five to ten minutes foam rolling. A foam roller is inexpensive, and there are tons of how-to videos out there. The main objective is to roll every muscle group you can as often as possible. Upon completing your workout, spend 10-15 minutes stretching the worked muscles slightly past the point of mild discomfort. Whatever you do, DON’T SKIP STRETCHING! With the increased demand you’ve recently placed on your body, the natural reaction is for it to increase tension on the newly recruited muscles, resulting in loss of mobility, higher risk of injury, and decreased efficiency. Stretching will keep you mobile, speed up recovery time, and reduce soreness.

Muscular endurance is the most fun of the big three to train. We all love hitting the weights in comparison to doing cardio or running. There
are two main muscle groups to focus on for improvements in hunting performance; lower body and core. Sadly, the “beach muscles”, such as arms, chest, shoulders, and back just don’t give us enough in return to spend our precious time on them in preparation for hunting season. But since I love muscle building, I’ll
typically add one day of upper body training per week, for my own selfish satisfaction. You might’ve caught it earlier, but this program is very lower body intensive, and for good reason! When it comes to hunting out west, our legs carry us everywhere, climbing steep hills, covering sometimes double-digit miles, and
hopefully carrying heavy packs! Now obviously we can’t train our legs every single day and expect them to improve or recover, so this is where our cardio, balance, and core training come in. A typical week of workouts will look like this:

- Monday: Lower body plyometric and athletic
training

- Tuesday: Core and balance training

-  Wednesday: Cardio and flexibility

- Thursday: Lower body muscular endurance training

- Friday: Cardio and flexibility

- Saturday: Core and balance training

- Sunday: Cardio and flexibility

This is of course, the most advanced and difficult training setup, and for it to work, you need to be eating healthy, sleeping at least
seven hours, and stretching religiously. A good way to decrease the workload is to shorten the workouts and combine them into a few days per week, being sure to get your 3-4 days of cardio in. If you do choose to utilize this method, perform weight training before cardio.

Let’s take a look at what kind of exercises will be most beneficial to us. The easiest way to choose exercises to insert into our program is to simply think about the movements we perform while hunting! A few of my favorites for lower body are lunges, box step ups (both forward and
laterally), squats, and jumping movements such as box jumps. All of these exercises will simulate the activities we perform throughout the day on the mountain in some fashion. Try to keep the reps high (15-20) and the rest periods around 30-60 seconds. Core exercises are simple in most cases, planking, rotational movements, and crunching movements are all great. One
muscle group to not neglect is the lower back. These are huge muscles that stabilize our spine under load, so basically what we ask the most of while hunting! Hyperextensions and deadlifts with lower weight/higher reps are two excellent choices. Balance exercises can sometimes seem boring, but if you’ve ever been pinned down by a critter mid-stalk while one foot is in the air and the other is standing on a log, you’ll appreciate the importance. One of my favorites is to stand on a Bosu ball, with the flat side up, on one foot. The other foot will be moving around the ball, tapping the floor, in front of you, to the side, behind, and back across to the other side. Single leg hops are another great balance worker, simply hopping forward, backward, and laterally while standing on one foot.

Adjustments.jpeg

It’s now early July, your cardio and weight training are in a good spot. Time to really ramp up the cardio. The “3 in 30” will become “3 in
as fast as you can”, Perform this a minimum of four times per week, striving to shed 15-30 seconds off your time each workout. By this time, its warm outside and out west, scouting season is in full swing. Get out your hunting pack, load it up with 30-50 pounds and hit the trails! A good 2-3 hour hike once a week is
a solid addition to the program. When I achieved my peak fitness level, I was hiking and scouting every weekend, averaging 15 miles per trip. In the instance you don’t have the luxury of living out west where mountains are available, get on the treadmill and crank up the incline as high as it will go, walk at 2.0-3.0 mph for at least an hour. Once a week I also utilized this method with 90lbs on my meat hauler frame. I’d walk for 10 minutes, rest for two minutes, until I reached an hour, BRUTAL!

By putting our body through constant strain in the months leading up to the hunting season, we are aiming to give ourselves an advantage.
Remember, the animals we hunt climb mountains as part of their daily routine! I
remember last season, hunting elk, we got on a set of tracks that went up an impossibly steep mountainside, eventually connecting to a game trail that ran up and down that mountain. I’ll tell you right now, training hard will not make
it easy to run up mountains or keep up with a herd of elk, but it will make it EASIER than if you don’t train at all. We spend a lot of money, time, and energy preparing for what could be one single opportunity at filling a tag. If
you ask me, I want every possible advantage I can get to capitalize on that. Archery season will be here and gone before we know it, so why not make the most of it by training your body to be able to go further, hunt longer, and recover faster? The game we pursue sure don’t care if you’re out of breath, in fact, they count on it!

Adjustments.jpeg


The Other Big Game Hunt

IMG_1606.jpeg

For many, the dream of heading west to chase big game with a bow is the ultimate goal. Giant mountains, vast open prairies, new animals, and grand adventures await. Many hunters unfortunately never get to experience these amazing places due to the hefty price tag that often comes with a non-resident hunting
license. Most elk tags are upwards of $650, and on top of travel expenses and missed work days, that just isn’t an option. For those of us that live in the “wild west”, our archery seasons are often filled with thoughts of bugling bulls and velvet bucks. All of us, westerners and non, are forgetting one key big game option that often gets overlooked, and for the life of me, I will never understand why.

The Pronghorn Antelope is an iconic staple of western big game. Having survived since the time of prehistoric mammalian predators (North American Cheetah), they are certainly built to survive, as they aren’t extinct like the aforementioned predator that hunted them! Archery Antelope hunting is vastly underutilized as an early season hunting pursuit. With a significantly lower tag cost, plentiful animal densities, and delicious meat, it’s quite perplexing that they aren’t even on the radar of most archery hunters. My hope, however detrimental to my archery Antelope hunting solitude it may be, is to shed some light on just how amazing and attainable an Antelope hunting adventure can be.

Okay, you took the bait and picked up an archery tag for an area you’ve never been. Where to start? From a gear standpoint, it’s pretty dang simple to hunt Antelope with a bow. You’ll either be camping in your vehicle or right next to it, so no need to get fancy there. You’ll also likely be no more than a mile from the truck at any point, so no need to get fancy on your backpack or clothing either. However, there are a few key pieces of gear that will make your hunt considerably more enjoyable.

Let’s start with your clothing. Archery Antelope seasons open in mid-August across most western states, so that means 90-degree temperatures. Your clothing should be lightweight, very breathable, and fast drying. I love a synthetic hooded base layer due to the ability to keep the sun off of your ears and neck. Footwear should be light and flexible, but also durable (you’re gonna kick a cactus or two). Knee pads are a MUST! I use a simple volleyball knee pad, worn over my pants. You can keep them at your ankles until needed, thus doubling as a gaiter to keep the pokeys out. A good binocular chest harness is also a necessity. This is big country and our eyes need the help. I recall a stalk I was on this past season where I was belly crawling towards a bedded buck through a cactus “mine field”. Whenever I would stop, my bino harness protected my chest from the thorny monsters that wished to impale me. A small, low profile backpack comes in very handy on longer stalks or when walking to far away glassing points. I use an Eberlestock H7 Dagger hydration pack, but any small hydration pack will do the job. It should fit a 2-3-liter bladder, a few snacks, and a rain jacket. That’s about all you will need to carry.

Antelope live in a vast, wide open prairie often devoid of any vegetation taller than your knees. They also are equipped with eyesight comparable to your 10x50 binoculars. I want you to imagine trying to stalk into bow range of your buddy, who’s holding binoculars while standing in the middle of a giant parking lot. That’s what you’re dealing with here, sounds easy right? You now see why most “smart” bowhunters sit on a water hole inside of a ground blind. But we aren’t that smart, and there’s nothing more fun than spotting and stalking these critters. The point I’m working towards is: your shot opportunities will likely be considerably farther than you’d have at any other big game animal. Your shooting ability and bow setup need to cater to this.

In my experience, the average spot and stalk shot opportunity at an antelope is around 70 yards. I’ve had closer, but more often, I’ve had farther. In order to increase your chances of success, you need to be proficient out to 80 yards or more, WITH BROADHEADS! This means practicing all year, knowing how to tune your bow, and also having great situational ethics. Ethical shot distance is a can of worms that I will not be opening in this article, I’m just stating the facts of Antelope hunting. In my opinion, being proficient means that you can shoot arrows in a 4-6” group every single time in order to call that your effective range. Okay, you’ve established your effective range is adequate for the task at hand, that means you’re likely shooting a slider sight, and a 10-15” stabilizer. Stabilization is key out at the longer distances, and with the amount of wind you’ll be dealing with, it almost becomes required to slow down bow movement at full draw. Arrow setups are totally up to the shooter and as long as your bow will tune and shoot out to longer distances, you’ll be fine. Broadheads are also very personal, but an Antelope is simply not as tough as a Mule Deer or Elk, so mechanicals are a feasible option.

You’re shooting great, have your gear dialed in, and are headed out on opening day. A large cooler full of frozen gallon water jugs sits behind you along with 5-8 non-frozen gallons of water. You reach your hunting area, golden waves of grass, rolling hills, and a seemingly endless horizon await you. Upon hitting the dirt road, you instantly spot a nice buck several hundred yards off! You check your map, only to find out he’s on private land. Public land Antelope hunting is a chess match, or should I say a checkers match. Having a good, accurate, mapping application is a must-have in order to sort through the checkerboard of public and private land. Some private parcels have no fence, so knowing where you’re standing is vital to remaining legal. Driving away from the forbidden buck you soon find another group of antelope, a buck among them! As your truck comes to a stop, you’re greeted by every set of eyes in the group, shortly followed by a hasty departure of every last one.

The above two examples are just a few of the fast lessons you will learn on your first day, with many more to come. The best part of Pronghorn hunting is the sheer number of animals you will see. It isn’t unheard of to see over 100 Antelope in a single day. The challenge isn’t in finding your game like Elk and Deer, but in STALKING your game. That’s why it’s so fun, if you blow a stalk, just move on to the next group. A good day of Antelope hunting can result in 5-10 stalks! You’re probably wondering why you don’t just capitalize on one and enjoy the beautiful triumph of success. Believe me, by day two or three, you want nothing more, but due to the Antelope’s annoying instinct to not be shot, they avoid the possibility of that happening as best they can. Another great thing about hunting Antelope is that they’re active all day long. So it just might be you that ends up “bedding down” midday, not them.

Adjustments.jpeg

A typical day of hunting is as follows: you wake up 30 minutes before sunrise, eat a quick breakfast, and hop in the truck. Most areas where Antelope live are a maze of roads, both gravel, and two tracks. You drive around, looking for antelope until you find some in an approachable (this will become easier to determine with more failed stalks) position, then park and continue on foot. The number one rule of parking before a stalk is to ensure your vehicle is out of their sight. Rifle hunters tend to “bend” the rules on how close to the road you can legally shoot, and this results in the Antelope learning that trucks mean their buddies end up dead. Once parked out of view, you begin moving towards the Antelope. If you are out of their sight, RUN! Once you approach a point where they can see you, get down on all fours or even onto your belly. One thing I’ve learned about stalking antelope is that if you get lazy for even a short stretch, they will see you and be gone. If you think you might be visible, simply don’t risk it. You’ve managed to close a lot of distance, crawling up to a small rise, you peek over to see your target buck has bedded down facing away from you. PERFECT! You range, only to be surprised by the fact that the buck is still 165 yards away. With no point of reference, it’s incredibly difficult to guess yardage so a good rangefinder is a necessity. Crawling forward on your belly, arrow nocked, bow setting on the ground on your bow-hand side, you pick yourself up with your forearms, pull yourself forward as your toes aid in the progress, then slide your bow forward. 12 inches at a time, for over an hour you repeat this, eventually closing in to 74 yards, it’s time to make it happen. As you rise to your knees, the buck whips his head around, then rises to his feet and bolts. You’re dripping sweat, have cactus thorns in your elbows, and have to watch that dang buck run away for several miles. Antelope have a field of view of about 310 degrees. Welcome to the spot and stalk game. Some stalks consume several hours of your day, while others are over just as quickly as they started. The key is to find an Antelope in a vulnerable spot, often meaning the terrain on your approach allows you to remain out of sight until within bow range.

Two seasons ago I was hunting an OTC archery tag in my home state of Colorado, my last day was about halfway over. As I sat on the roof of my truck glassing, I spotted a buck chasing two does about 500 yards away on top of a small plateau. If I drove down the road another 300 yards, I’d be able to park out of view, walk through a large, low draw, and crawl up to the lip of the plateau they were on. As I arrived at the base of the plateau, I crouched down, and inched up to the lip. As soon as the top revealed itself, there they were, less than 100 yards away! Still totally unaware of my presence, the two does were walking in my direction, the buck was about 50 yards behind them. I nestled into a yucca bush that was about mid-thigh height, and got to my knees, bow standing vertical in front of me resting on the ground. I dialed my Spot Hogg double pin to my predetermined guess of how close they may come, 67 and 79, for each pin. The two does continued working towards me as the buck meandered around further up on the top. As the does approached the lip, now directly in line with me on my right, I ranged, 41 yards! They spotted me, and began to stomp and snort. This got the buck’s attention and he was now walking dead at me! I ranged the buck, 86 yards, then 79 yards, my bottom pin distance. I got ready, ranged one last time, 67 yards, my top pin distance! As the buck turned broadside, I drew back, settled my pin, and released. As my arrow left the bow, the buck jammed on the accelerator. My arrow arrived, only to meet the prairie dirt where the buck once stood.

Although unsuccessful, it’s these kinds of encounters that keep me coming back every single season. I can think of so many amazing stalks that almost came together, but one small variable forced the outcome in the Antelope’s favor. In the game of spot and stalk Pronghorn hunting, you need to be perfect. Everything has to come together, the terrain, the animal, your stalk, the wind, and of course your shot. If you want to put an Antelope on the ground with your bow the first year you chase them, sit in a ground blind. If you want to improve your stalking ability, topography interpreting skills, and hunting instincts, get out there and test yourself by hunting arguably THE most difficult game animal to take down with archery equipment when hunting spot and stalk. It isn’t the physicality that will break you down, it’s the mental battle of “if at first you don’t succeed, try, try again”. The plains of the west will provide you with solitude, breathtaking sunsets, and lessons in humility that are tough to beat, and if nothing else, those things are worth the price of admission.

3D2E6B88-D6DD-45B1-A2FD-3CE97ADC7CE5.jpeg


How To Build a Perfect Arrow

Adjustments.jpeg

One of my favorite aspects of archery is the ability to customize my setup. I’m a gear junkie, tinkering and trying new products has always been fun. Experimentation is the best way to see how a setup can help or hinder your accuracy, and is an excellent confidence builder. Arrows and arrow setups are as widely debated as the age-old Ford vs Chevy conversation, and it usually comes down to everyone being wrong. To keep the conversation constructive and informative, I’ll touch on my personal setups that I’ve ran over the years, their pros and cons, and then dive deeper into the actual process of building those setups.

As I stated in the above paragraph, I love to try different setups. Over the past year I have built, shot, tested, and hunted with five different arrow configurations utilizing three different shaft models. Throughout that time period I have honed in on certain characteristics that I like to have more than others. For example, I was blessed with T Rex arms, so shooting a 27.5” draw length, I will never see arrow speeds in the 300s. However, I decrease the importance of speed and increase the importance of amount of range I can get out of my sight tape. I practice a LOT in the offseason, and I enjoy shooting long distance. If my sight can’t dial out past 100 yards, my arrow is too heavy for my offseason wishes. Come hunting time, that distance becomes less important and penetration becomes paramount. My ultimate goal is to find an arrow weight that is conducive to both of my aforementioned wishes.

There are three main factors that affect my choice of arrow specs. First up is performance in the wind. Second, penetration potential, and third, consistency. Let’s dive deeper into what makes up these factors and how to build an arrow that caters to all three harmoniously.

 Wind performance is vastly important for a pile of reasons, from proper arrow flight to the distance you need to hold off target in a crosswind. Plain and simple, the larger the surface area, the more effect wind will cause. It is for this reason that I choose a micro diameter shaft. Vanes play a big role in arrow stabilization, but also dictate how much the wind can affect arrow flight. For a hunting setup, a good guideline for fletching is “as little as possible, as much as necessary”. The best way that I have found to accomplish this is by selecting a low-profile vane in a four fletch configuration. I like a vane with a length in the 2-2.5” range. This will provide adequate steering for fixed blade broadheads, but also cut down on wind resistance, resulting in better arrow flight in windy conditions. When it comes to penetration, it all comes down to surface area again, the more resistance, the more force is needed. This is another reason I like the micro diameter shaft. Paired with the proper vane configuration that creates proper arrow flight, the arrow will not waste energy by entering the target crooked. Point weight is one specification that is often overcomplicated. FOC, or Front Of Center percentage, is the latest buzzword in arrow building conversations. The idea is that by adding an abundance of weight to the front of the arrow, the rear is basically “along for the ride”. Proper arrow flight will always be paramount in my setup, and my point weight is essentially used to get my overall arrow weight to where I want it. A solid goal for FOC is between 12-15%, thus leaving you with more arrow options since the spine of the arrow won’t need to be as stiff as with a higher FOC setup. Consistency is a very broad factor to work from, and this case, it does cover a lot. I start my hunting arrow builds with a premium grade shaft. This simply results in tighter tolerances in straightness and weight from one shaft to the next resulting in less work being needed on my end in the build process. With higher quality shafts it isn’t too hard to get a full dozen arrows to weigh within 3 grains of each other across the entire batch. This of course results in more CONSISTENT groups at the range.

We’ve established a pretty good baseline of components, shafts, and vanes; now it’s time to build! You will need a few tools in order to build your arrows, some will come from archery sources, others from the hardware store. Below is the complete list of tools and materials needed:

-  Arrow saw

-  Fletching jig of choice

-  Arrow spinner

-  Arrow scale

-  Insert glue or epoxy depending on components

-  Super glue (Ultra Gel Control)

-  Isopropyl alcohol

-  Q tips

-  Silver sharpie

-  Medium grit sand paper (220 works well)

-  Small wood block

-  Mouse pad

Start off by removing the nocks from your bare shafts so you are left with the plain carbon shaft. Using your arrow spinner, slowly roll the arrow, watching one end for wobble, then the other. Mark the side that wobbles the most with your sharpie, this could be one side or both may be equal. The idea is to use the straightest portion of the arrow shaft. Next you will cut the shafts to length, for the ones you marked on both sides, cut off equal amounts from each. Now move on to the final step before component and vane installation, squaring the ends. This is the single most important step to improving the accuracy capabilities of your arrows. You’ll need a small block of wood or other flat object to place behind your sand paper. With the arrow on the spinner, place the block vertically at the edge of it, and press the arrow into the sand paper (see photo). Give it a few twists and move to the other side.

IMG_2458.jpeg

You’re now ready to fletch. Take the sand paper and lightly scuff the shaft, then wipe down with a paper towel soaked in alcohol. Do not touch the cleaned surface as the oil from your fingers will decrease the adhesion of the glue. If you chose to use an arrow wrap, place it on the mouse pad, align the arrow with the edge of the wrap, press down and smoothly roll the shaft over the wrap. Repeat your sand paper and alcohol step on the wrap. Different vanes require different methods of prep, so I won’t get too detailed here, simply make sure the bottom surface of the vane is clean. Apply a thin, uniform bead of glue and let your fletching jig do the rest. I like to apply a small dot of glue to the front tip and back tip of the vane as well. After the glue is fully dried, weigh each shaft, with nock installed. Sort from heaviest to lightest. If you chose high quality shafts, the range should not be larger than 3-6 grains. Next gather your inserts, outserts, or whatever front-end components you’re using and weigh them as well, sorting from heaviest to lightest. Upon installation, pair the heaviest arrow shaft with the lightest components, lightest arrow with heaviest components, and so on. Using this exact system, I have been able to build arrow sets that had a variance of only 1.3 grains across the entire dozen.

The arrow building process I use, much like other aspects of my archery setup practices, is likely overkill, but at the end of the day I know that my projectile is as perfect as humanly possible. Knowing your setup is perfect allows you to focus on your shot execution and skill because, well, you know it isn’t the equipment that missed the shot! Knowing that you put in the effort and time to build perfect arrows will pay dividends both on the range, and in the woods.  Having confidence in your setup will bring you success and a feeling of accomplishment unlike any other when it all comes together and your tag is filled come hunting season.

IMG_1641.jpeg

Hybrid Archery

Adjustments.jpeg

            We wait 11 months for that one magical stretch of time that our passion for bowhunting is allowed to be exercised. Crisp mornings, autumn colors, and if you’re lucky, an opportunity to harvest one of the wild game animals that we love. Then, just as it came, it’s over. We return to civilization, the hunting gear goes back in the closet, and for many, the bow goes into the case where it will reside in neglectful solitude until August. But for a rapidly increasing number of bowhunters, that bow is getting to stretch its limbs all year long. This is often referred to as hybrid or crossover archery.

It goes without saying that there is simply no substitute for that moment at full draw with an animal in front of you. However, archery is so much deeper than carrying your bow around for a few weeks of the year. With numerous events catering to the hybrid archer continuing to emerge, it has become easier than ever to simulate the hunting experience all year long. Simply put, hybrid/crossover archery is the act of adapting your hunting bow setup to handle more like a target archery setup, allowing you to be more accurate in offseason practice. There is no denying that when you hit the center, you enjoy shooting a lot more than when you don’t! So, the question remains, why would you want to change your hunting setup just to practice in the offseason? The answer is simple, ACCURACY! The more you’re able to practice, and practice effectively, the better your shot execution will become. Sure, you can shoot your hunting setup in the offseason, but take it onto a 3D course, or even a Total Archery Challenge (totalarcherychallenge.com) or Mountain Archery Fest (mountainarcheryfest.com) course, and you’ll soon find that you’re leaving a lot to be desired!

Today’s hunting bows have come a long way from those of years past, higher let off, more efficient cam systems, and more stable riser and limb designs that produce nearly no hand shock. That being said, if you look at a hunting bow setup next to a target bow setup, you won’t find a lot of similarities from an equipment standpoint. Target bows are considerably longer axle to axle, and are set to lower poundage for the shooter. Target sights typically house a single pin, or magnified lens with a spot, resulting in a cleaner, more precise sight picture. Target arrow setups are considerably lighter than most hunting setups because you don’t need to worry about breaking the shoulder blade of a rubber deer target! The most noticeable difference is the stabilizer lengths. We’ve all seen the target archers with 30” front bars and either a rear V bar or rear offset bar setup. Some hunters don’t even have a stabilizer on their bow.

Where to begin? The number one accessory to consider changing is your sight. A fixed five pin is the most popular for most hunting applications. The multiple pins provide an efficient way to be prepared for any shot within the pin ranges you have set. But what happens when you need to shoot between pins? Most archers don’t feel nearly as confident when the shot requires pin gapping or holding high or low. The natural tendency is to hold dead on. That is where a single pin slider sight comes in. This style allows you to dial to the exact yardage you’re shooting. Say there’s a 3D elk target at 56 yards, with your fixed pin sight you need to hold either high with your 50 or low with your 60. At that distance a few inches of incorrect holding height can result in nearly a full yard of impact point drop! With a single pin slider, dial to 56 and put your pin right where you want to hit. With fewer pins in your sight picture, (the view at full draw through your peep) it will appear much less crowded as well, allowing your brain to more easily process the shot without distraction from additional pins. And we can’t forget to mention the additional yardage you can get out of a slider. Where
your pins stop at 60 yards often on a fixed five pin, you can likely have a pin all the way out to or even past 100 yards with a slider. At a Total Archery Challenge event a few years ago, I was faced with a 107-yard uphill Dahl Sheep target. I was able to dial to that distance, hold dead on and walked away with a nice shot that hit in the vitals.

So, you’ve saved up for a few weeks and purchased your single pin slider sight. You’ve been shooting longer distances and making some great shots, but it feels really difficult to keep your pin on target. Your pin float pattern is HUGE, and you find that target out there at 80 yards looks awfully small. The next change to make is to your stabilizers. By simply increasing the length of your front stabilizer you can exponentially improve your accuracy by tightening pin float, and slowing down bow movement. A great length for a hybrid archer is a 12” bar. This length will adequately accomplish the above two tasks and, come hunting season you might find yourself keeping it on your bow! Increasing the length of lever will greatly improve bow balance and tighten the pattern of your pin floating on target at distance.

With the above improvements, you will likely find that your accuracy and effective range in practice have both skyrocketed, but what if you could make both even better? One of the easiest ways to increase your accuracy and consistency is to decrease the size of your peep. By matching the size of your sight aperture perfectly, you ensure a consistent, centered position of your pin every single shot. For a hunting application, the objective is to get as much light to our eye as possible since dawn and dusk are when the critters come out in most instances. In a target or practice environment, this isn’t the case, so its perfectly acceptable and practical to decrease peep sight size. Say you’re shooting a 3/16” peep for hunting, going to a 5/32” or 1/8” peep for target shooting is an excellent idea. Now your peep perfectly lines up with the outside ring of your sight housing and you have created a “tunnel of accuracy” from the target directly to your eye.

It’s early June, you’ve been hitting the range and the local 3D course once a week and have been POUNDING bullseyes! But in the process, you’ve managed to miss a few times as well. Your dozen hunting arrows are now a slightly less assuring seven survivors. Its decision time, do you buy more hunting arrows to shoot at rubber deer or do you build a new set of arrows specifically for target shooting, allowing your hunting arrows to remain pristine and perfect for your moment of truth come September? For me, the decision is simple. I downgrade one step from my hunting arrows, and build designated target arrows. For example, if you hunt with Gold Tip Hunter Pros, your target arrows would be Hunter XT’s. With less demanding weight and straightness tolerances per dozen, they are about $65 cheaper, making it a little easier on your wallet when you accidentally hit a rock. Most arrow models are offered in cheaper, looser tolerance options. The way to go is purchasing bare shafts. This way you can build them to be just as you want. By following a few simple steps, you can actually improve the grade of the arrow back up to the better model. I’ll cover arrow building in detail in a future article. Fletching options are plentiful, and without the need to steer a broadhead, you can decrease the size of the vane you are running, thus improving clearance and decreasing facial contact. A short, low profile vane in a 4 fletch configuration is my go-to for 3D and target shooting. Point weight can be decreased to aid in flatter trajectory since we aren’t worried about momentum or kinetic energy in this application. Be sure to check the arrow spine chart that corresponds with the arrow you choose, as changing point weight may change the desired spine of the arrow.

You now have a designated setup custom built to help you get maximum accuracy and efficiency out of your hunting bow in target applications. You’re shooting great, and feel extremely confident as late August turns to September. Your form and technique are the best they’ve ever been simply because you’ve been working on them all year! It shouldn’t come as a surprise if some elements of your target setup may just find themselves staying on your bow as you hit the woods this coming season. Hybrid archery is a great way to achieve the best possible accuracy from your hunting bow. 3D targets force you to pick a spot, offer a chance to shoot on uneven terrain, and push past your comfort zone of effective distance. All these elements will provide you with an edge when it’s crunch time and that tag in your pocket wants to find its way onto the antler of the game you’re pursuing.

CC731D6C-CB48-4A7E-B7AD-D382F093A321.jpeg

Stabilization 101

IMG_1639.jpeg

You’re hiking up the face of an aspen covered mountainside, wind blowing in your face, shadows of early morning still long and looming. Upon reaching a small meadow you catch movement on the far side of the clearing. A 6x6 bull elk is feeding on the edge, unaware of your presence. Adrenaline surges through your veins as you ready an arrow in preparation for the shot. Full draw comes and goes like a
black cloud, a flash of tan disappears into the distant timber as you see your arrow stuck in the ground, devoid of blood. What happened? If you’ve spent any amount of time bowhunting, you can relate to those moment at full draw when everything seems to leave your mind and instinct takes over, often leaving no
room for mental aptitude or memory retention. Back to the drawing board. 

As the season comes and goes, you’re faced with another long offseason to reflect on what could’ve been. In your practice sessions you notice that holding your pin in the middle is not always easy, any wind and you find yourself being blown completely off target. It becomes clear that the 3” long rubber dampener on the front of your bow is not helping you. Enter the stabilizer conversation. For the context of this article, we will be discussing hunting applications only. 

Bow stabilization is one, if not THE most underutilized elements to improving
accuracy. Without changing the tune of your bow or your point of impact, it is the one true “plug and play” piece of equipment to help you hit in the middle more often. Where to start? We know that target archers have crazy long
stabilizers on their bows, and frankly, that just won’t work in the woods. However, venturing away from the tiny rubber “stabilizers” of the 90s and 00s you will find a variety of practical lengths that are perfectly at home in the wild places we love so much.

The best starting point is to grab your bow, with no stabilizer, using perfect grip
technique, and  watch what it does when
you loosen your grip. Its going to either tip forward or backward naturally based on the design of the riser and limbs. Let’s take my bow for example, a Hoyt Carbon Defiant 30. When I have no stabilizers, the bow naturally wants to
tip back towards me. This isn’t ideal for the most efficient follow through and pin float. As I add a front stabilizer, with the proper amount of weight (we’ll address that later) it remains level as I relax my grip. Perfect. A slow,
gradual forward lean is also ideal. Now, what length bar gets us to this perfect balance point?

The best advice I can give is to get the longest bar you can comfortably hunt with. Different hunts require different lengths, but we can
always find a middle ground if your hunting terrain changes throughout the seasons. A 15” bar is right at home in the high country, and out on the open plains, but may be too cumbersome to maneuver into position on a cruising buck from a tree stand. Remember, the longer the stabilizer, the better the balance.
You don’t see tightrope walkers holding 3-foot-long sticks to help them balance. Longer lever, better balance, slower pin float. Another advantage to a longer bar is the ability to run less weight. One of my favorite quotes about
the backcountry is “pounds are pain”. You want the lightest setup possible.

Figuring out how much weight to run on the end of your bar often seems like putting on a blindfold and throwing darts at the board, but
there’s certainly a system that can be followed to find your recipe. Start with one ounce, do your grip test, does the bow achieve the desired result? If so, you’re done, if not, add another ounce. Once your bow performs the neutral or
slow forward lean its time to shoot some arrows. Get to a distance that is near the far end of your max range, 40-60 yards is a good starting point. Come to full draw, and get your pin in the center of the dot. Does it hold steady or
move erratically? If the latter is the case, add weight until the movement slows. This may be one to six more ounces of weight! You know you’ve overdone it when 1, your pin begins to drop out the bottom of the dot, and 2, when your front shoulder begins to rise at full draw. Once you’ve found the sweet spot,
make sure that your grip test results are still desirable. If the bow leans forward too rapidly, you have two options, get a shorter bar or add a back bar.

A back or side bar as it is often referred to can take your game to the next level. One of the biggest benefits is having the ability to make your sight bubble “self-level”. If you’ve spent time shooting on side hills or steep up or downhill shots it seems that your bow feels level, but then you check your bubble only to find it smashed all the way to one side! A
back bar can be set up to make balancing your bow in the lateral plane much easier, especially with a quiver full of arrows. Offset brackets make mounting and adjusting your back bar much more customizable than if your riser has a
straight rear mount. Choose one that has 1-2 planes or directions of adjustability.  Let’s go back to our front and back plane from the above paragraph first. Start with your offset bracket pointing your back bar straight back, parallel with the front bar. Choose a length that is comfortable to carry and maneuver, I like one that is 1-3” shorter than my front bar. Begin adding weight until your bow achieves the
neutral or slow forward balance from our grip test. Now let’s move to the lateral plane. To start, attach your quiver, fill it with one less arrow than it will fit (you’re going to be shooting one!) and come to full draw. Close your eyes for a second, when you open your eyes, you’ll likely see that your bubble level is not centered. Let down without shooting and begin adjusting your offset bracket away from the riser until you repeat the above test and find
your bubble in the center. Now, go hit the range, push past your comfort zone and you’ll likely find your pin is staying in the center longer and your shots feel much cleaner.

When it comes to bowhunting, the odds are stacked against us. The game we pursue spend their entire lives with the sole purpose of
avoiding getting killed! Any advantage that you can put on your side is one that you should take. Stabilizers help in many ways: creating a more desirable follow through, increasing your ability to hold in the middle (especially in
windy conditions), decreasing vibration and bow noise, and even giving you a handle to hold onto when you’re carrying your bow on your shoulders. So, take the time this offseason to dive into your setup and experiment with your stabilization options. I promise you’ll hit the woods next season with increased confidence in your moment of truth!

IMG_1551.jpeg