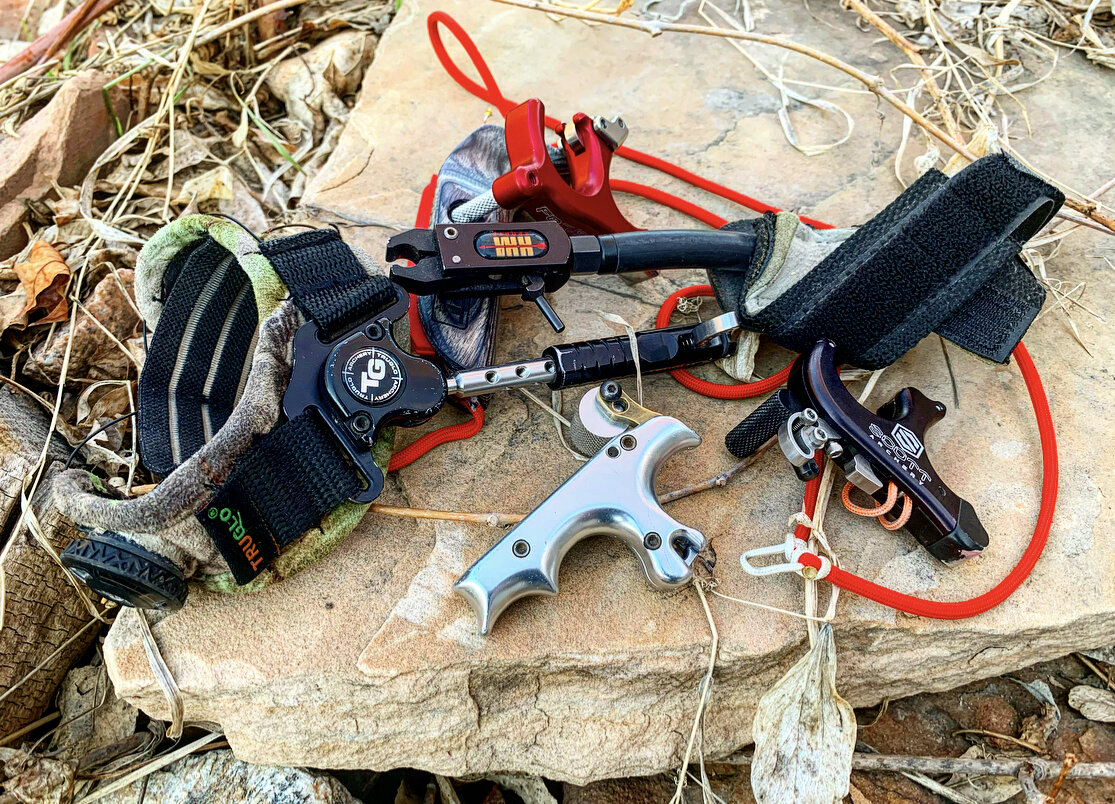
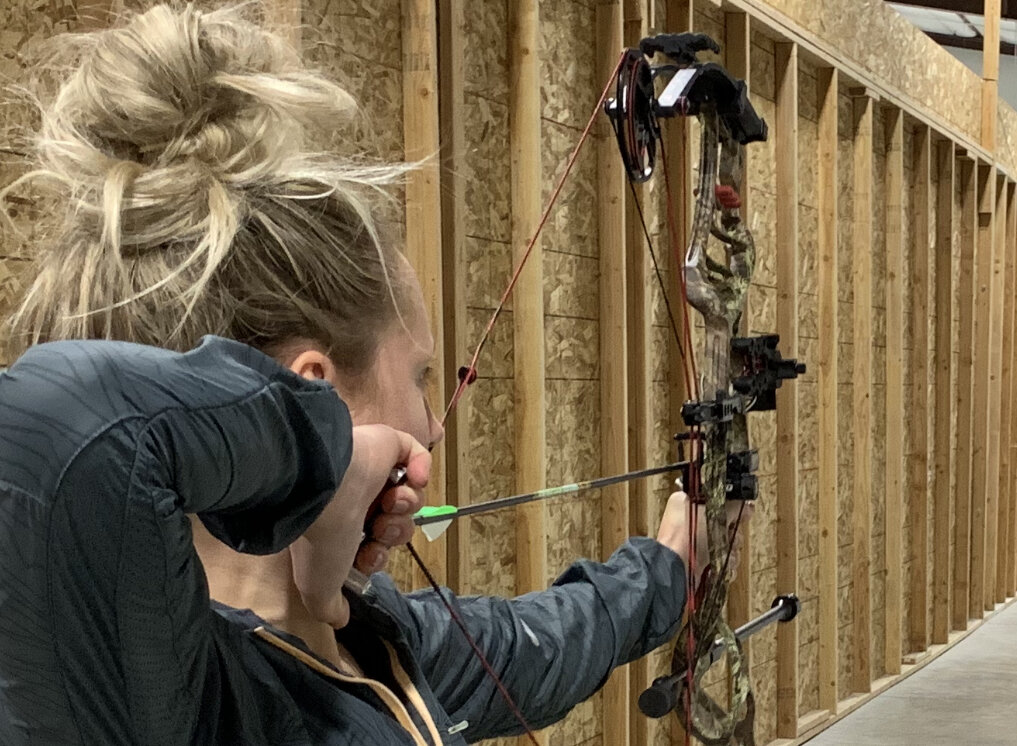
Brand new bow, new sight, new rest, and a fresh dozen arrows sit on the counter in front of you at the archery shop. Tuned to perfection, ready to drop archery bombs, but there’s one thing missing: a quality release aid. For the last ten seasons you have relied on ol’ faithful, an index finger release from the early 2000’s. Accuracy with your old bow was consistent, but seemed to plateau lately. Release aids have come a long way in the past few years, crisper triggers, more adjustability, and increased comfort. With the surge in popularity of 3d archery, a large number of bow hunters are seeing the benefits of utilizing more and more equipment from the target world. With that, more than just the index finger, wrist strap style are now hitting the woods. In the following paragraphs we will showcase the four primary styles of releases along with their unique benefits.
The index finger, or wrist strap release is by far the most used style of release. With an easy crossover from the trigger position a lot of us grew up learning on small bore rifles as kids, it’s a comfortable place to start. Keeping the release ready for action in a hunting scenario is simple because it’s right there on your wrist. This style of release aid often gets a bad rap for causing target panic, or shot anticipation, and for good reason! The majority of archers who shoot this style of release are doing so incorrectly. The tip of our index finger is one of the most nerve receptor dense places on our entire body, so often it becomes linked, touching the trigger makes the shot break. The result can be catastrophic for accuracy and you may find yourself “locked off target” or holding low or high, then dipping your pin into the center and hammering that trigger. By removing the fingertip from the equation, you are greatly improving your ability to execute a surprise shot, which is what we always are striving for. To set up an index release correctly, the trigger should be inside your first knuckle of your index finger, creating a deep hook. In order to do that, the trigger sensitivity should not be so hot that you are afraid to apply slight pressure. Once your “hook” is formed, begin driving the rear elbow back and expanding through the chest to allow back tension to cause the shot to break. By simply decreasing trigger sensitivity and shortening the neck of the release, you can greatly improve your accuracy and consistency with a wrist strap style release aid.
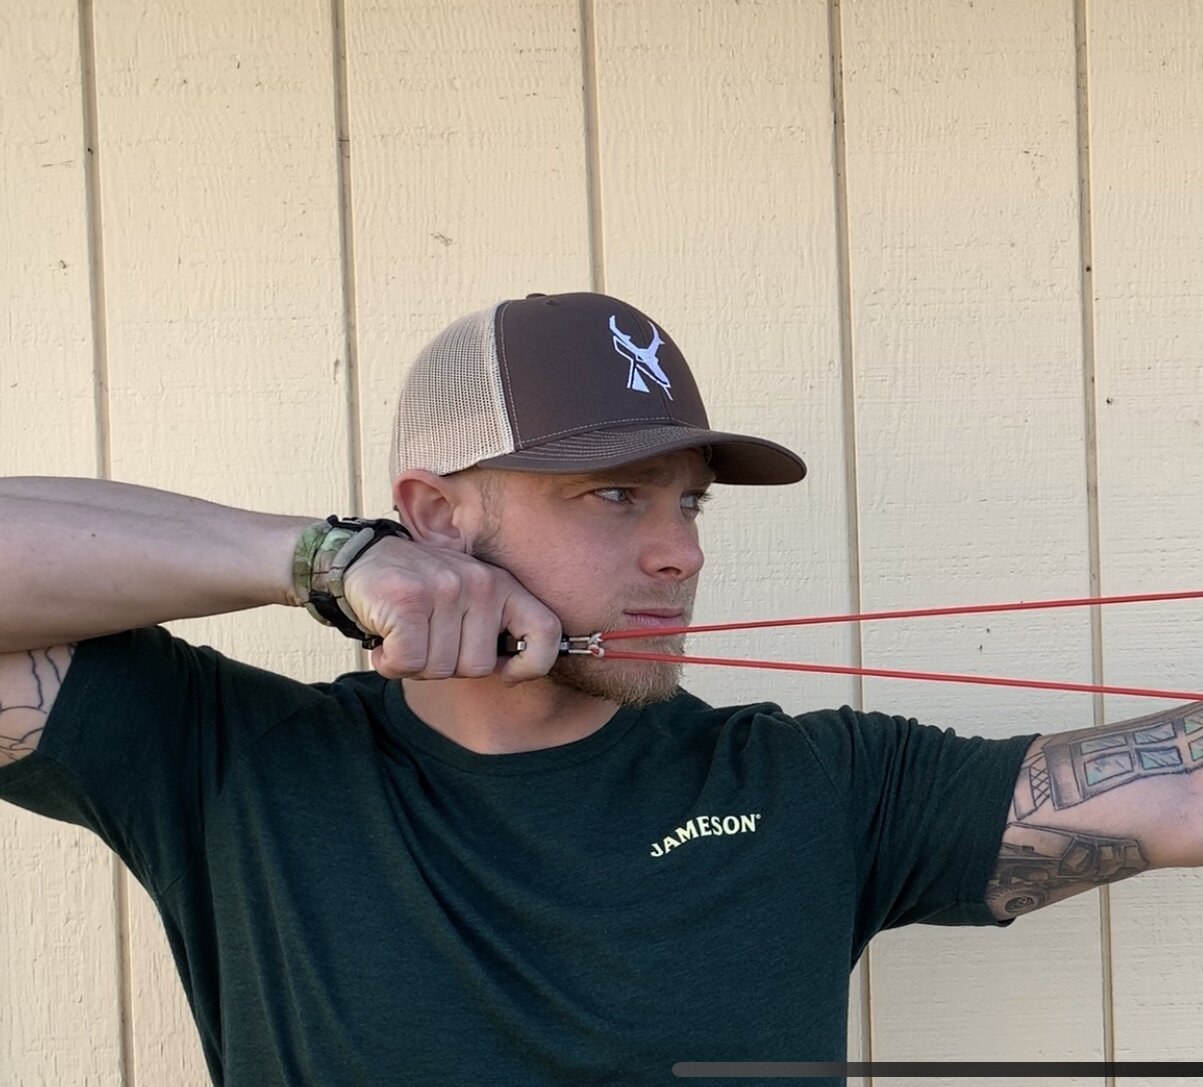
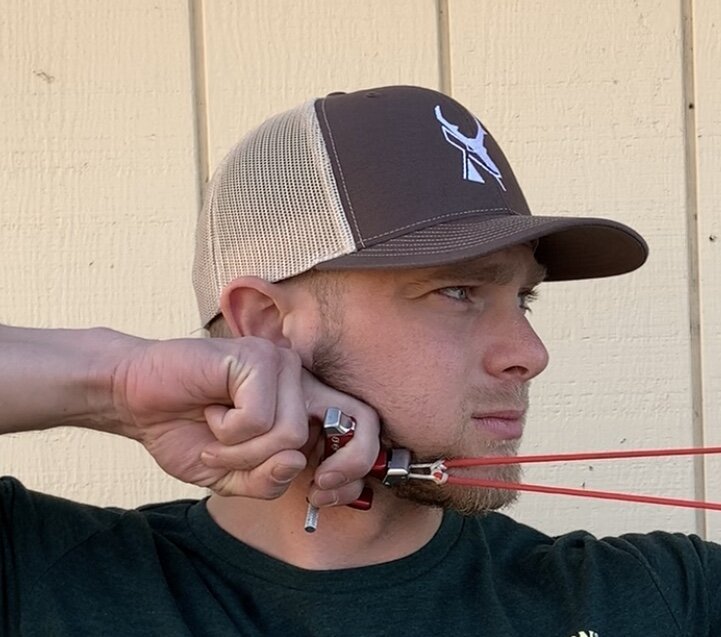
A deep “hook” around the trigger
The next most popular release aid style for a hunting application is a handheld thumb activated release. By eliminating the sensitivity issues associated with the index finger, archers often find their shot sequence remains clean and uninterrupted by shot anticipation. A handheld release in general will change the anchor point of the shooter since the hand will be flipped upwards. By placing your jaw bone in the gap between index and middle finger created by the release aid, a more consistent and repeatable anchor point may be established. It is still possible to “punch” a thumb activated trigger, and often the results of a punched shot are worse than with an index trigger! It is for this reason that proper setup and execution are utilized. There are several ways to adjust a quality handheld thumb release to fit the hand of the shooter, but for this instance, I’d like to highlight what has worked for me. Moving the barrel forward as far as possible and placing the peg or trigger in the middle of my thumb pad, I then make contact with my index finger. By holding this position throughout the shot and pulling with the rear elbow while expanding, I am able to utilize back tension to get a surprise break. One of the downsides of a handheld release is the possibility of dropping it or losing it while hunting. For this reason, I choose one that can be connected to a wrist strap or paracord strap. It ensures the release is there for me whenever a shot may present itself. For whitetail hunting, most thumb activated releases can be clipped on the string once in the tree stand. The only negative of that is how cold a metal release can get in mid November if you aren’t wearing gloves! I keep mine inside a hand warmer muff along with my bare hands.
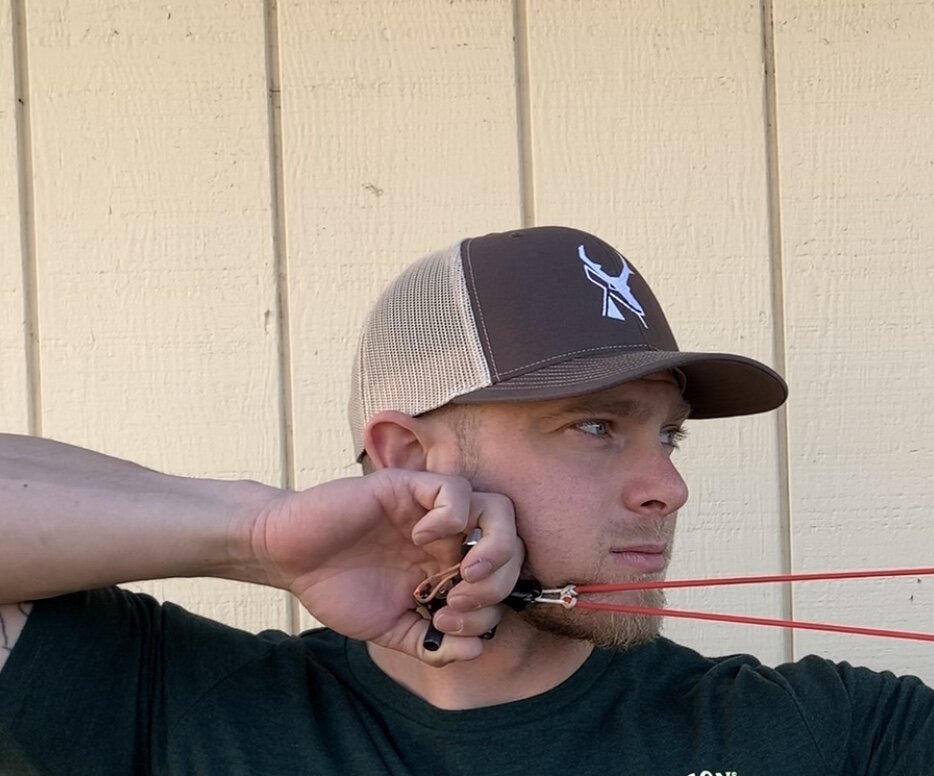
Contacting the index finger with the thumb
The next two styles of release aids often get interchangeably called “back tension” releases. Within this umbrella title are the hinge style release and the tension activated release. The hinge is activated by movement of the shooter’s hand, where the tension release is activated by pulling against the string of the bow. It is not out of the question to hunt with these styles of releases, and as a matter of fact I know a lot of people that do! Let’s take a look at the hinge first.
The hook of a hinge release slides along a “half moon” shaped steel piece when, once reaching the edge, it falls off thus opening and firing the shot. To draw the bow back, the release must be tilted forward and pressure must only be on the index finger and thumb. Once at full draw, the thumb is removed and pressure is slowly shifted from index to middle finger, rotating the release and allowing the hook to slide off the edge of the half moon. The benefit of shooting a hinge is that your shot process needs to remain coherent enough to rotate the hand while allowing the pin to float resulting in a slower, more controlled, and often smoother shot execution to occur. The downside, is of course if you forget to rotate the hand and focus too much on aiming, the shot will not go off. This can be frustrating, but in the end, it really forces you to focus on your execution rather than your pin.

Drawing back, keeping pressure on thumb and index finger only.
Transferring pressure to middle finger and rotating the release in hand.
Tension activated releases, such as the Carter Silverback sold by Nock On Archery, have exploded in popularity in recent years. A true surprise shot is almost guaranteed, and executing a clean break is nearly automatic. The shot is fired by pulling against an internal spring set to slightly more tension than the holding weight of the bow at full draw. A safety is engaged while drawing the bow back, then released once anchor is established. In order to get the most from a tension release, a few things need to happen; consistent pressure needs to be kept on the back wall at full draw, and front shoulder position needs to remain the same. If either of those two things change, it can feel substantially easier or more difficult to make the release fire. It is for this reason that a tension release is a great training tool. There are plenty of people who hunt with them, and if you practice generously in the months preceding season, you can find hunting success with a tension release as well.
Disengaging the safety once at anchor and beginning to pull.
With all of the hundreds of release options available to the archer, it can seem to be a daunting task to choose one. Find yourself a good pro shop that will allow you to try several and find which feels the best in your hand. The ergonomics of a release make all the difference in the shootability for that particular person. A great way to learn a new release is to get some paracord that matches your draw length and tie a d-loop on the end. This will allow you to practice without worry of shooting a bad arrow. If picking up a hinge release in particular, use the practice rope for at lease a few days before even attempting to draw back your bow. It is possible to punch yourself in the mouth if you do not draw back correctly, and nobody likes getting punched in the mouth.
Experimentation and personalization are two of the aspects of archery we all love, and having a high quality release is paramount to getting the most accuracy out of your bow. You wouldn’t want a gritty, 12 lb, mil-spec ar-15 trigger in your custom built, long range, precision rifle, would you? Good releases are not cheap, and cheap releases aren’t… well, you get the idea. Shoot straight!